The Veloster N has electronically controlled shocks that dictate how the car rides in normal driving situations, and then changes the damping automagically whenever the system detects the need to do so. It’s a sophisticated system that allows the car to have both Jekyll and Hyde personalities, without the driver ever being aware that this transformation is happening instantaneously, behind the scenes.
This split personality has three pre-programmed modes, which are selected by using the different drive modes on the steering wheel. Or if you go into N Custom mode, you can choose the suspension setting you want in that mode, and save it. The three modes are:
- Normal – This setting is mostly Jekyll, and works great for everyday driving. But when the car detects a handling event, there’s enough Hyde personality to compensate. This is my preferred mode on a wet or bumpy track.
- Sport – This is quite a bit firmer, and so I don’t use this on the street. But it’s a good setting for both Jekyll and Hyde, as long as you have a smooth and dry track.
- Sport+ – At this setting, Dr Jekyll is an ornery pain in the ass, and My Hyde is an unpredictable and dangerous monster. I never use this, it’s awful.
In essence, the system gives you a three way switch. But since the shocks are controlled electronically, it makes sense that you could have the equivalent of a dimmer switch instead. This way you could set the firmness anywhere you want. For example, I’d like one mode that’s softer than the Normal. My daily driving includes many potholes, recessed manhole covers, potholes, bad pavement, and more potholes.
I’d also like a track-only mode that allows me to tune the suspension somewhere in between Normal and Sport. I also want to adjust the front and rear shocks independently, because on a FWD car, setting the rear shocks a bit firmer can help a lot with rotation.
The Mando ECS10 suspension controller allows you to do exactly that. It’s essentially a Bluetooth potentiometer that allows you to set the suspension softer, firmer, or anywhere in between. More importantly, you can set the front and rear independently. And in Advanced mode, you can even set the damping at different speeds!
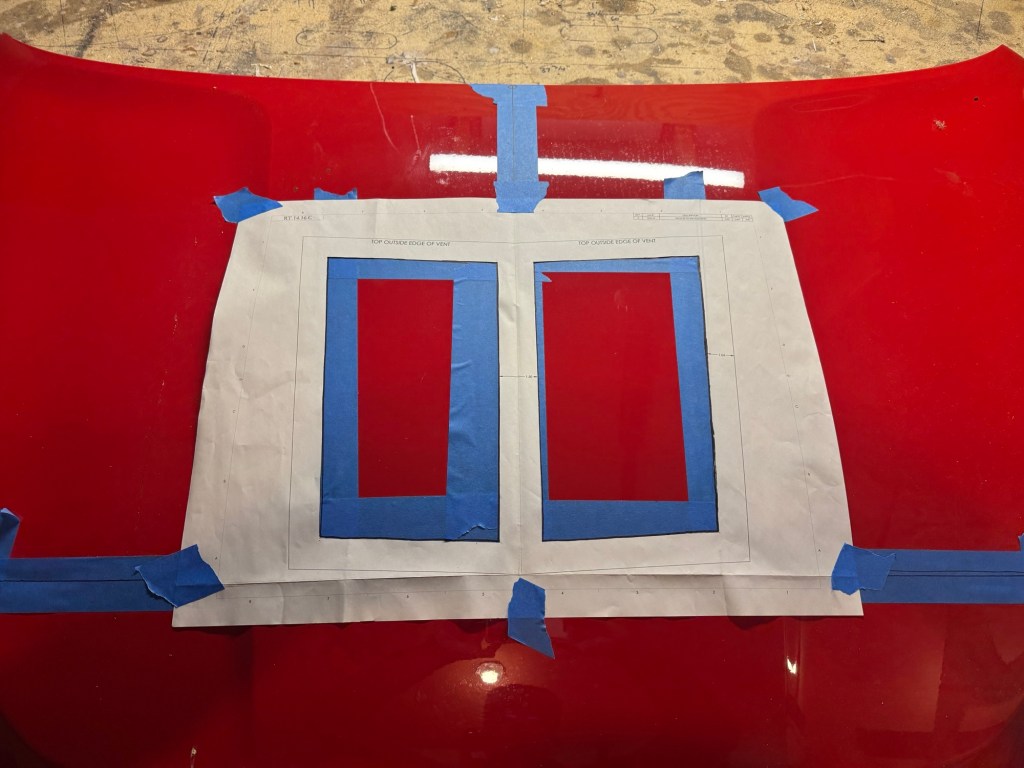
Installation
It took me about an hour to install it, but it’s really a 30 minute job. You need to remove the steering wheel cowl, unplug a harness and plug in a piggy back harness that goes into the Mando brain unit.
The Mando has one wire that needs power, and so you’ll need to provide a fuse doubler for that. I jumped the interior light fuse, but there are plenty of candidates in the fuse box. Once it’s hooked up, you’ll see a green light indicating the unit is on. I mounted the Mando inside the fusebox area with some zip ties; it’s completely out of sight.
You access the ECS10 using a Bluetooth phone app. The app is a little quirky the first time you use it, it keeps saying that it’s not connected or some such. But be patient and you’ll figure it out, it’s just like most motorsports apps in this way.
How it works
Once in the app, the controller allows you change the settings for Ride and Handling. This is exactly what the shocks were doing all along, but now you have precise control over how much Jekyll and how much Hyde.
- Ride is the normal driving mode. It’s active whenever there are no Handling events.
- Handling mode is triggered by an event. This could be hard acceleration or braking, changes in steering angle or speed, changes in yaw, swilling a potion, etc. Out comes My Hyde.
The shocks go into Handling mode in milliseconds whenever one of those events is detected. It’s not clear on what triggers going back to Ride mode, perhaps just an interval of time with no more Handling events.
In both Ride and Handling modes, only the low-speed compression damping is adjusted. This doesn’t mean low vehicle speed; it means the shock has a single curve for damping. A dual-adjustable shock would have more sophisticated digressive damping, with low and high speed curves that absorb sharp impacts like curbing differently.
But the shocks aren’t that sophisticated, and so while we don’t get two damping curves, we do get to control the compression damping over two driving situations, normal (ride) and sporty (handling).
The controller allows you to set the compression from 0 to 100 for both Ride and Handling. Hereafter I’m going to refer to these numerical settings as percentages, because these go from 0 to 100. But 0% is not a blown shock absorber and 100% is not locked out suspension. These are just a range of numbers based on who knows what, and I’m calling it a percentage.
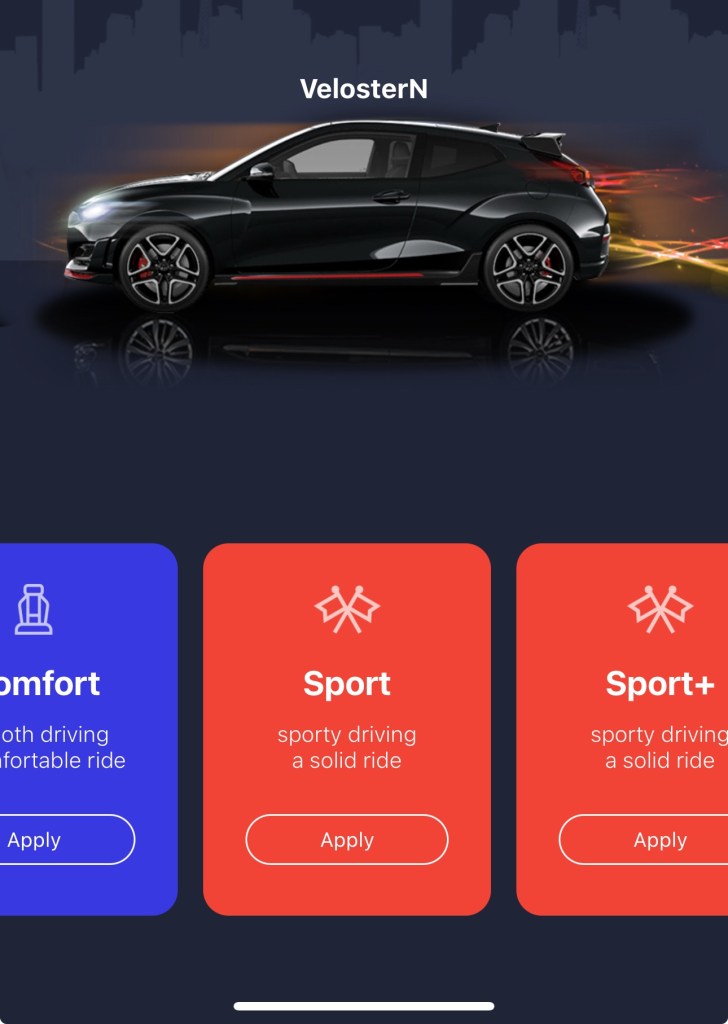
Pre-programmed settings
The Mando ECS10 comes with three pre-programmed modes. Although the names are similar to the Veloster’s suspension menu, I don’t know for sure if the settings within these modes are exactly the same.
- Comfort – I haven’t tested this vs Normal mode, as I made my own custom mode that’s as soft as it goes.
- Sport – I tried this once, it seemed similar to Sport mode in the Veloster, but I didn’t evaluate this much considering there are custom settings available, and that’s the whole point of the ECS10 controller.
- Sport+ – The Veloster’s Sport+ mode is useless and dare I say, dangerous. So I avoided this mode altogether in the Mando; once bitten, twice shy.
Custom settings
In addition to the pre-programmed modes, there are three user configurable custom settings. This is where the fun (and confusion) begins.
Luckily a user on the Veloster N forum who goes by ProjectVeloN went through an exhaustive process to determine what the Ride settings control (see parts 1, 2, 3.) He did this street driving, not on a race track, but the data and insights were still very valuable. Generally he found the following.
- Changes at the lower end of the scale were more significant. So going from 10% to 20% was a larger difference than going from 60% to 70%.
- He found that the rear shocks should be set slightly stiffer than the front: If the front Ride setting is 10% or less, multiply rear by 1.5; For front in the 10-20% range, multiply rear by 1.3-1.4; For front 20-30%, multiply rear by 1.2-1.3.
With that information, I started to experiment both on the street and on the track. I set the Ride to the following:
- F0%, R5% – This was too floaty for anything but street driving, but what a difference! More on this later.
- F10%, R15% – Feels too soft on track, and I preferred it softer still on the street.
- F20%, R25%: Still not stiff enough for track work.
For Handling events, I started with 60F, 80R, and then gradually softened both ends.
- F60%, R80% – Pretty terrible.
- F40%, R55% – Better, but needing fine tuning.
- F35%, R50% – Good for a bumpy tracks or rain.
My custom settings
You can save your custom settings and give them a descriptive name; I went with Buick, Track, and Rain.
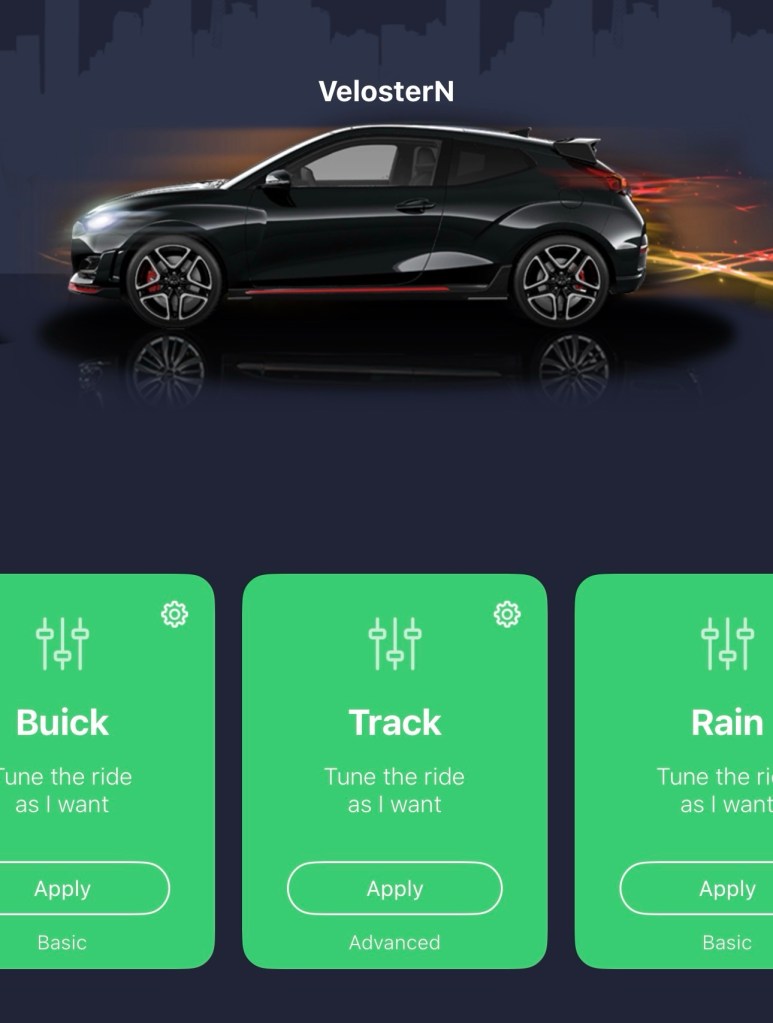
- Buick – This is my daily mode (I don’t daily this car, but when I drive it around town, this is the setting I use).
- Track – My track mode for dry conditions.
- Rain – This is for driving on a wet race track, not on the street, where I always use Buick.
Buick
My philosophy for this setting was to make the car as plush as possible. I don’t foresee needing any handling events in this mode, but just in case I need to run from the cops, I changed the handling to base track settings.
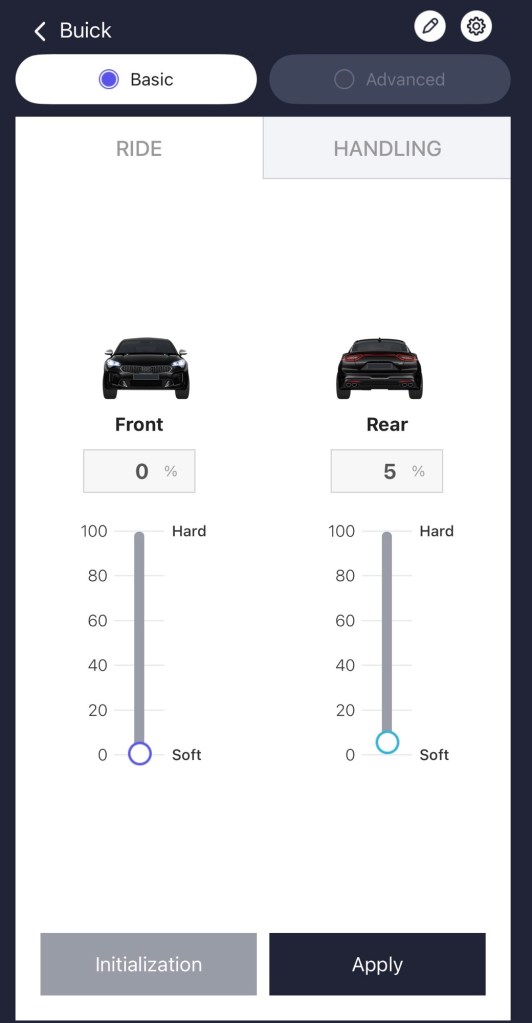
- Mode: Basic
- Ride: Front 0%, Rear 5%. I’ve tried the rear at full soft as well, but I can’t tell much difference.
- Handling: Front 30%, Rear 50%. This is an all-purpose track setting, which probably (hopefully) won’t be triggered during street driving.
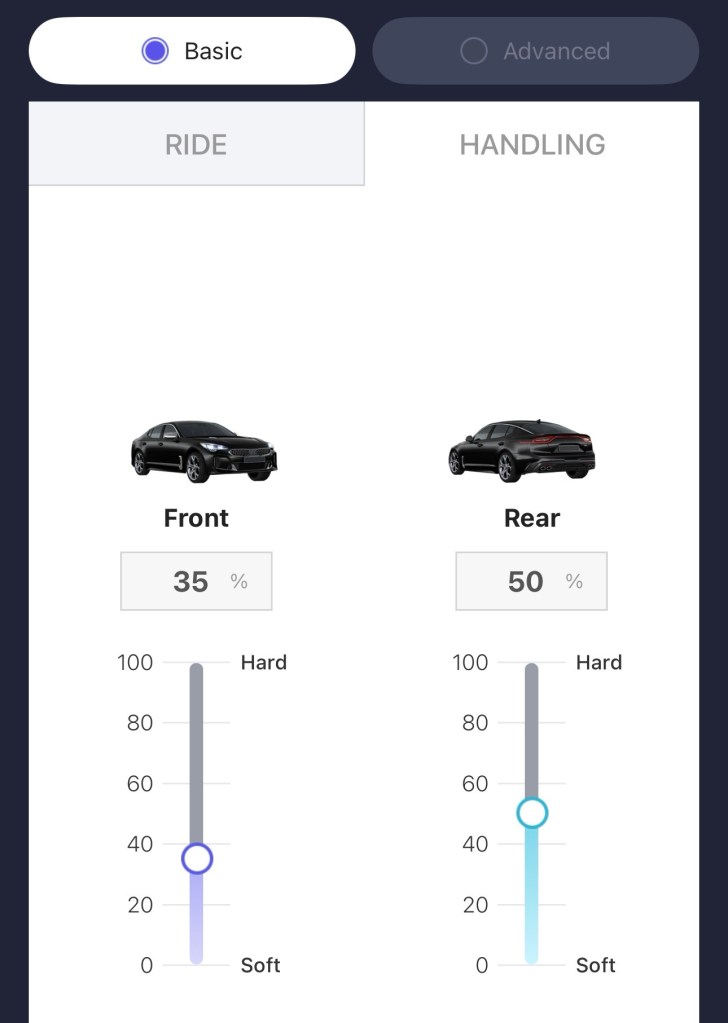
Rain
My philosophy for this setting was to make the car as predictable as possible. Since I would only be using this on a race track, I could set the Ride and Handling settings to be identical. This should (in theory) keep the car from behaving differently when it kicks into a handling event.
- Mode: Basic
- Ride and Handling: Front 35%, Rear 50%.
Track (basic)
Before I got the Mando I used Normal mode for wet weather and Sport for dry and smooth tracks (Watkins Glen). For dry tracks with some undulations (Pineview, NYST), I flip-flopped between Normal and Sport without a clear indicator of which was better.
With the Mando I began to experiment a lot more, but I still haven’t figured out exactly what I like, other than a firmer rear. My Rain setting is honestly quite good all around. Bumping up both ends by 5% in the dry work great, but I haven’t found a full stiff setting that I like.
Track (advanced)
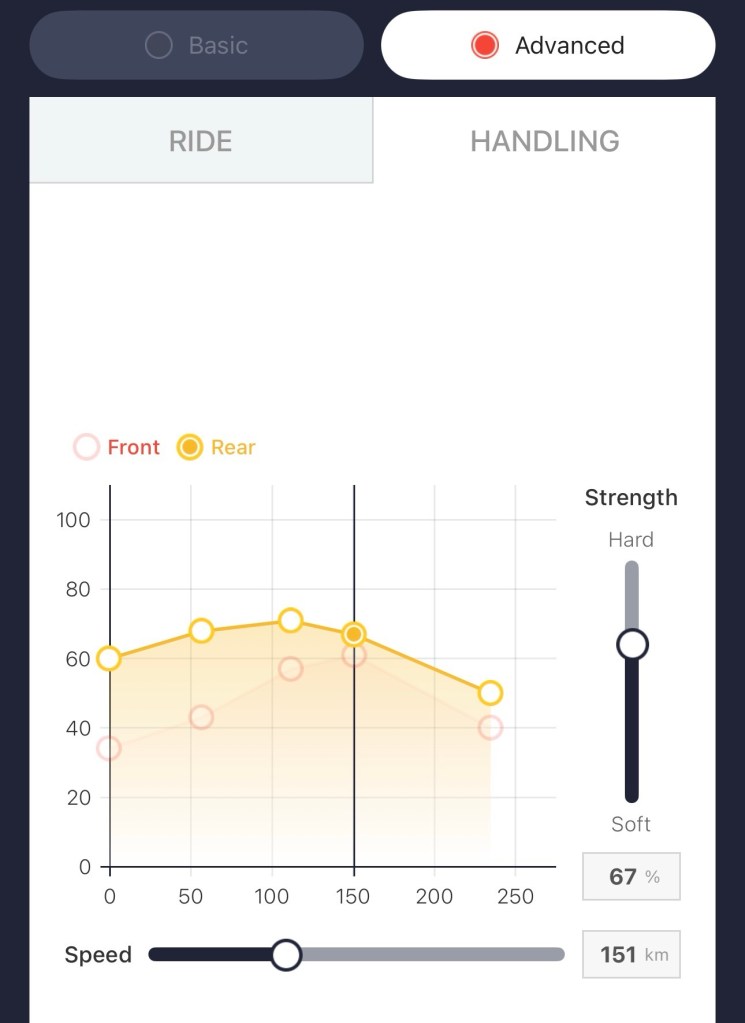
Advanced mode allows you to change the damping at different speeds. I don’t have enough data to say that the Advanced mode is better than Basic, but it surely has potential. Here’s how Advanced differs.
- You define different speed zones on a chart (see image).
- You can then set the compression damping at each speed, both front and rear, for both ride and handling.
This means you could do something like set front compression to 40% at 50 kph, and then at and 55 kph it bumps up to 50% front, and then at 60 kph it goes back down to 40% again. I don’t know why someone would do that, but it’s possible.
A better approach might be to set a low-speed zone where the front is medium-soft, say 35%, and the rear is much harder at like 60%. At lower speeds, you want the car to pivot more, and the imbalance in front/rear compression should help that.
Similarly, you might define a medium-speed zone where most of the corners are, say around 100 kph. At this speed you ramp up the compression of the front and rear, but more front, to gain some predictability in turn-in. Because you want balanced handling for the average corner, you set the rear to be just more than the front.
Finally you set a high-speed zone where the front and rear compression are both a little softer. This is so you don’t upset the chassis at high speed, or some such logic. This is depicted below.
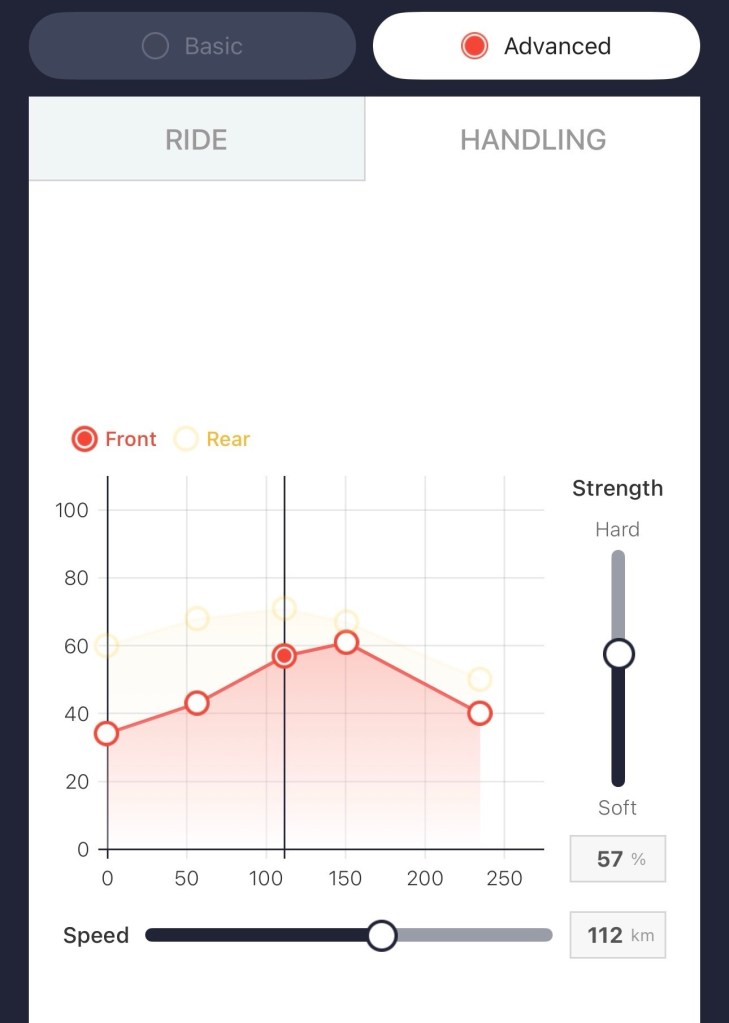
The previous logic might make sense for defining three speed zones, but the ECS10 allows you to set five different speeds. These are completely custom, you can set them anywhere you want on the graph.
A neat usecase for this would be setting the suspension up for basic track work, but there’s one corner, like a bumpy fast kink or bit of bit curbing you hit at a particular speed, and you soften the suspension for that one event (speed). You could go pretty far into the weeds with this shit, fine-tuning the suspension for different tracks and specific corners, with a log book for every track.
Conclusion
If you daily your Veloster N (or Kona N) on shitty roads, the Mando ECS10 might be the best modification you can make. It has transformed my car from a being uncomfortably stiff to acceptably compliant. The change is more significant than going from 235/35R19 tires on OE wheels to 235/40R18 tires on lightweight wheels. Combine the Mando with the increased sidewall height and it’s like a totally different car.
On the race track, the Mando has allowed me to unlock much better handling balance, even just using the Basic settings. My suspension is otherwise completely stock, and the car handles just incredibly, with laugh-out-loud four-wheel drifts.
As for the Advanced settings, I’m still on the fence. Having the ability to control damping at different speeds sounds incredible, but is the complexity really worth it? I’m not sure yet.
I don’t know how the ECS10 would handle things like lowering springs, stiffer spring rates, sway bars, and other seasonings, but I can imagine the ability to tune all of those things together with the Advanced damping options could get very rewarding. And very complex.
Although this also reminds me of my youth as a twenty something living in Seattle. I was the guitarist in a punk/grunge band playing a Gibson Les Paul through a vintage Fender Bassman head. The Fender had a nice warm sound, to which I added a Rat rack-mount distortion pedal with three options (A, B, and stacking A+B). This gave me four different voicing options: clean, bluesy, sludge, and heavier than fucking dinosaurs.
Later I got a Mesa Boogie Studio amp with switchable channels, preamp inputs (for the Rat), and a built-in graphic EQ. There were so many good sounds coming out of that thing that I could never really settle on what I liked. I was like the proverbial donkey that starves to death deciding between two piles of hay. Except there were 10 piles of hay. A couple years later I sold the Boogie and kept the Bassman.
Maybe the Mando’s Advanced mode is like the Mesa Boogie? I don’t know yet, but being able to set five different speeds of my choosing, and then front and rear and ride and handling at each speed… well it’s going to take a lot of experimenting to get everything out of this. I’ll certainly document this journey, but I won’t be surprised if I wind up with a track mode that’s 35% front, 50% rear, at all speeds.
But honestly, the Buick mode is reason enough.