You can buy a cheap wing on eBay, Amazon or whatever for as little as $50, or a double decker for $75. I’ve previously written about the testing I did on this wing. Let me be clear about this: it was a piece of junk right out of the box. At a minimum you must make new endplates (see previous blog post) and get the wing higher.

I made those and other modifications and it performed better than I expected. The 53″ wing created almost as much downforce as the 60″ 9LR wing! But also a lot more drag, which negatively affected front downforce. You have to think of aero as a system, and as a system, the 9LR wing with OEM hard top had a Cl of -1.01 and a Cd of .48 for an aero efficiency of 2.11. Whereas the eBay wing in the same configuration had a Cl of -0.56 and a Cd of .55, for an aero efficiency of 0.90.
While the eBay wing system was worse than the 9LR, the drag and lift values showed that my car would go faster with the wing than without it. Even my very slippery fastback without a wing was slower in a race simulation than the eBay wing with a hard top. Even cheap wings can be good!
Just the same, the eBay wing has been sitting unused. I got tired of looking at it and decided it was time for some new development efforts. Before I get to that, I’ll recap all of what I did previously, and then get onto version 2.0.
Wing stands
The janky mounts that came with the wing might work on a hatchback, but are far too low to be efficient on a Miata. You need to get the wing higher, where the air is less turbulent. I made my wing stands out of a square piece of 1/4″ aluminum plate, 12″x 12″, which I simply cut at an angle to make two matching sides.
I bolted the stands through the trunk gutter with three bolts per side. Note that the trunk gutter isn’t parallel or plumb, meaning that once the stands are bolted in, I had to pull on them and bend them to be near vertical. This bends the trunk gutter into shape.
Pro tip: If your wing stands are slightly sprung (meaning there is tension between them, and you have to force them into a vertical position), it makes the wing stands stiffer. So don’t fret about getting them vertical, just pull them into position about 40″ apart at the top when you mount the wing.
End plates
The end plates were the next things to go, not only because they were too small, but because they didn’t allow me to set the convergent gap and secondary wing angle correctly.

Convergent what? Basically, the gap between the two wings must accelerate air as it passes through. In order to do that, the gap at the front edge has to be larger than the gap at the back. The factory end plates have two arcs cut into the end plates, and pivoting the upper wing through this arc is supposed to allow you to set the angle and gap distance. But if you do that correctly, then there’s no overlap.
The top wing should overlap the lower wing at about 4% of the chord, which is about 0.3″ in this case. I measured that distance and drilled a single front hole to use as a pivot, and then three holes further back to provide a range of adjustment. This gives me the proper overlap and gap, and I can set the upper wing angle easily.
Upper wing modifications
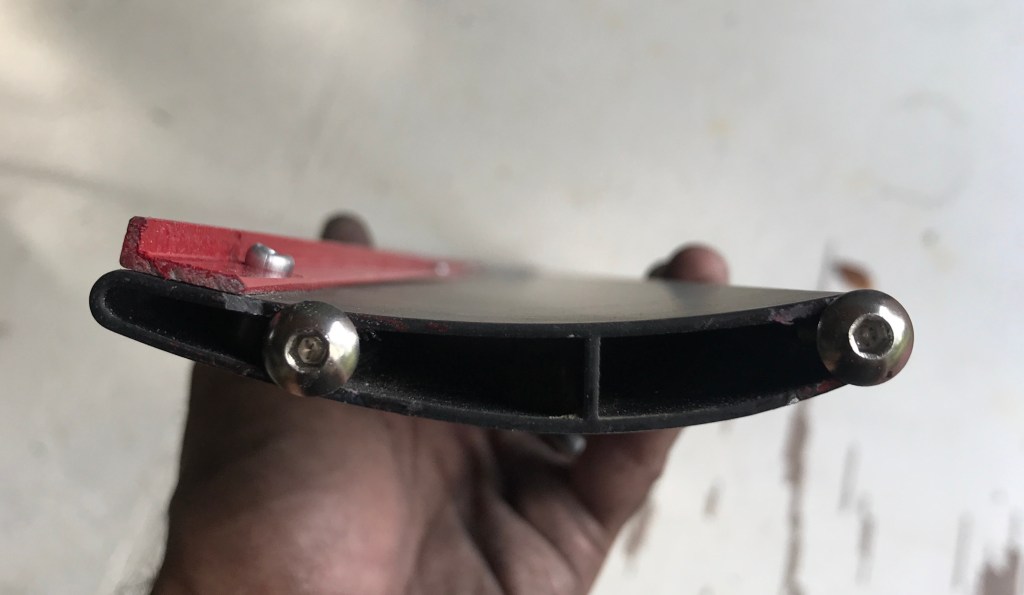
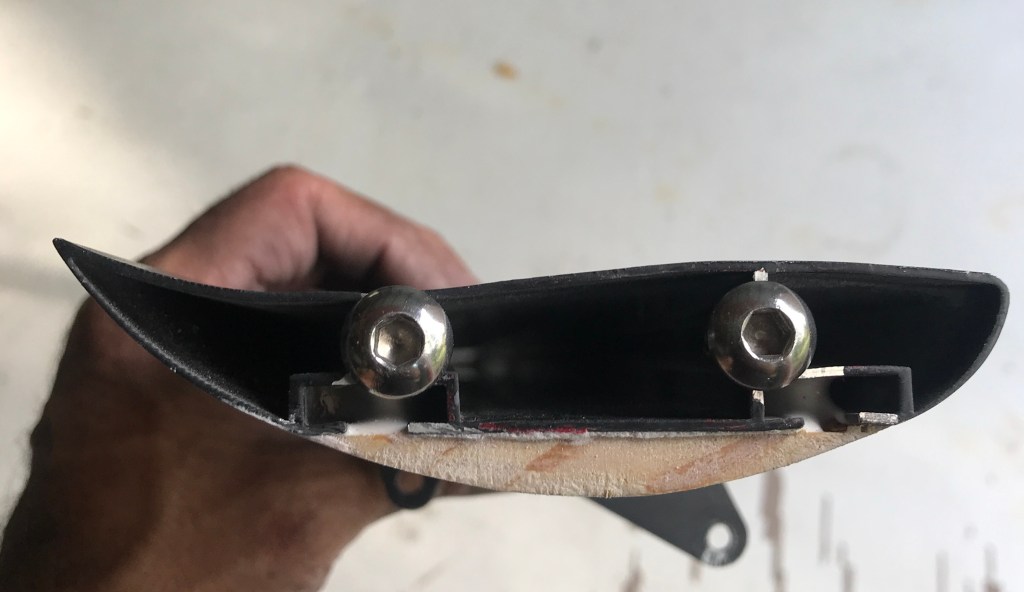
The upper wing is flexible, and if you set the proper overlap and gap to the lower wing, the upper wing will vibrate and hit the lower wing. So I added a stop in the middle of the lower wing, which will support the upper wing as it bends. The stop is just a piece of aluminum with a couple rivets to hold it in place. You could duct tape a piece of rubber tubing and it would work (did that for the first race).
I also riveted a Gurney flap to the upper wing. This stiffened up the upper wing a little, but based on the test results, I think it was too large, and part of why the wing had some much drag.
So this is where the 2.0 developments being. The first thing I did was cut the Gurney flap down to half the height, as shown below.
However, I’m not 100% sure the upper wing needs a Gurney flap. The gap between the wings is supposed to accelerate air, and that should be enough to keep air from separating at the trailing edge. Also, the trailing edge of the upper wing is round and thick, and just looking at the camber across the chord makes me think the wicker isn’t helping. At some point after taking this picture, I removed the wicker altogether.
Curving the underside of the main wing
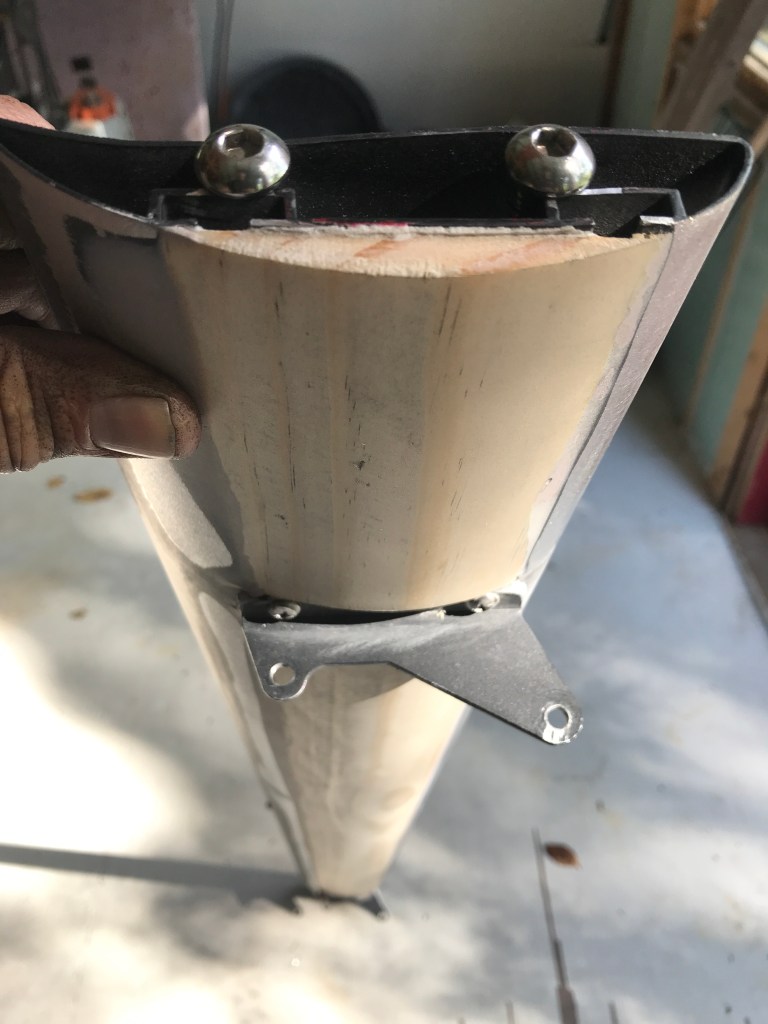
The underside of the main wing is flat and has two mounting grooves that span the length of the wing. This conveniently allows you to mount the wing at any width, and makes the main wing a good deal stiffer. The compromise is less than optimal flow under the wing, not only because of the flat shape, but the grooves.
I could have simply filled the grooves, but if you’ve been following my blog then you understand I like to go a bit overboard. So I bought a piece of pine baseboard at Home Depot, glued this to the bottom of the wing with epoxy, and sanded it to a rounded shape. If you decide to do the same thing, you need to know exactly how far apart your wing stands are before you do this, as there’s no adjusting the width afterwards.
Note for Grid Life Touring Cup (GLTC): I was looking at the rules for Grid Life Touring Cup, and noticed they don’t count points for wings that measure 250 square inches or less. The lower wing measures 244 square inches, so you could use this wing without the 3% penalty! You can buy the lower wing alone for about $50.
Finishing touches
All that was left was to sand and paint it, and I think it looks pretty cool. You can still see some of the wood grain beneath, which is either a shitty paint job, or a DIY detail to appreciate, depending on your point of view.

Before shaping the underside, the wing and end plates weighed 7.6 lbs. After shaping the underside, the ensemble weighed 8 lbs. Pine boards are light. I’m not 100% happy with the end plates, they need to be larger, but I can continue to mess with that.
Test results
To see how the wing performed I took it up to my usual testing grounds, Pineview Run. Now this is not the ideal place to test aero, because at lower speed, aero is not as pronounced. I don’t have Man and Machine Consulting’s telemetry equipment, so lap times is the best I can do.
Those excuses aside, my teammate Alyssa tried the 60” 9LR wing back to back with my new modified wing and somehow the double wing went faster. We did nothing to control variables such as wind speed and temperature, so let’s not call this a conclusive test, but for sure it’s an improvement on the 1.0 version of this wing. Will I race with it? I might use this wing at a Lemons race, or on a short track like Pineview, but for any real racing, I’ll be using the 9LR wing for sure.

How well does this work on the street
LikeLike
I never tried it on a street car
LikeLike
I think I’ll try it just for fun
LikeLike