I’ve been itching to use a smoke wand for some time, but whenever I go to the A2 wind tunnel, I never use it. Smoke doesn’t return any numbers, and it takes time, and time is money. So being a cheap bastard, I use short yarn tufts to visualize what’s happening in the boundary layer, and call that good enough.
But yarn isn’t great for scratching the smoke wand itch, so when I saw a prototype scale model wind tunnel a couple years ago, I got on kickstarter and became an early backer of Windsible.
As a backer, I got regular progress reports and saw the development process evolve. It’s a shit ton of work! From my initial backing to delivery took 22 months.
The unit required very little assembly, and the quick start instructions got me up and running within minutes of unboxing. The machine was already set to my preferred language and to mph, which was a nice touch.
It also comes with cleaning tools, an extra filter, and two bottles of fog fluid. There are two fog dispensers, one vertical and one horizontal. They attach magnetically to the fogger base, so there no futzing around with small parts. Very clever. You can also buy more fogger attachments from Fun-Tech-Lab.
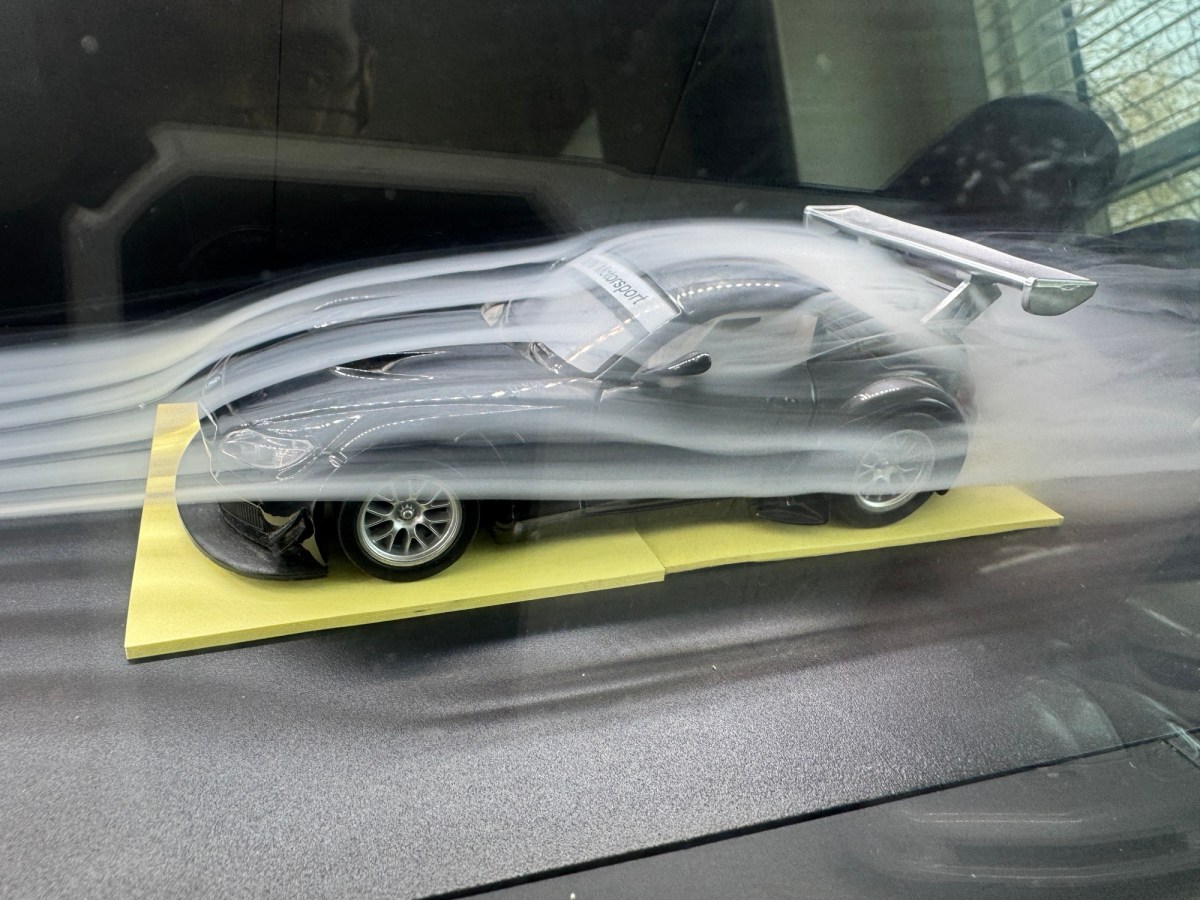
You can adjust the color and brightness of the internal lighting, but most of the illumination is at the front of the tunnel, and I’m more interested in what happens at the trailing edge. Anyway, this works well in a dark room, and not as well with lights behind you (glare).
For build quality, design, and ease of use, I’m giving this a solid 10 out of 10.
Scale models
The Windsible is designed for 1/18 cars, and the fan speed scales up to 210 mph in that size. You can of course put any size cars in the wind tunnel, and I think 1/18 is actually too big. 1/24 scale cars are cheaper, and the smaller size lets me see more of the trailing wake.
My local CVS pharmacy has a bunch of 1/24 scale cars and I got a Celia GT and C6 Corvette there. I would have bought more cars, but many were missing mirrors or other small parts. Alibaba and eBay are both good sources for 1/24 diecast cars, and many plastic Tamiya models are also in this size.
Lowe’s has a bunch of smaller scale vehicles for just $7. These range from 1/28 scale to 1/36. Most of the cars are 1/32, but there are some oddball sizes mixed in, such as 1/31 and 1/33.
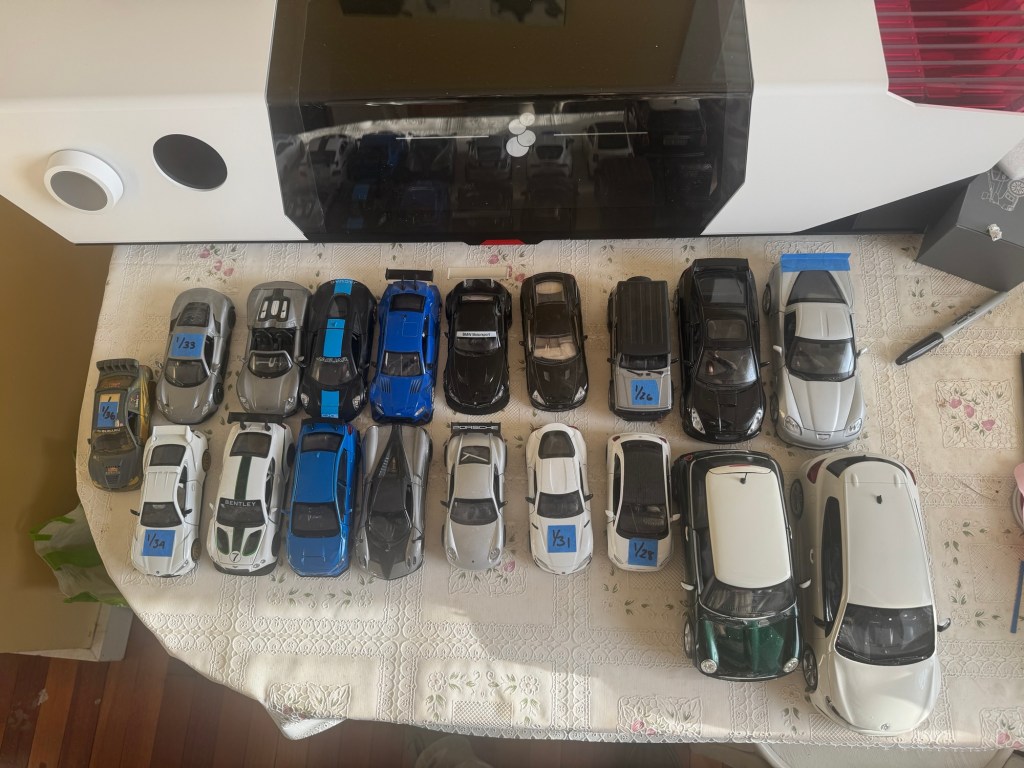
I bought a Subaru rally car at 1/36 scale, and it’s borderline too small. The problem isn’t just the size of car and its parts, but the height of the streamlines. It’s necessary to raise the cars up slightly to get into the bottom stream.
The only Veloster N I could find is in 1/38 scale, which is too small to develop parts for. I’ll use this one to mock up interactions with a teardrop trailer I’m building, but for visualizing aero parts, I’ll need something larger.
I plan to do a whole series of tests and videos, but I need a repeatable way to set up cars exactly the same way, a static camera mount, and lots of little parts.
Open windows
I can tell you one thing right away, which is that every car is different with respect to open windows. Some cars seem to be designed for open windows, with mirror placement and other factors actively shunting air away from the window.
On other cars, air smashes into the B-pillar and creates turbulence inside the cockpit. This results in a vortex of air shooting out the top rear edge of the window.
How open windows affects aero is a fascinating subject, and an area I will spend some time investigating. This is something I’ve already experimented with in the A2 wind tunnel, and so I’m not surprised every car is different.
If you’ve read my first wind tunnel report, you know that open windows reduced rear downforce by 15% and increased drag by 7% on my Veloster. I was able to halve these with rain visors.
Meanwhile the Miata I tested in the second wind tunnel report did not lose as much with open windows. But I was still able to reduce drag and increase downforce meaningfully with some clever tricks. (Also, don’t remove side mirrors on an open-window car.)
Finally, Kaan’s 8th gen Civic Si didn’t seem to care one way or the other if the windows were open, or if we put on a safety net, etc. Weird, and wonderful, these differences in just open windows!
Not for drag and downforce
Measuring drag and downforce in a wind tunnel of this size is a waste of time. Anything you’d learn from such an exercise would be just as likely to send you down the wrong path as the right one.
This isn’t a problem of not having an accurate scale (I have scales that go down to a thousandth of a gram), nor the usual things people say about the A2 wind tunnel, like like the wheels don’t spin, or the growing boundary layer, or the blockage ratio from the size of the tunnel. The reason you can’t use the Windsible for drag and downforce is that things behave differently at different Reynolds numbers.
As an example, let’s take an aero modification everyone is familiar with, the dimples on golf balls. The dimples create a thicker boundary layer just before the air separates off the back half of the ball. This thicker area of turbulence delays separation, which essentially fools the air into thinking the ball is more egg shaped, than sphere shaped. An egg is more elongated and has better aerodynamics, and so the ball flies further.
Now what’s truly interesting is that at high speed, the dimples increase drag. Also at low speed, the dimples increase drag. But in the range of speed at which golf balls travel most of their distance, the dimples decrease drag.
Testing a scale model golf ball in this wind tunnel would be folly, because you can’t accelerate the air to a speed where the dimples would reduce drag. It would always show that dimples increase drag. Which we know isn’t true.
Likewise, a scale model wing would be something like 5k Reynolds in this tunnel. In Airfoil Tools, you can’t even enter values under 50k Re! Whereas a typical car wing in a typical corner is going to have a Reynolds number of around 500k.
So any downforce data you’d get from testing at this size and speed (Reynolds number) would not relate to the real world. Total. Waste. Of. Time.
Future testing
So I won’t be testing downforce, but you can expect to see more posts on visualizing flow, including wing placement, yaw, drafting, trailering, and lots of silly aero mods. I’ll title these posts “Windsible # x:” so you can find them or ignore them.
This is definitely more of a winter doldrums kind of toy, and with track season now fully underway, I have full size parts to build and test. So don’t expect a lot of Windsible posts just yet, but they will figure into a Lancer Evo project I’m working on right now.
If you want to join in the fun, but don’t want to invest in a Windsible, I can help. Get a 1/24-ish scale model of your car, preferably in a dark color that contrasts well with the smoke. Optionally modify it to look like your piece of shit Lemons car (or whatever), and send it to Mario Korf, 137 Hopkins Rd, Ithaca NY 14850. I’ll be happy to take videos and pictures with things you want to try. Pay for postage, and I’ll send it back when we’re done.
