Look at an NA Miata front end and you’ll notice that you can see the front tires exposed to airflow. Rotating wheels are terrible for aero, and this is made worse by the shape of the nose, which forces more air at the exposed tires and also under the car. Under the car, the spinning wheels put the airflow in yaw, making things even worse. For drag and lift reduction, the Miata’s front end is the clearly place to start. Each generation of Miata has gotten progressively better in this regard, and so you can see Mazda agrees.
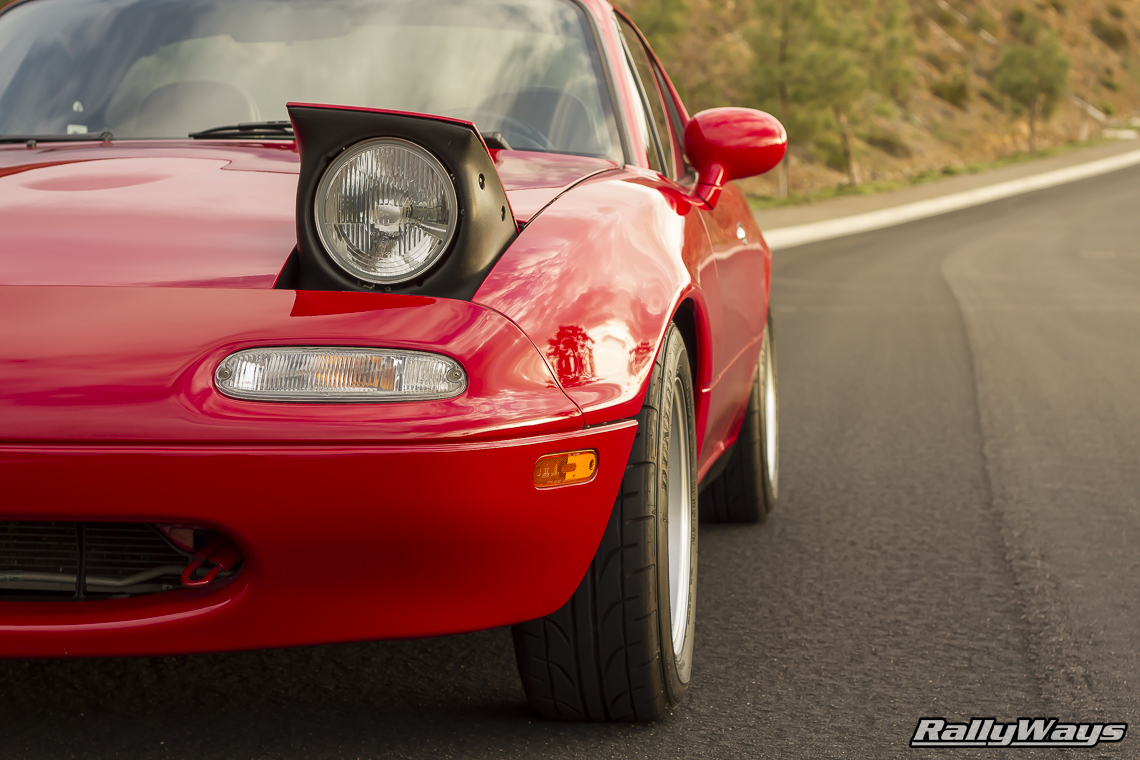
Mazda’s partial solution to this was the R-package front lip, which reduces the amount of air going under the car, and directs some towards the brakes. But the tires are still very exposed.
The are a number of aftermarket companies making Miata front ends, and many address this problem. The DIY solution is a vertical sheet of plastic, which you can buy at Speedway Motors for $20. I’ll always refer to this as the Supermiata Airdam, because Supermiata did a lot to popularize this style. 9 Lives Racing sells a pre-cut piece that will save you some headaches.
To mount the airdam you should use a sturdy undertray. Some racing rules limit the rearward length of the undertray, and so most of them start at about the front axle. If the rules permit it, most people simply extend the undertray in front of the airdam making it into a splitter. Trackspeed engineering makes an undertray/splitter bracket, which greatly simplifies building one.
The Hancha Group (and Velox) did a cool CFD study on Miata front-end design, and you should read Splitter or Airdam, Which is Best?, on their site. I’ll post their images and chart here.

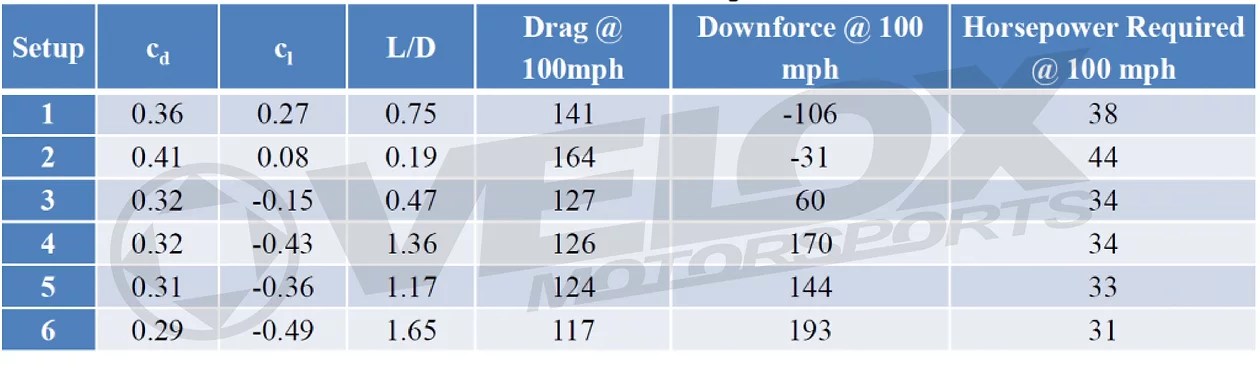
Let’s take those drag and lift values, put them in OptimumLap, and see the results at my local race tracks. I’ll use a Miata with 100hp, 2400 lbs, and tires that grip at 1g.
| Setup | Pineview | NYST | Watkins Glen |
| 1 | 84.40 | 111.27 | 153.52 |
| 2 | 84.24 | 111.01 | 153.58 |
| 3 | 83.96 | 110.09 | 151.30 |
| 4 | 83.68 | 109.43 | 150.42 |
| 5 | 83.74 | 109.55 | 150.44 |
| 6 | 83.60 | 109.16 | 149.70 |
Setup #1 is stock. Setup #2 is lowered to 4″, and this causes more drag, but also less lift, and that’s why it’s faster than #1. The exception is at Watkins Glen, where drag is more important. (Yes, lowering a car has other benefits, but I can’t simulate that in OptimumLap.)
Setup #3 is significantly faster. I don’t know if Hancha used the R-package front lip for the CFD, or if they calculated a chin-style airdam that completely covers the front wheels. Setup #4 adds a splitter to the chin airdam, and you can see it makes more downforce, without adding drag.
Setup #5 is a Supermiata style airdam, and it’s just a bit slower than #4. Add a splitter and you get Setup #6. Adding the splitter to the airdam reduced drag by 6.5%, and increased downforce by 34%. At a short and slow track like Pineview, this is only worth .6 seconds compared to a lowered Miata. At a track like WGI, it’s 3.8 seconds. Astonishing!
But probably not accurate in the real world. Add over 200 lbs of downforce to the front of the car and it’ll oversteer. So a real-world figure would be less. But then of course you’d balance that with a spoiler or wing, and go even faster, right?
Wind tunnel testing
Back when I wrote this article, all we had to go on was some CFD. Since then, there’s been more CFD from 9 Lives Racing, and also some actual wind tunnel testing by your’s truly.
You can purchase the wind tunnel report using the link below, but note that I wasn’t able to test the car without the splitter and just the airdam. The reason for that is I was trying to exactly match the CFD published by 9 Lives Racing, and their undertray and splitter are all one piece: you can’t just remove the splitter and test an airdam with an undertray.
In any case, if you’d like hard facts rather than CFD simulations, you can purchase my wind tunnel report for $35. Click the link and you’ll get a download link. In the report, I also go over a whole bunch of aero options, including the following:
- Splitter diffusers, spill boards, and tire spats.
- Canards in various locations and combinations.
- Closed windows versus open, plus modifications to reduce drag and turbulence from the open windows, including wickers, mirrors, and venting the rear window in two different locations.
- Singular hood vents fender vents.
- Brake ducts, NACA ducts.
- OEM hardtop with and without a rear window spoiler, versus a CCP fastback.
- Blackbird Fabworx spoiler at different angles/heights.
- Wings from 9 Lives Racing, Wing Logic, and a couple prototypes.

One thought on “Miata Airdam and Splitter”