I recently got an older AiM Smarty Cam, and it came with an AiM Solo DL and GPS-08 external antenna. There are a lot of AiM products and it’s confusing to know how to put them together, so I contacted Peter Krause who patiently walked me through what I’d need.
It’s really easy for the Veloster, or really any other car with OBD2. The 7-pin port on the Solo DL connects to the car’s OBD2 port. A 5-pin male to male cable goes between the Solo DL and the Smarty Cam’s EXT port. That’s it. Or rather, if I had any of the cables, then that would be it.
The camera’s 4-pin GPS port isn’t used in this configuration, and so I’ll be getting rid of the GPS-08 antenna, which will more than pay for the cables. These are widely available; I paid about $50 each.
In this configuration, the Smarty Cam gets power and GPS info for speed and lap timing, as well as the trigger to turn on and recharge from the Solo DL. The Solo DL in turn gets its power and extra channel information from the car’s OBD2. So essentially the car powers both devices, and you don’t need any other cables. Sweet.

I’ll also need to load the latest track maps into both devices. This means downloading the latest version of Race Studio 2 and uploading the track maps into the Solo DL. And then downloading the latest version of Race Studio 3 and uploading the track maps to the Smarty Cam. Weird, but OK.
With all that done, I should be able to get quite a lot of extra information, in addition to the GPS data I’m use to.

I like my AiM Solo mounted on the windshield, as far left and low as I can put it. Most road courses go clockwise, and so the Solo is out of view for the majority of corners. I’m addicted to the delta timer, and this is a way to impose limits on screen time.
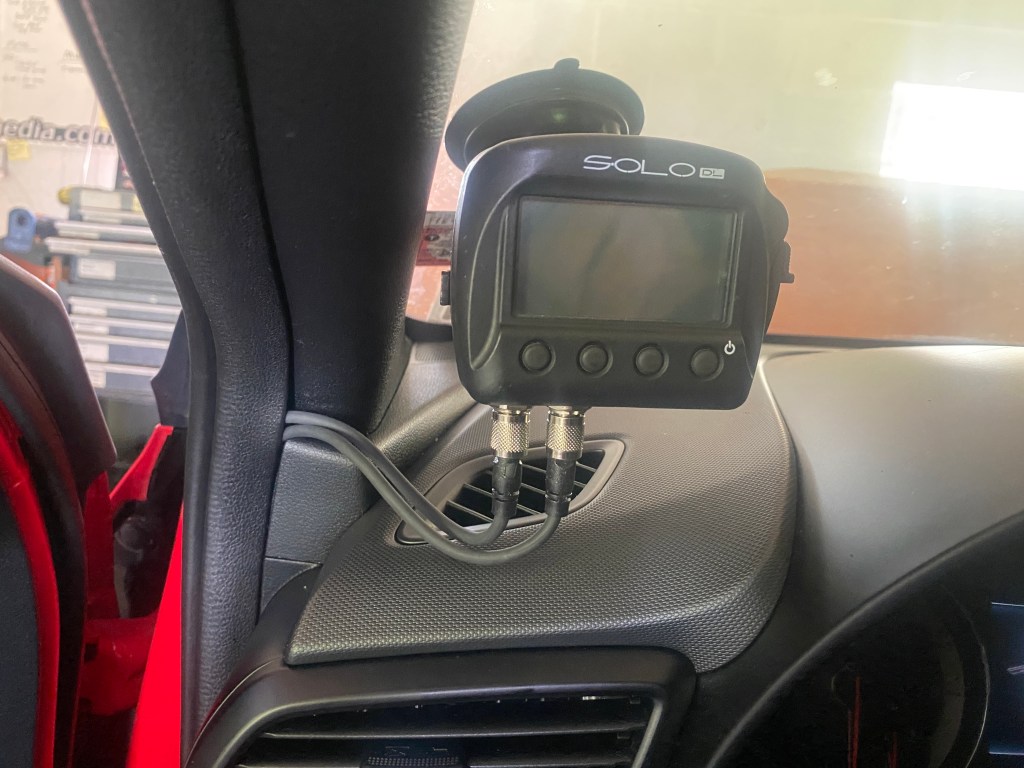
Running the wires was easy and oddly fulfilling. I pulled the rubber moulding away from the door jamb and tucked the wires into the slot below. The wires need to go in and out of this slot, so I used extant gaps in the interior panels for that. Going aft, I ran the wires back towards the seat belt anchor and popped them out under the driver’s seat and under both seat rails. The wires then go up to the camera.
I had a lot of ideas on how to mount the camera, and this is the one time Facebook read my mind and sent me the correct ad. There’s a product made specifically for cars called a Lapole, and it’s compatible with a lot of cameras, but doesn’t mention the Smarty Cam. I could probably adapt it to work, but at $100, I shouldn’t have to.
So I bought a heavy-duty adjustable spring-tension curtain rod for $20 and added a cam-lock mount with a 1/4-20 thread. This was one of those items I knew I had somewhere collecting dust, and it was going to take me 1 minute or 1 hour to find it. Thankfully just 1 minute.

There’s a lot of tension on the spring-loaded pole, so I cut a piece of plywood on top to use as a clamping caul, so that I don’t ruin the headliner. I was less concerned with the floor and simply ran the pole down to the carpet.
The camera mount seems quite stable, and I’m chuffed it all came out so nicely. I’ll make some tethers next and find a better way to bring the wires up the pole, but good enough for a quick project. I haven’t taken any video yet, but I’ll update this post when I get it on track.
