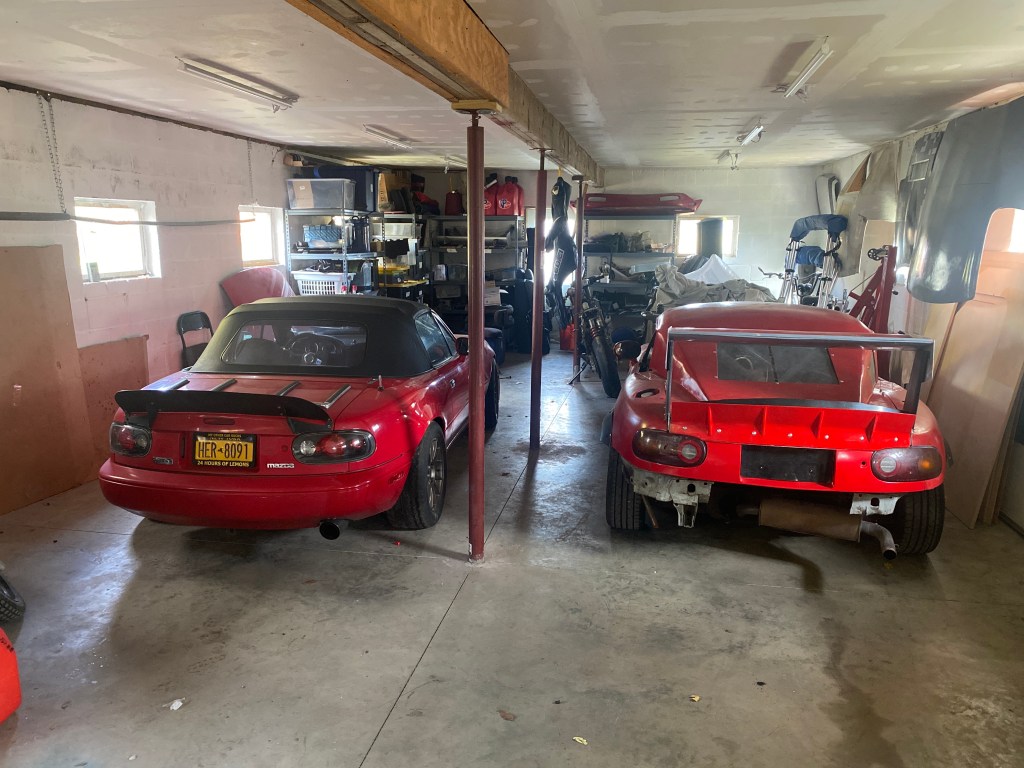
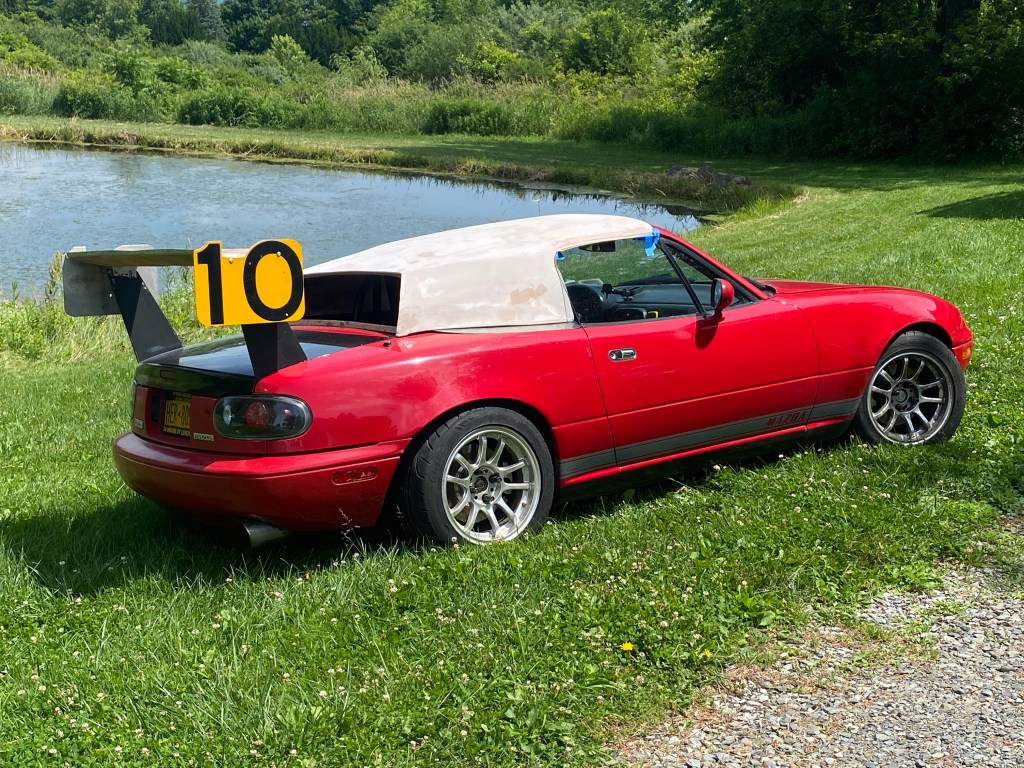
There’s a scene in The Road Warrior where Max hits a switch on his shifter and his supercharger spins up, giving him an extra boost of speed. I’ve always wanted something like that for my Miata. Or rather, I want something more effective than turning off the A/C.

The aerodynamic equivalent of that is a DRS system, like on Formula 1 cars. In F1, the upper wing of a dual-element wing can pivot into two positions, one for downforce, and one for low drag. It works, and makes F1 racing a lot more fun to watch. But you don’t see active aero much in other racing series, which is a shame, because racing improves the breed.
Since active aero is largely banned in racing, most of the advancements are happening on street cars. The first street car with active aero was way back in 1986, the exotic and unattainable Porsche 959. But just two years later you could get an active spoiler on a pedestrian Volkswagen Corrado.

And two years after that, the Mitsubishi 3000GT had active aero on both ends! A Russian magazine did some testing and reported that front lift reduced by half, and rear lift became actual downforce. This reduced top speed by 5 mph, which is an acceptable trade.

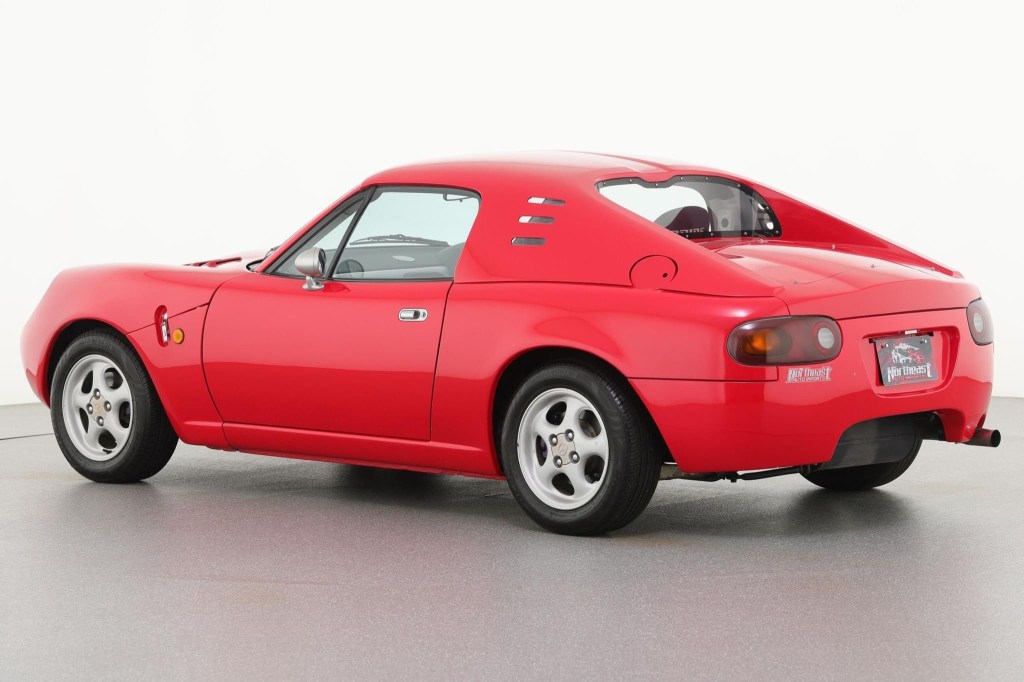
Those cars are now considered vintage, and on modern supercars like the Pagani Huayra, active aero is much more sophisticated.

Given unlimited resources and time, I’d develop a system that changes around the track based on GPS points: On the straights the aero would settle into the position of least drag; In braking zones the aero devices would move 90-degrees to the wind and behave like a parachute; In corners, the aero would pivot into the position of max downforce. I’d also have rudders and vanes on the sides of the car to help bank it into turns, loading up the tires differentially and using air resistance for turning.
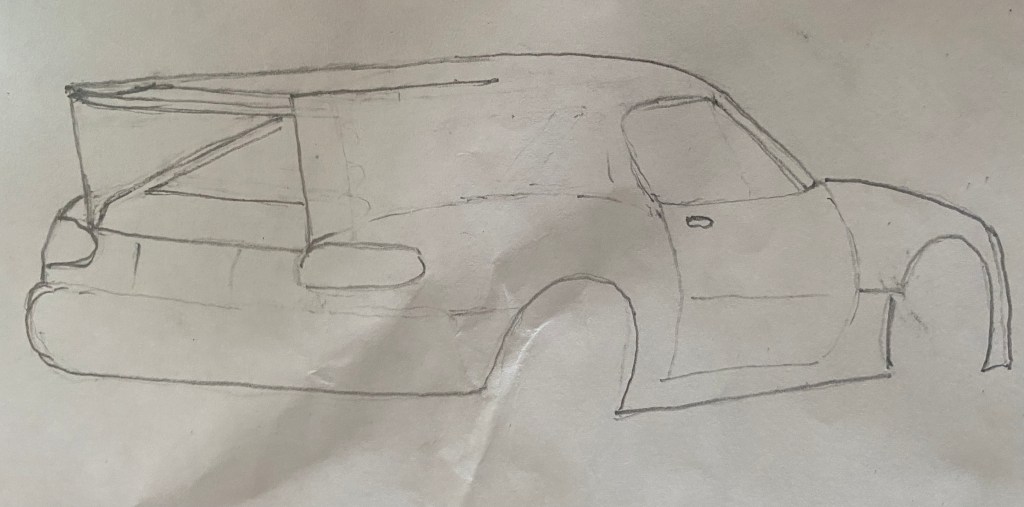
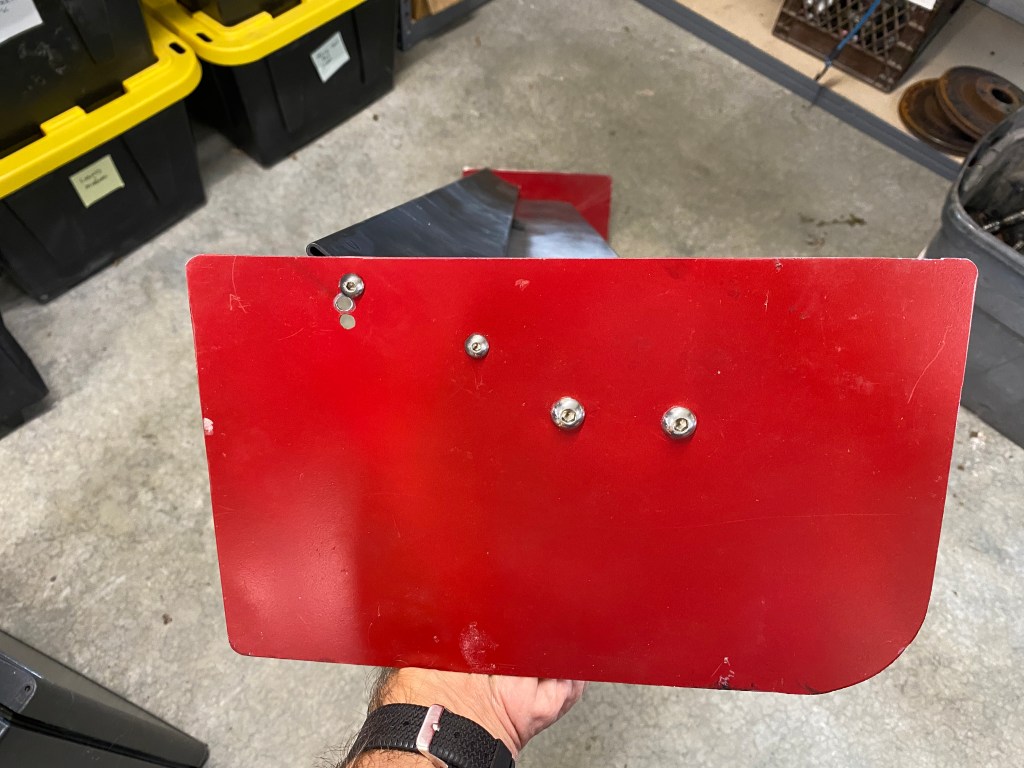
But bringing this back to reality, I’d start with something simple, like the VW Corrado spoiler. I’ve got a pair of Miata pop-up headlight motors on a shelf that I’m saving for just such a project. I’d hook them up to the headlight toggle switch on the dash, which would give me a high downforce setting I’d use for most of the track, and a low-drag DRS setting for straight line speed.
Before I embark on that journey, I’m going to look at a few aftermarket active aero systems, and then run some simulations to see how much active aero is worth.
NINTE Lifting Spoiler
I’d never heard of NINTE before writing this article, but apparently they make active aero for many sedans. You can tell from the shape and the integrated 3rd brake light that this is not a wing – they really don’t care what the underside is doing.
The spoiler rises up automatically when speed reaches 60 km/h, and descends automatically after 10 seconds when the speed drop down to 30 km/h. You can also control it manually.
In general, I’m a fan of spoilers on street cars, because they reduce drag and lift, and cars look better with them. Aesthetically, I like simple spoilers and this one is not. But at $850, it’s not outrageously expensive for something that could be fun and different.
Active Miata Wing
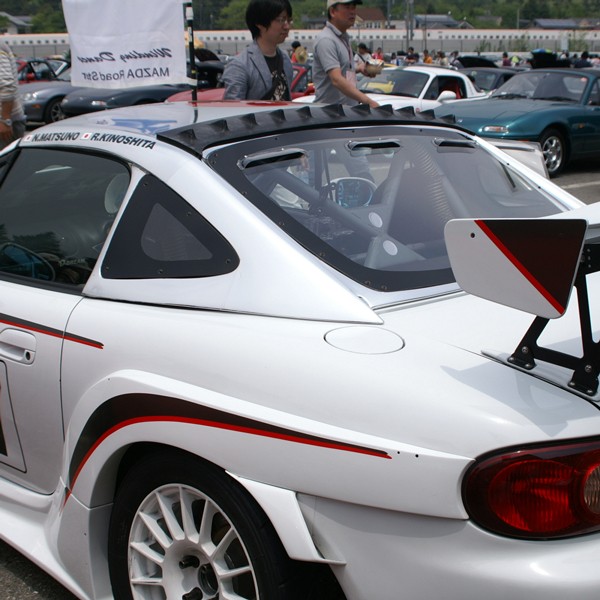
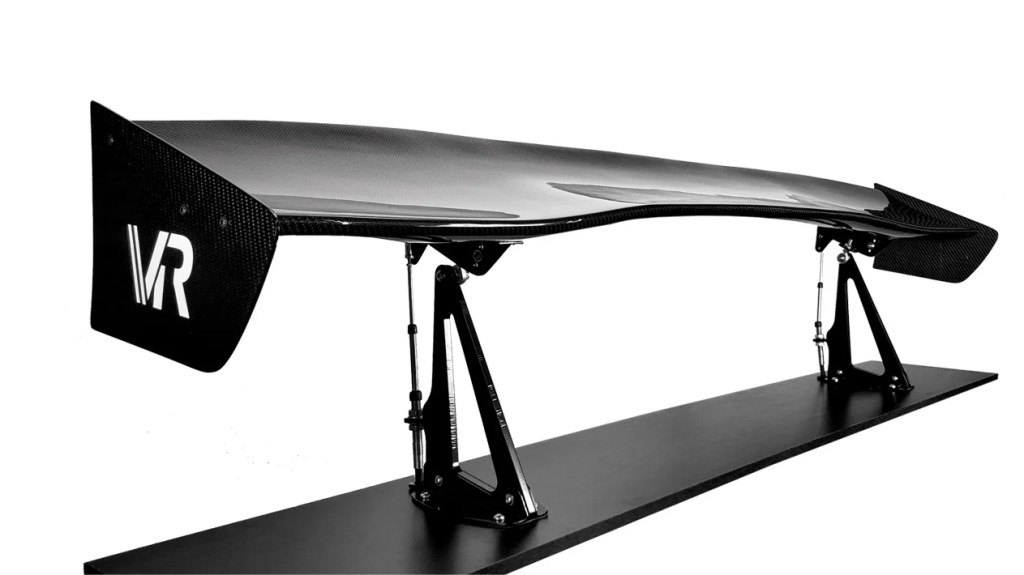
Carbon Miata sells an active wing for Miatas. It’s a three-position system for DRS, normal, and airbrake. The motors and levers are exposed and the entire thing has a DIY look about it. Normally I’d dig that, but if I was shelling out $3k, I’d want a more professional look. I think they could have hid the motors on the underside of the trunk lid or something.
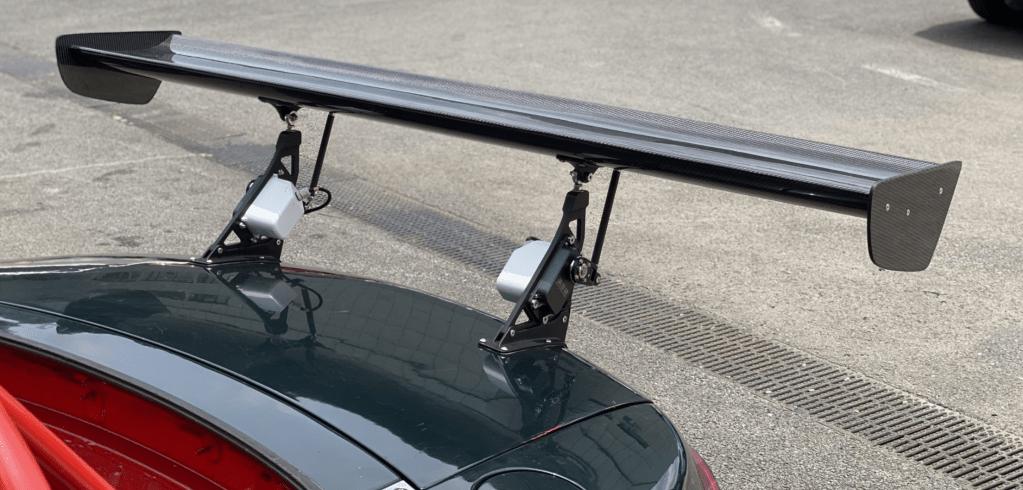
The airbrake mode is interesting, it tilts the wing to 90 degrees and while I believe it would be effective, it also scares the shit out of me. With the wing in airbrake position you’d lose rear downforce, but you’d move the center of pressure rearward and get a lot of drag to boot. I wonder how much stress the system can take, and if it’s designed for fast racetracks or just autocross.
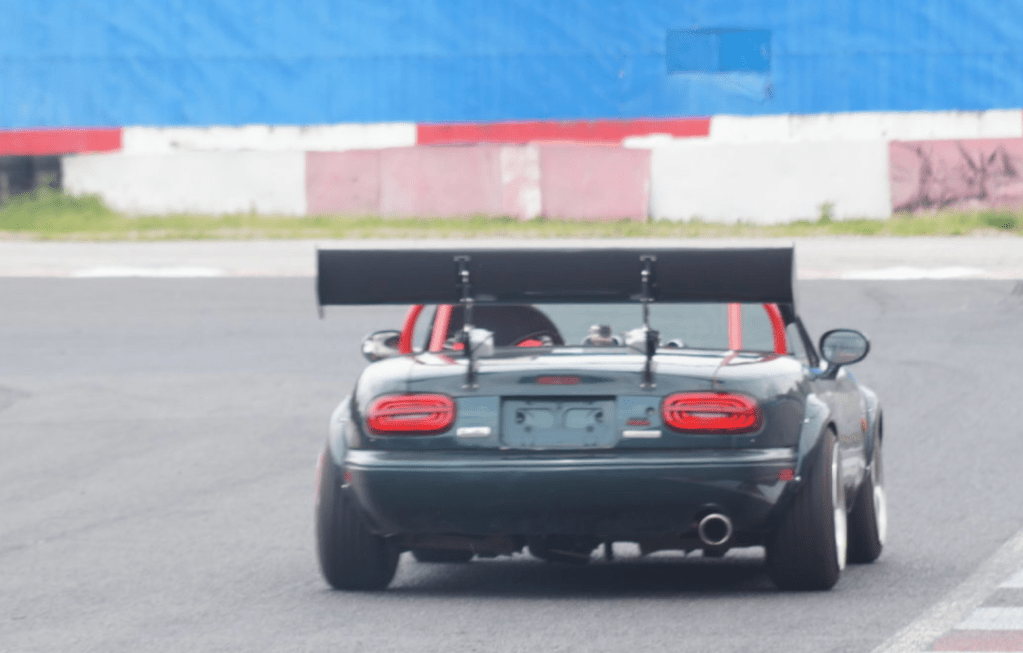
The carbon wing looks quite nice, and even if you never used the airbrake mode, the standard setting and DRS would be useful.
TRK1 Active Aero Smart Wing
If you have $3500 bucks lying around, you might want to try the SPT 1 Smart Wing. The wing comes in different sizes from 58″-70″, and has five downforce settings, low-drag, three downforce levels, and airbrake. The downforce levels can either be preset or programmable.
If you opt for the presets, you get three downforce levels: 10 mph, 50 mph, and 80 mph, plus the low drag and airbrake settings. If you buy the CPU version, you can program the wing to change angle at any three speeds you want.
For example, you might set the wing for low downforce at speeds up to 40 mph, to help the car rotate in slow corners, then transition to a maximum downforce setting up to your fastest corners, say 80 mph, and then start dropping wing angle at 100 mph, and go into full DRS mode at 120 mph.
You set the airbrake based on longitudinal Gs. Now I imagine this one would be a little tricky to set up, because just lifting off the gas will give you around .3 G of deceleration, and there are times when you want to lift and brush the brakes slightly, but still retain maximum downforce and grip. In such a situation, you wouldn’t want the wing to pivot into airbrake mode. So maybe after some experimentation you’d find that around .6 or .7 G translates to straight line braking, and that’s when you’d activate the airbrake.
It all sounds very high tech and fascinating, and one wonders what it would be worth in a lap time. The manufacturer claims that their single-wing DRS system was 10 mph faster than a fixed wing when tested on a Shelby GT350 at COTA. I’m not going to call total bullshit on them, but if F1 cars get only 7 mph out of a double-wing DRS system, it does sound a little far fetched.
OptimumLap simulations
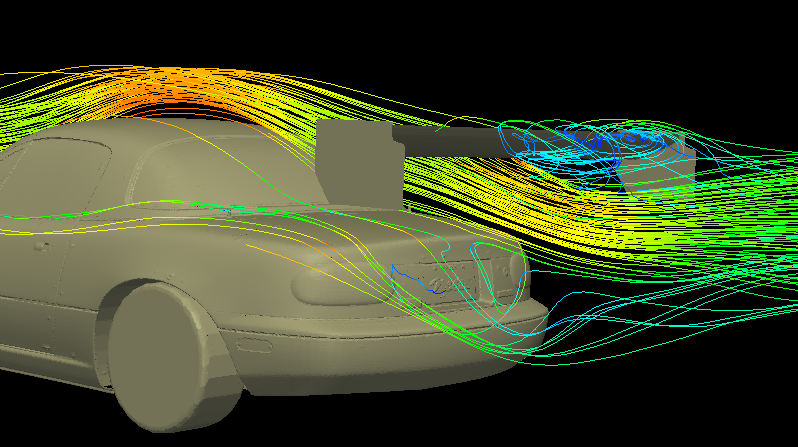
This is Occam’s Racer, where we do simulations and pretend it’s meaningful. In this make-believe world, I’ll do the simulations at Watkins Glen. The straights are long enough to use active aero, and in the real world, the track is only 25 miles from me, so I might be able to test this for realz one day.
| You might want to skip ahead to Single element wing. The rest of this section recaps how I made an error in the simulations, then figured out a more accurate way to measure DRS, and a neat trick in OptimumLap to see small deltas. |
The first time I ran the simulations, I cheated: I simply took a wing and reduced its drag value, reckoning that this was the same thing as active aero. It’s just less drag, right? Wrong. I immediately saw my error because the active aero wing had a lower top speed than the low-drag wing. The reason is, the car weighs less in when the wing is in a low-drag setting. Wings make downforce, which is the same as weight. So I had to scrap everything and start over.
To properly simulate active aero, you have to take into account not only drag reduction, but weight reduction. To do this required increasing mechanical grip of the low drag wing, such that it matched the exit speed of the high downforce wing. And then I had to determine the amount of time from corner exit to the braking zone between the active wing and the low drag wing. Good fucking god that was a lot of work!
And not to get too far ahead of myself, but the values were tiny, and difficult to see in the data. However, in doing these simulations, I found out something useful, which is that you can easily zoom in or out in OptimumLap. If you draw a rectangle on any of the charts starting in the top left and drag to the bottom right, it zooms in. Do the reverse and it zooms out.
Using this method, I was able to zoom into the time-distance graphs and get the exact amount of time it takes to cover any amount of distance on track. By subtracting starting and ending points, I then got the delta for how much faster the low-drag setting was. Ugh, tho.
Single element wing
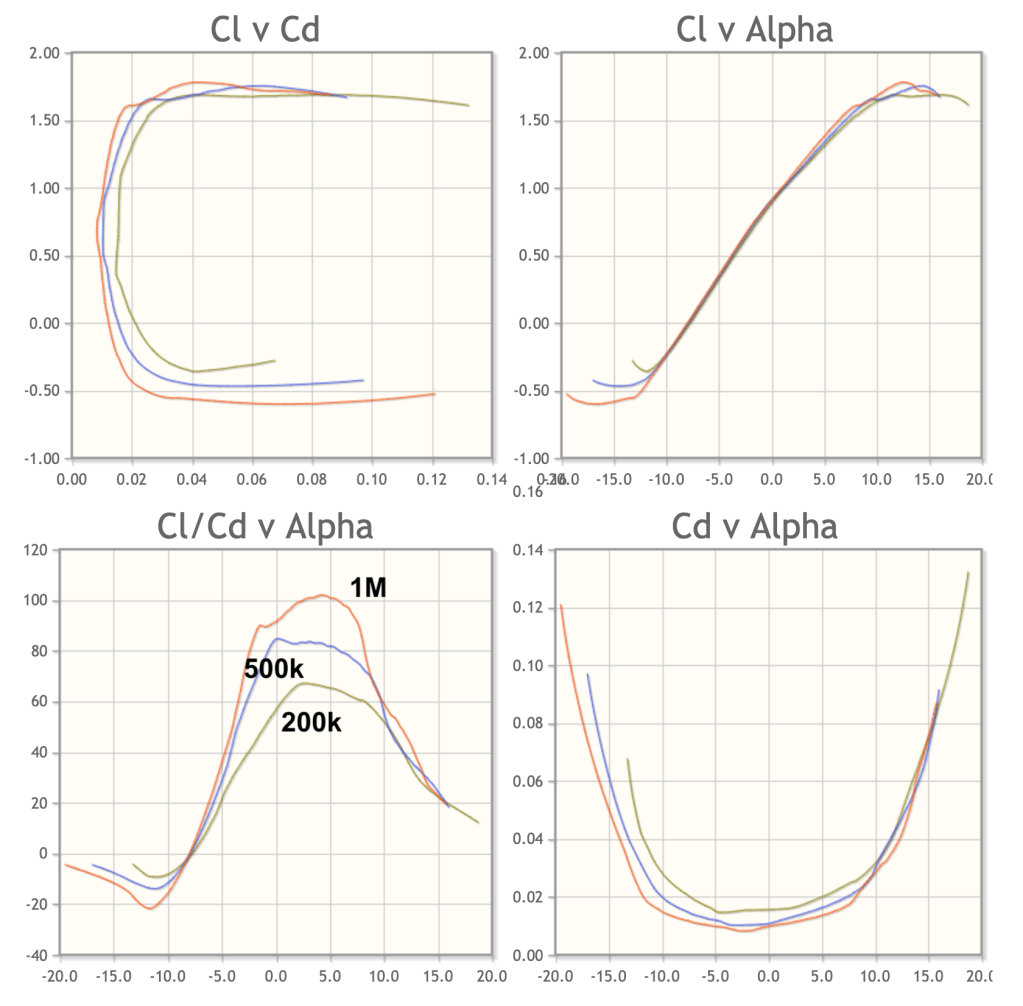
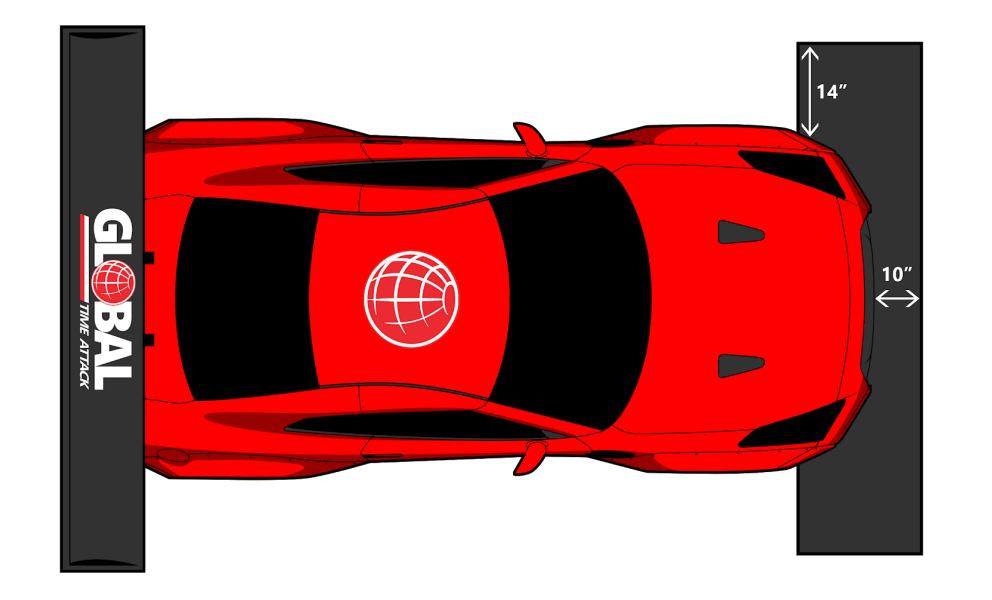
On a Miata, you typically run a single element wing at 3-5 degrees angle of attack. Air comes down the roofline at an angle, which puts the middle of the wing at around 10 degrees. Most wings will stall at more than 10 degrees, and so you don’t want to set the wing with much more angle than that. A wing set like this adds 3 points of drag, so if your Miata has a Cd of .45 without a wing, it’ll be .48 with a wing.
In the low-drag wing configuration, the car would have a Cd of around .465. This is really the best you can do on a 2D wing, as the ends of the wings are always 5-7 degrees offset from the middle of the car, and a properly set up wing doesn’t have a lot of drag anyway.
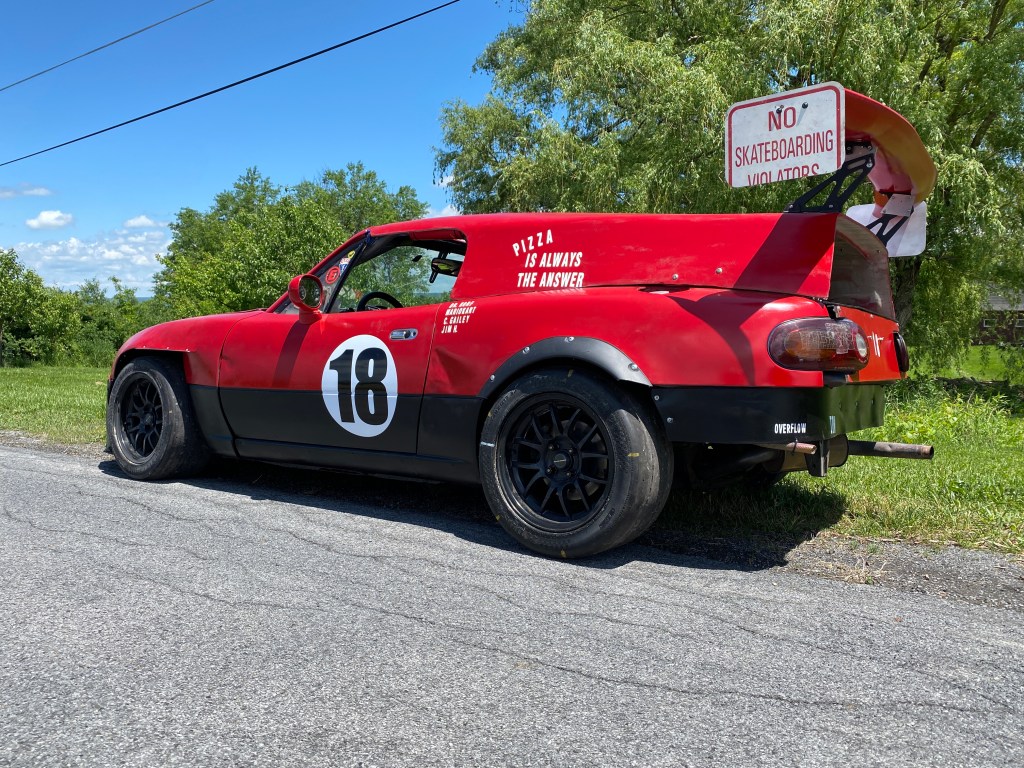
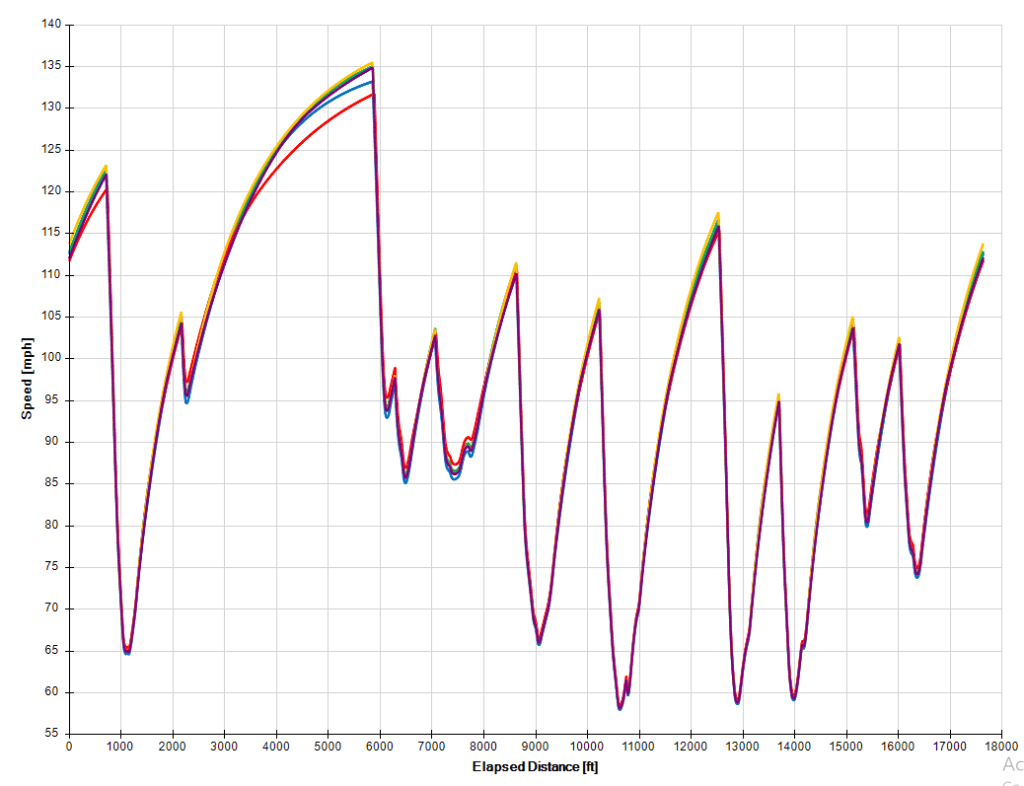
Watkins Glen has eight potential DRS zones: the front straight, the back straight, and the short straights between the corners. In those DRS zones, I’d have to push a button to lower the wing after exiting each corner and then push the button again to raise the wing before the start of every braking zone. Sixteen button pushes would take some concentration, and I might find my lap times were worse using DRS.
Instead I’m going to say that there are three DRS zones: front straight, back straight, and between turns 7 and 8. I’ve added 10 lbs to the car with active aero, to account for motor and levers.
I’ll simulate going around the track three times. Once with the wing fixed in the low drag position, another time with the wing fixed in the standard downforce position, and then using active aero in the three DRS zones. Here’s the lap times:
| Wing | Low drag | Standard | Active aero |
| Lap time | 2:18.12 | 2:15.28 | 2:14.92 |
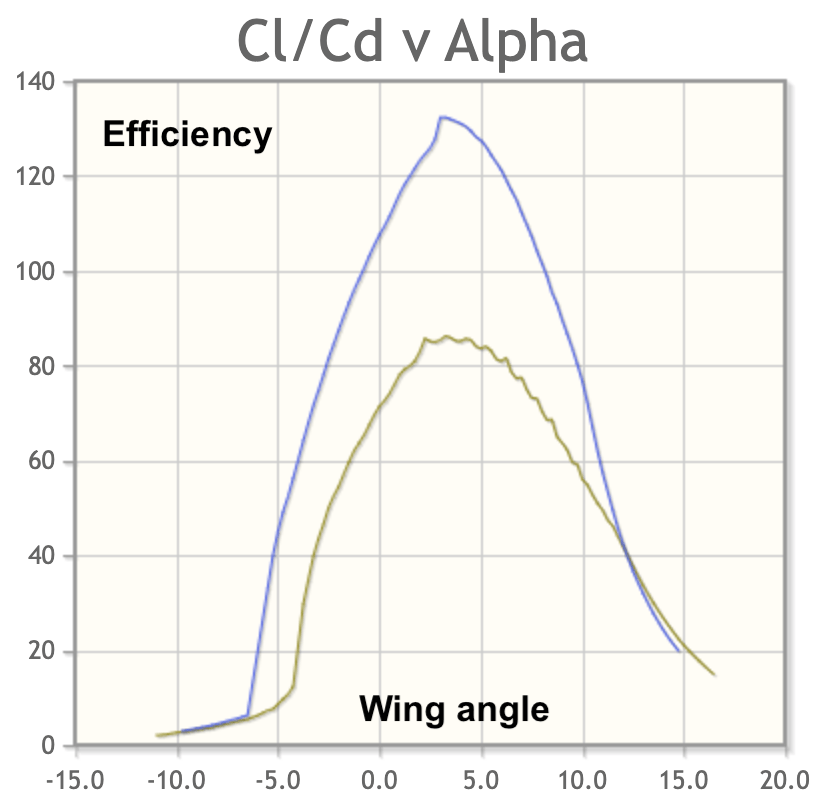
- The slowest configuration would be the wing set to the lowest drag setting. This corresponds to the wing set for maximum efficiency, which is why choosing a wing or angle of attack based on its efficiency is meaningless.
- Setting the wing to the standard 3-5 degrees angle of attack makes the L/D ratio of the entire vehicle the most efficient. This is faster than the low-drag setting by almost 3 seconds.
- Finally, the active aero wing would be about 0.36 seconds faster than a fixed wing. Now wait a goddamn minute… that’s it? Yep.
Single element wings are efficient at producing downforce and do so with very little drag. In fact, a wing has about the same amount of drag as your two side mirrors combined. Thus, active aero on a single element wing is about as effective for drag reduction as if you moved one of your mirrors inside the car on the straights.
Given that, is active aero worthwhile? For causal lapping at a track day, notsomuch. In a racing situation, sure.
At Watkins Glen, the back straight is where drag reduction makes up the most time. From the exit of Turn 2 to the braking zone of the Inner Loop is about 3000 feet. Setting the wing into the low-drag position makes the car go 1.5 mph faster, and gains 0.17 seconds per lap over a fixed wing.

But a better way to visualize that is that DRS gains about 25 feet on the car with a fixed wing. So with two evenly matched cars racing close together on the back straight, the car with active aero should be able to pass the car with a fixed wing.
And that’s pretty much how it happens in Formula 1. The trailing car activates DRS and makes a pass on one car at the very end of a straight. Speaking of F1, wouldn’t a dual element wing be a better usecase for active aero?
Dual element wing
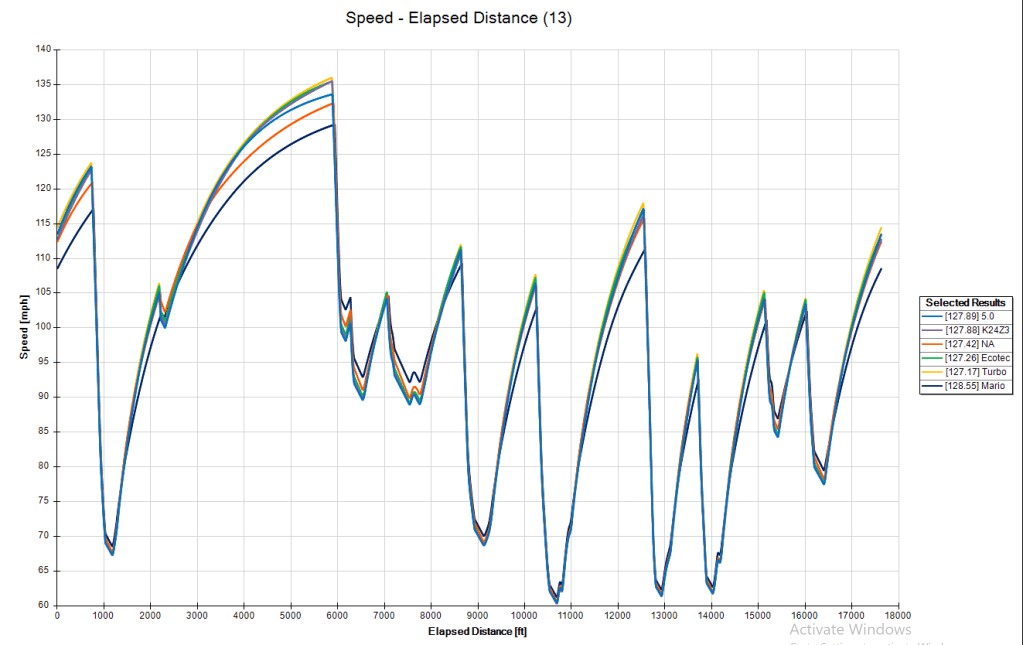
Dual-element wings aren’t as aerodynamically efficient as single wings. As you add elements, you gain downforce, but you gain drag at a higher rate. However, because the wing contributes a very small amount to the overall drag of the car, the aerodynamic efficiency of the vehicle is better with a dual wing. As I’ve simulated it, the aerodynamic efficiency of the single-wing car is 2.08, and the dual wing is 2.98.
The first simulation I’ll run is a fixed single wing versus a fixed double wing. Despite a 2 mph slower speed on the back straight, the double wing is about 1.5 seconds faster than single. It makes up time in every corner and keeps that speed onto the shorter straights.
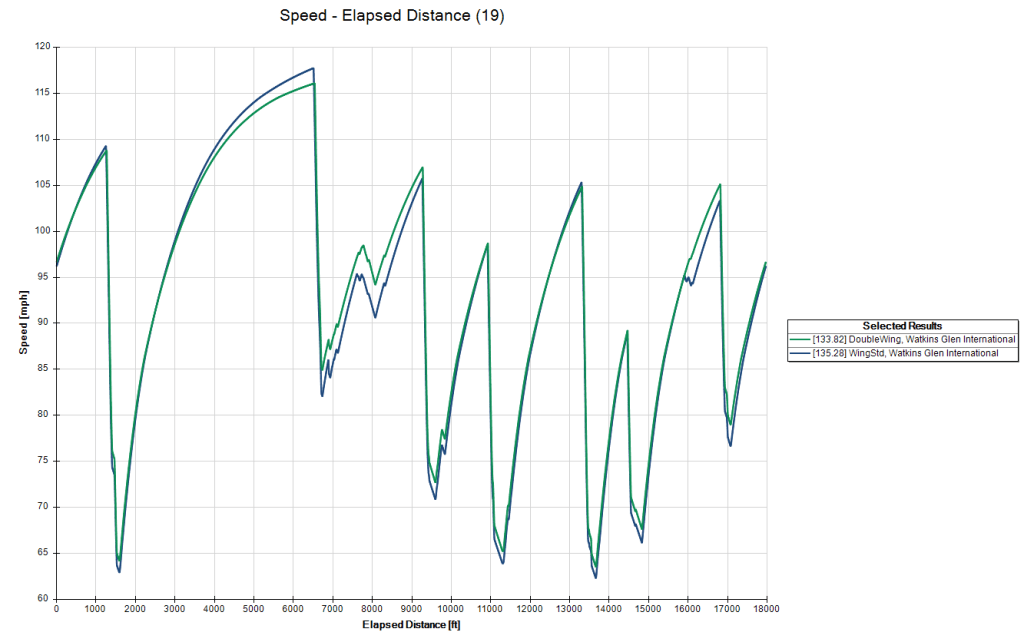
So now I’ll make the upper wing active and it goes .60 seconds faster than a fixed dual wing. Here’s the lap times:
| Wing | Single wing | Double fixed | Double active |
| Lap time | 2:15.28 | 2:13.86 | 2:13.26 |
That’s not too shabby, and most of the gain is on the back straight. Activating DRS on the run from T2 to the inner loop is worth .35 seconds alone. This is a gain of over 50 feet of track on a car with a fixed dual wing. So as you can see, active aero makes more sense for a dual-element wing than a single wing.
So how come active aero isn’t as effective as we see on TV? Mostly because F1 cars are so damn fast. Drag force doubles with the square of speed, so there’s four times as much drag at 200 mph than 100 mph. At autocross speeds, drag is inconsequential, but at high speed it’s a game changer. Even so, on a F1 car, DRS is only worth about 6-7 mph. So it stands to reason that a dual-element DRS wing might be worth only 1.5-2 mph on our cars.
New York Safety Track
Watkins Glen is a long, fast track with a higher top speed than any other track I’ve been on, and represents a DRS best-case scenario. I also simulated what would happen at New York Safety Track, because it has shorter straights and a lower top speed, and is more similar to the average road course. I also coach at NYST several times a year, so if I build a DRS system, I’ll be able to test it in the real world as well.
NYST has just one DRS zone, the 1400′ front straight that they use as an airstrip for small planes. I only simulated the dual-element DRS wing, as it was the most effective.
If I activated the DRS system at the exit of T18, I’d gain .058 seconds to the Start/Finish line, and from there to the braking zone for T1, I’d get another 0.062 seconds. All told, DRS would be just 0.12 seconds faster than a fixed dual wing. In terms of top speed, it’s a difference of less than 1 mph. That’s enough to make up only one car length against an evenly matched fixed wing car, and would be of dubious benefit.
Conclusions
Active aero is typically banned at the club racing level, and after doing this theoretical investigation, I’m inclined to agree with that restriction. Active aero adds weight and complexity, and mechanical things fail mechanically; I can only imagine the jank that me and other DIY pioneers would litter the track with.
Now if you’re racing in 24-hours of Lemons, go ahead and make an active aero system and see if it’ll pass tech. Or build an anti-aero device that makes a jack-in-the-box pop out of your roof. But for serious racing, you’ll achieve more by reducing drag anywhere else on your car.
Think about it: if you want to reduce the weight of your car, you don’t look at all your carbon fiber components and try to lighten them. You go after the parts that weigh the most.
Wings are already designed for optimum performance and low drag. Reducing drag on what is already the most aerodynamic part of the car, is as silly as trying to lighten what is already made out of carbon fiber. Your hardtop, cooling system, mirrors, wheels, rear surfaces, and everything else on your car are better places to concentrate on drag reduction.
For HPDEs, there’s even less to be gained with DRS than in racing. Moreover, I ran these simulations at a very fast track with three long DRS zones. Most race track have fewer and shorter straights, and DRS would be worth only a tenth of a second.
Just the same, I’m pretty sure I could build a robust DRS system. And I have those headlight motors just sitting there on a shelf. And it’s still over half a second at WGI that I’m not going to get anywhere else….
Addendum: Spoiler
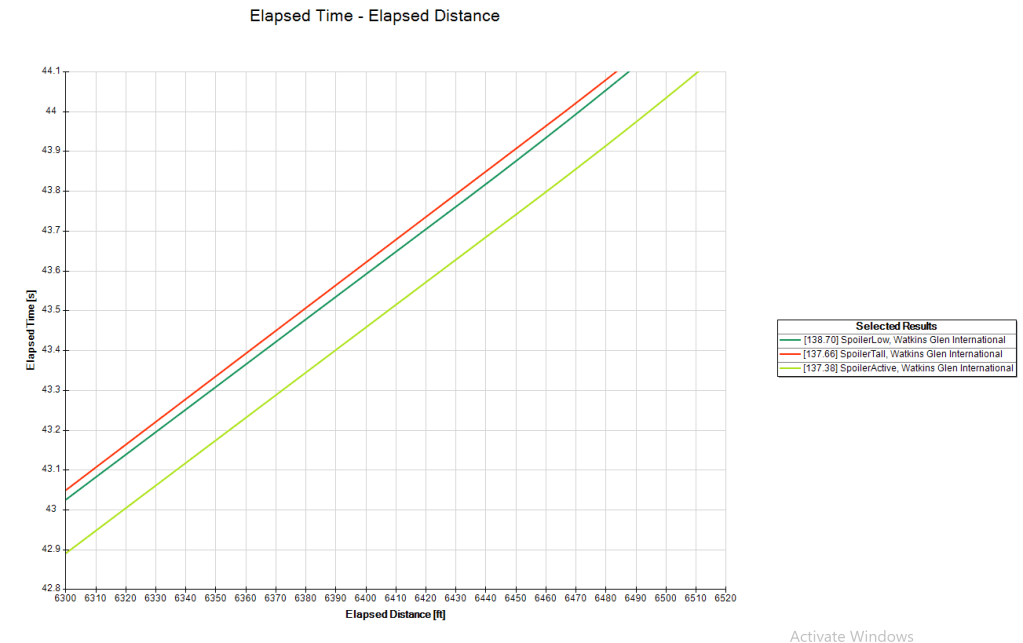
The first simulations I ran were with spoilers, but once I realized that I’d made incorrect assumptions, I didn’t bother recalculating the lap times to the same level of detail as I did with the wings. However, someone might be curious about the effectiveness of spoilers and this data is close enough.
- A low spoiler makes the car about a second faster than a car with no rear aero.
- A tall spoiler is about a second faster than a low spoiler.
- An active spoiler is .28 seconds faster than a tall spoiler.
If you read my previous posts on 3D wings, you’ll know that a 3D wing designed for the Miata’s roofline shape is marginally better than a 2D wing. I’ve included the 3D wing data and a car with no rear aero in the summary data below.
| Rear aero | Lap time |
| None | 2:19.63 |
| Low spoiler | 2:18.70 |
| Low-drag wing | 2:18.12 |
| Tall spoiler | 2:17.66 |
| Active spoiler | 2:17.38 |
| Fixed single wing | 2:15.28 |
| 3D single wing | 2:15.09 |
| Active single wing | 2:14.92 |
| Dual-element wing | 2:13.86 |
| Active dual wing | 2:13.26 |