Watkins Glen Test #1: Veloster N Spoiler and Wing

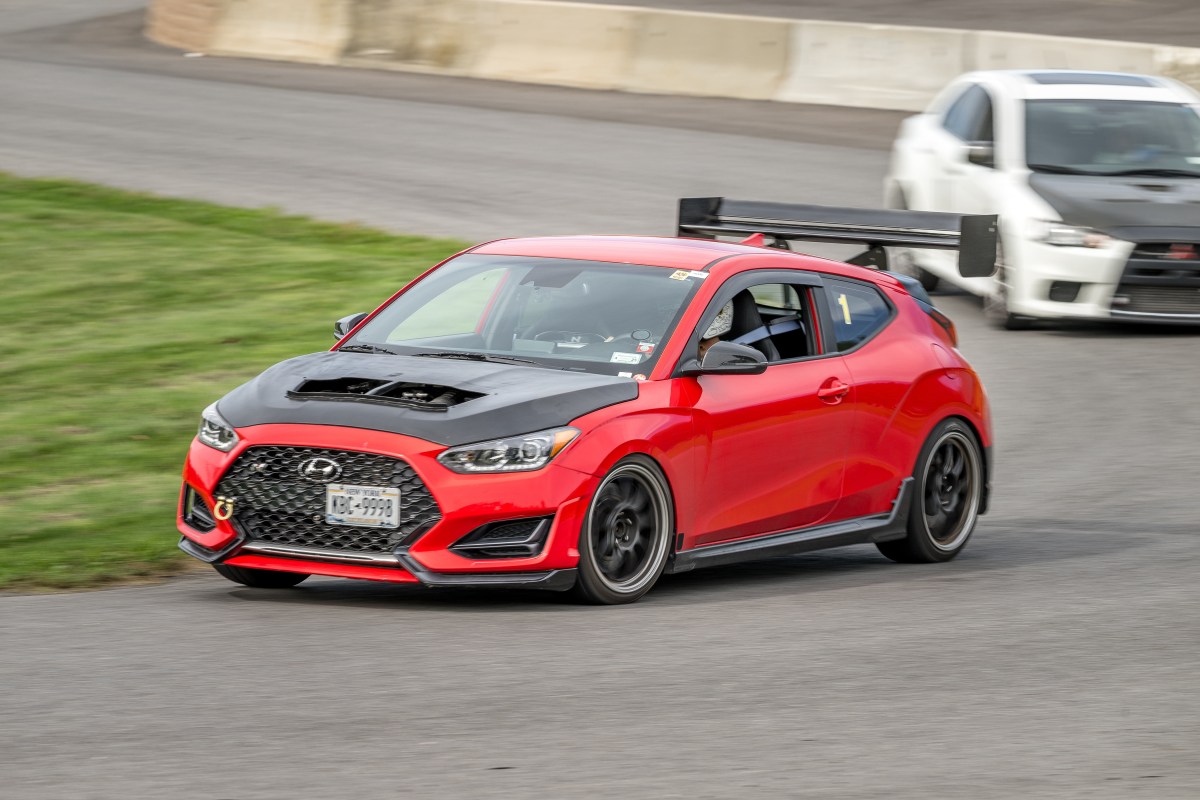
I plan on doing a few tests at Watkins Glen International this year, and this is the first of (I hope) several reports. WGI is 25 miles from my house, and I have a lot of opportunities for free track time with groups I instruct for (Chin, HoD, MT, NASA, PCA, SCDA). The Glen is convenient for testing, and the corner speeds are high, making it a good place to test aerodynamic downforce. But the straights are also quite long, and so drag matters a lot here.

However, as a testing venue, WGI is only so-so because it’s a popular track, and so there might be 40+ cars in your run group. It’s not just the traffic that’s the problem, but highly variable weather, and virtually no runoff. So it’s not uncommon to lose a session due to rain, fog, or because someone hits a wall. For this reason, I may need to use sector times and predicted laps in order to get good data.

But on April 13th we had decent weather and lots of space on track with Mass Tuning, and so I was able to test different things and get clean laps. But because I made aero changes each session, and was also playing taxi (guest rides), I wasn’t able to string together many hot laps, and so there are only three decent laps from each aero configuration.

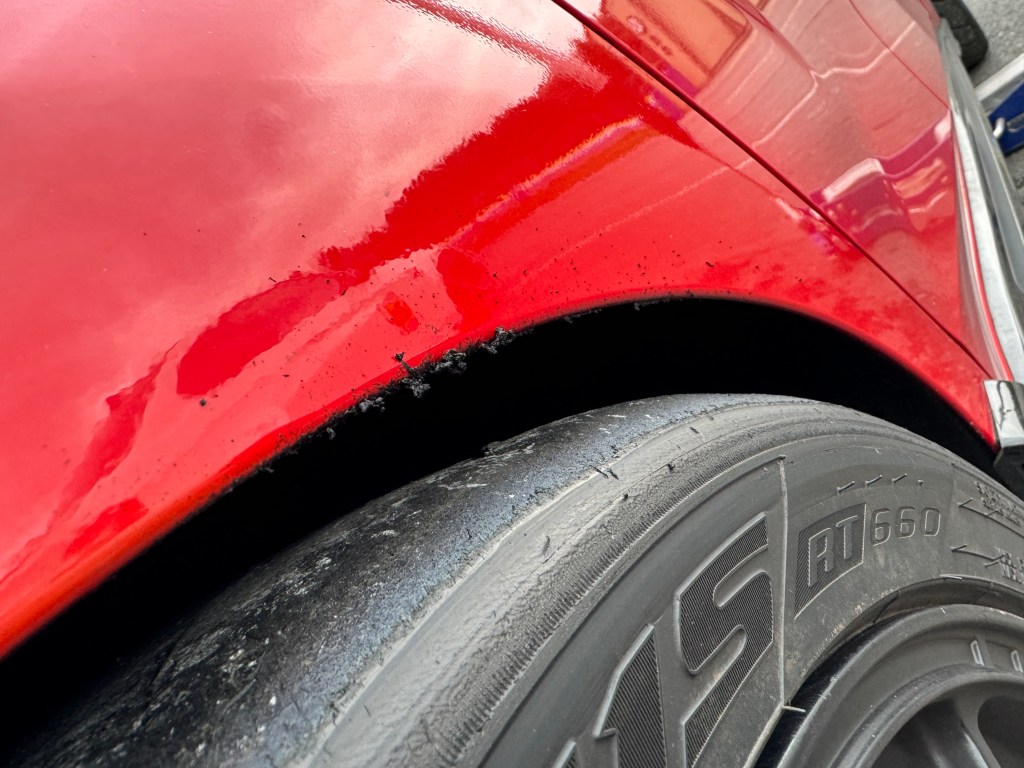
Another reason for the lack of hot laps is it takes a full three laps to get my tires up to temperature. I start them at 27 front and 30 rear, and at the end of the session they are properly at 37 F and 36 R. But I lose a lot of time early in the session, braking and accelerating hard to get the temps up, while keeping corner speeds low. If I’m impatient and corner hard at less than 32 psi, the tires roll over and I cord the outer edge. I learned this the hard way last year, getting only about 1/3 of the life out of my tires.

In the future, I may start the tires at 30 psi, which should put the tires out of the danger zone after one lap. This would result in the front tires being 40-42 psi for most of the session, and while this won’t return the best lap times, I should be able to normalize the data better.

The long warm-up times are probably the result of not enough negative camber. In fact I never hear the tires working hard, they just make a low-frequency moaning sound, not the screeching howl I get out of my Miata on the same tires. The Veloster sits on lowering springs and has one set of camber bolts, and this maxes out the camber at -1.8 degrees. With offset bushings (or slotting) it’s possible to get -2.5 degrees, but any more than that and I risk blowing the OE struts. This is still a street car, and I’m not going to ruin it by turning it into a track car with coilovers, stiff sway bars, and solid bushings. Well, not yet anyway.

OE N wing 2:17.4

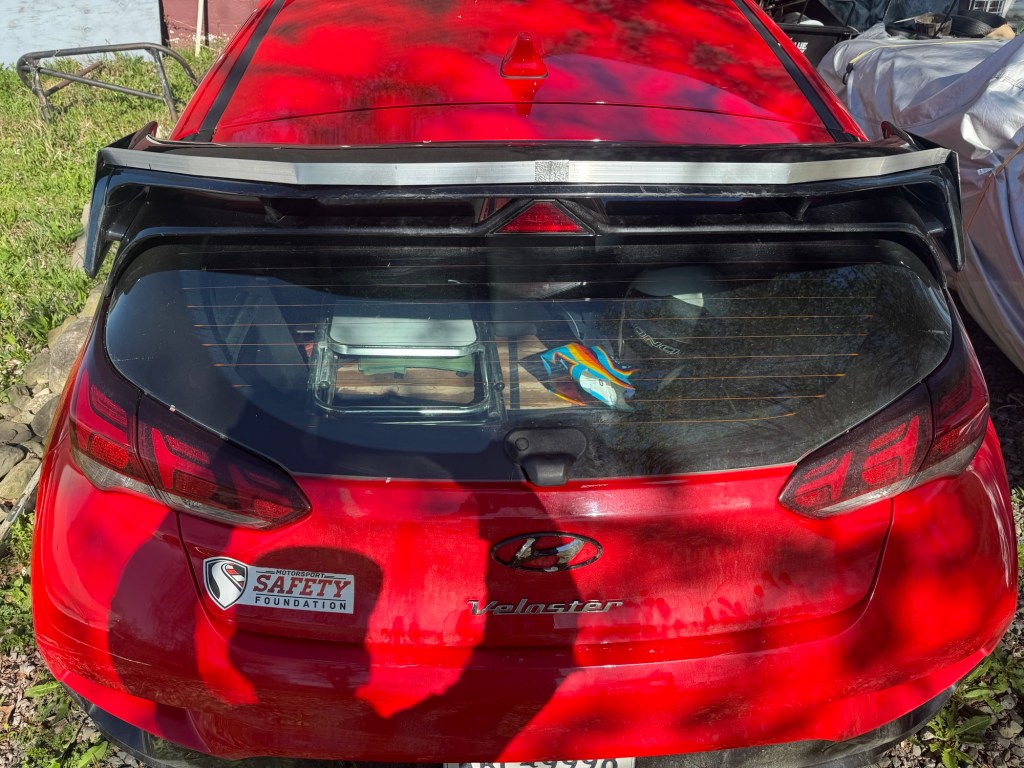
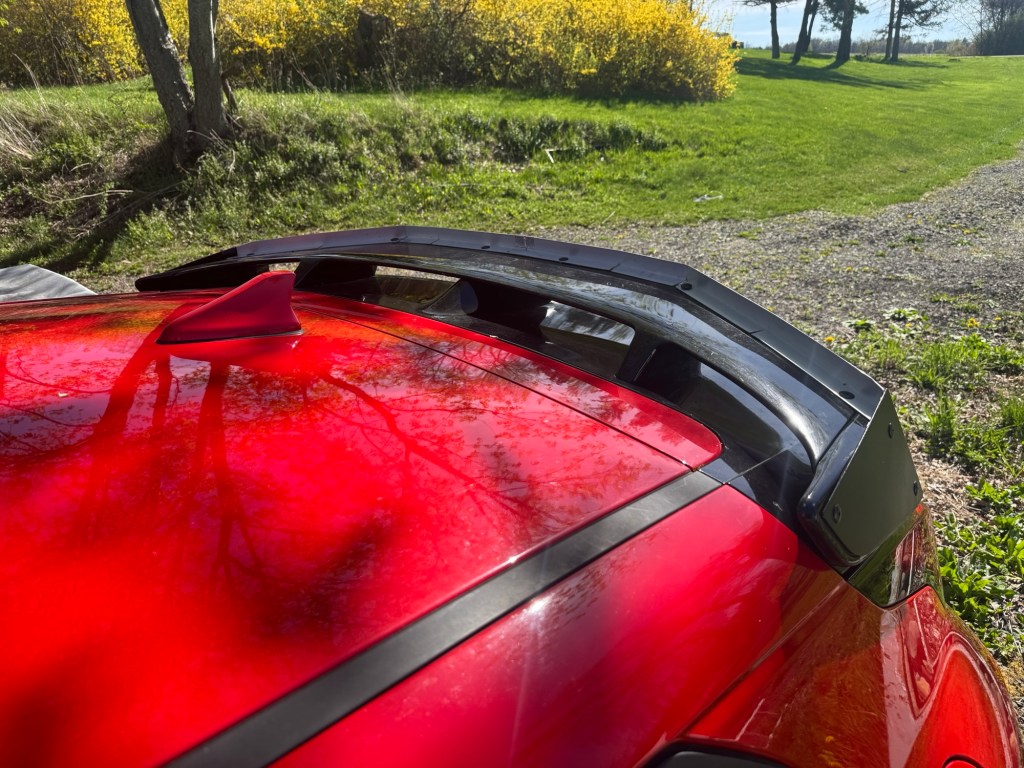
In the wind tunnel, the OE wing (or it could equally be called a spoiler) made 30.8 lbs of downforce at 100 mph. This cancelled out the rear lift on the base model hatchback, giving the car a slightly negative coefficient of lift. This is very rare in a street car. In my article Thinking in Aerodynamic Coefficients, I show that most cars have positive lift of around Cl 0.1-0.2. Cars that have zero lift or even some downforce are rare, and usually an exotic sportscar. But the Veloster N is one of those unicorns that has downforce straight from the factory.

The OE wing does a good job of stabilizing the rear of the car, and I felt none of the rear instability issues I felt when testing the car with the base model roof extension (meaning no wing). That was a test I ran at NYST, and the rear lift made the car twitchy under braking going into T1 and T5. But at WGI where I was 30 mph faster, the N wing felt stable under braking, and so the OE wing is definitely an improvement on the base model’s featureless roof extension.

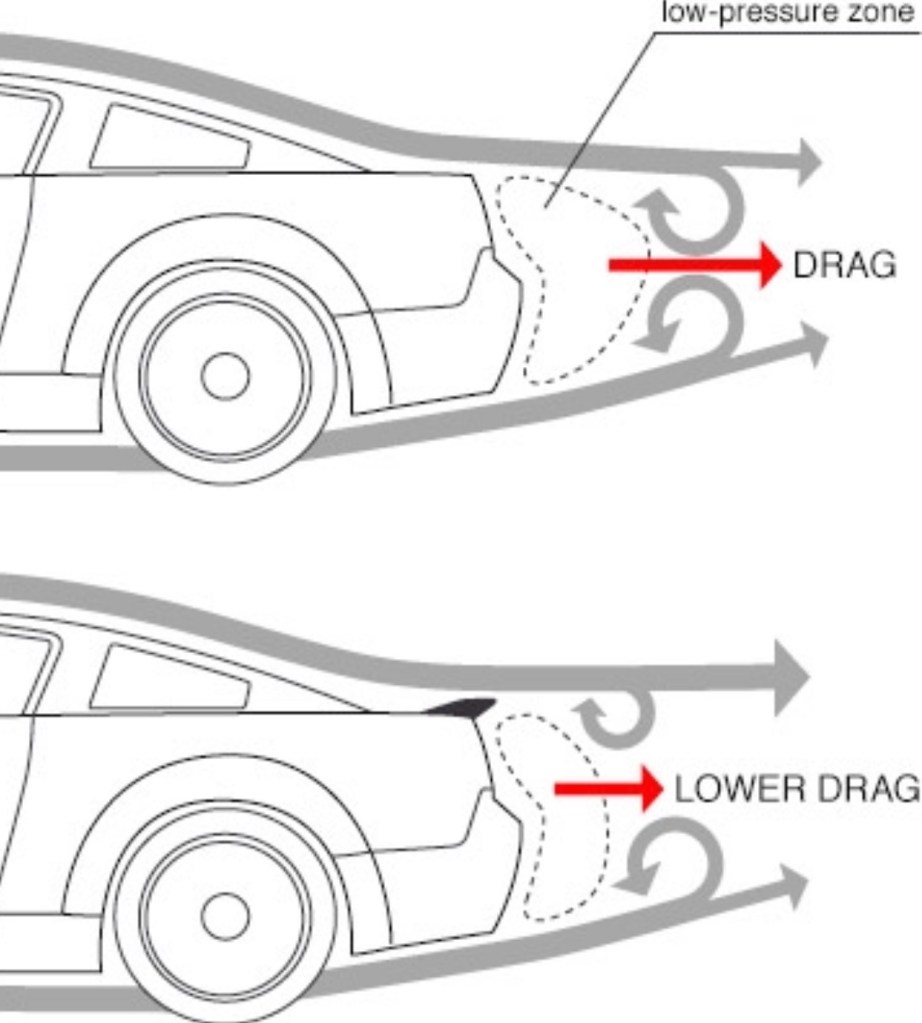
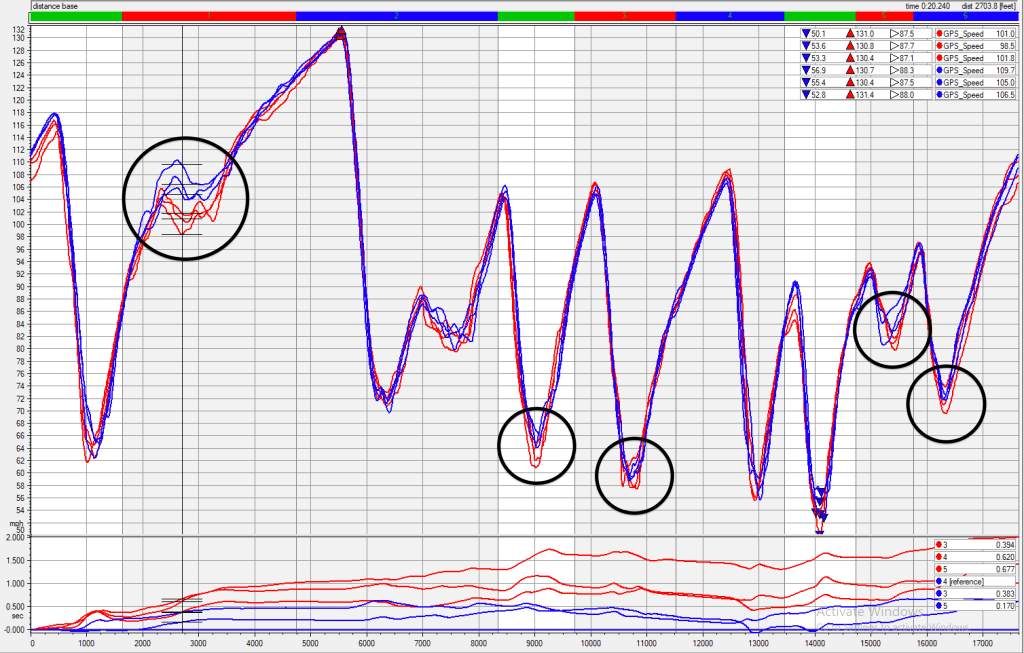
The N wing also had the least drag, and posted the fastest top speed of 132 mph on the back straight. But the OEM wing also had the least downforce, and you can see this on the speed trace below, where I compare the OEM wing (red) to the same wing with a Gurney flap (blue). Note the difference in speed through the esses, it’s huge. But also note the vMins in each corner that I’ve circled. Not only are the vMins higher, they are shifted to the left, indicating that I’m backing up the corner better when the car has more rear downforce.

Red is OEM wing; Blue is the same wing with a Gurney flap.

Wicker kicker 2:16.4

I put a 1” tall Gurney flap (wicker) on the trailing edge of the N wing, and in the wind tunnel this made 114.7 lbs of rear downforce and 8.9 lbs of front downforce. The fact that this made front downforce means the wing is behaving more like a spoiler than a wing, and the combined 123.6 lbs of downforce is a lot more than I would have thought from adding a simple Gurney flap. When I add a Gurney flap to a wing I usually get 150-170% more downforce, not over 400% more! With an increase in downforce, there’s more drag, and 8.3 hp is lost at 100 mph.

Wicker-kicker Gurney flap thingy.

But the extra grip through the esses is worth it, and by the time I get on the brakes for the bus stop, the max speeds are identical with or without the wicker. Around the rest of the lap, the modified OE wing has more grip, and the lap times are 1.1 seconds faster, lap after lap.

I uploaded a video of three consecutive laps, and I apologize in advance for the shitty audio. I use an original SmartyCam with an internal mic, and I can’t figure out how to make it less terrible. Anyway, I do a brace of identical 2:17.031 laps (down to the thousandth of a second!), on either side of a 2:16.415.

Three laps, turn the audio off.

S1223 54×11 wing 2:16.8

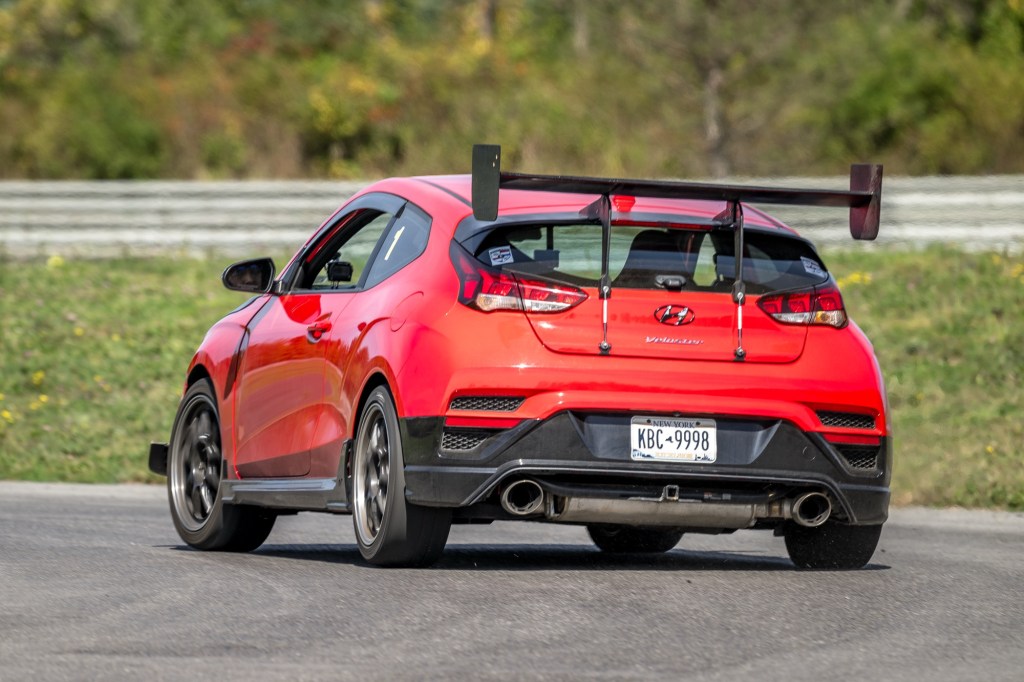
In the wind tunnel, my DIY Selig S1223 wing made 179.5 lbs of rear downforce at 100 mph, and 31.6 lbs of front lift. Wings are located higher and further rearward than spoilers, and so it’s normal for wings to lift the front end through leverage. As a practical matter, this is why people typically use a splitter and a wing together, but a spoiler can often be combined with a simple airdam, or just used on its own.

The wing’s total downforce of 147.9 lbs, divided by 45.3 lbs of drag force, returns a 3.27:1 L/D ratio, which is about the same as the OE wing, but not as good as with the Gurney flap. The drag amounts to 12 hp at 100 mph, and on the back straight of Watkins Glen, the wing is 2 mph slower than the other options.

One of the reasons the wing isn’t very efficient is because it has a span of only 54”. This is problematic for two reasons: first, wing-tip vortices have a detrimental effect on the wing’s overall performance, and so the greater the aspect ratio, the better the wing performs; second, most of the wing is in the silhouette of the hatchback roofline, and so very little of the wing is in clean air.

The reason the wing is 54” is because I wanted a cheap way to test a dual element wing, and bought a $35 extruded wing as the upper wing. The dual wing worked well at Pineview Run and NYST, setting the fastest laps (.8 seconds and 1.0 seconds faster than the single wing, respectively). But after seeing the initial results from the single wing at Watkins Glen, I didn’t even bother attaching the upper wing, as I’m sure the dual wing would have been the slowest.

Single wing has rather tall end plates, as they are used to hold a second wing element. I didn’t try the dual wing option at WGI.

Under most racing rules, wings are allowed to be body width, which in the case of the Veloster N would be 71.7”. I tested a 70” Wing Logic wing in the wind tunnel, and it made the same amount of total downforce as my 54” DIY wing, but with 44% of the drag. The resulting 7.4:1 L/D ratio shows how important it is to get the wing tips as far apart from each other as possible, into clean air, and away from the hatchback roofline. I may test this on track in the future.

Conclusions

Based on testing the single wing at Pineview Run (.7 seconds faster) and NYST (1.5 seconds), I felt for sure the S1223 single element wing was going to be worth 3 seconds at WGI. The fact that it was only worth about 1 second has me tail spinning into the D-K pit of despair. Let me think about why that may be….

One reason for the lack of performance may be the aero balance. As mentioned, the wing adds rear downforce with a lot of leverage, and so it was the only one that lifted the front. The result is the car may have too much rear aero bias, and not enough grip for turning in. Perhaps when I put a splitter on the car, I’ll see better results.

But note also that the aero balance was even worse at NYST and Pineview. The fastest rear aero on those tracks was the double wing, which I didn’t measure in the wind tunnel, but certainly has the most downforce and drag.

Another reason the wing underperformed could be the driver underperformed. I don’t believe I was cornering hard enough, and just barely edging into the performance envelope where aero is adding to what the tires alone can give. With more laps and coaching, we may see the driver perform better, and with that, the results may change.

Of course drag is a factor at Watkins Glen, and the 54” wing had the most drag. If I swapped to a 70” Wing Logic wing, I’d gain the equivalent of 6.7 hp (at 100 mph).

But as it sits now for both car and driver, the easiest and cheapest way to go faster in a Veloster N is to put a 1” Gurney flap on the OE wing. The performance of this modification was one of the biggest surprises in the wind tunnel, and it’s nice to see that reflected in real life, as well.

Three hot laps from each configuration went like this:

ConfigBest lapAveragePredicted
OEM wing2:17.4342:17.912:16.841
OE + wicker2:16.4152:16.832:15.783
54″ wing2:16.7952:17.022:16.284

While I have some work to do to get faster, I’m a consistent driver. Watkins Glen is a long 3.38 miles, but my lap times are usually within a couple-three tenths of the previous lap. That’s around a 0.3% difference, and probably similar to the noise you’d see in other variables that change throughout the day, such as air and track temperature, wind speed and direction, etc.

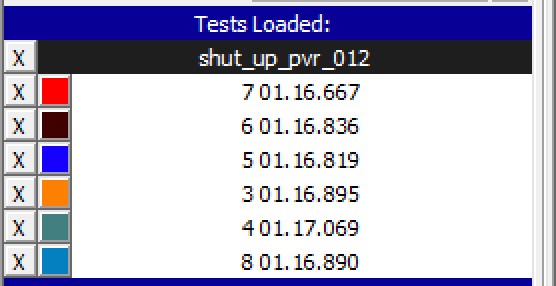
<brag>On a track that I have more laps on, like Pineview Run, I’m a metronome. Here’s six laps in a row with 0.372 seconds between all of them. If you throw out the fastest and slowest, I do four laps separated by 0.076 seconds.</brag>

Consistent laps matter for testing.

I mention this not just so that I can thump my chest, but to throw some validity on track testing aero components. There are a lot of variables that change throughout the day, or even within a single track session. As those tolerances stack up, lap times can vary a lot. However, my driving is probably less of a factor than you might think, and I just want to point that out so I can deflect some of the “you’re driving like shit” comments. (Which are true, but at least I’m consistently driving like shit.)

Future tests

For Watkins Glen to be useful as an aero testing venue, I’ll need to fix my attitude, and turn my frown upside down. I’ve never gotten along well with this track, and I have to get to the point where I enjoy driving here. With some help from Gregg Vandivert (Omega 13 Coaching) and many more visits to the track, perhaps I can flip this script.

[sigh emoji] I hesitate to list the tests I want to do in the future, because the best laid plans of mice and men usually amount to the same dung heap of disappointment. But if things go as planned, I’ll test the following:

  • Driver mod – I’m curious to see how much time I can lose from professional coaching alone. In order to A/B test myself, I’ll need to use the same baseline setup and pray for days with similar weather.
  • Splitter – I didn’t use a splitter in any of these tests because I was matching the same setup I already tested at Pineview and NYST. But now that I’ve done those tests, I can put a splitter back on my car and see how this compares to the wind tunnel, and how getting more front aero load helps the overall balance. Naturally I’ll need to test the splitter at various heights and angles of attack, and so this could be a whole day of testing on its own.
  • Canards – I tested canards in the wind tunnel on two different occasions, and now it’s time to take the best results and see how they do in the real world.
  • OE wing modifications – The 1” wicker worked great on the OE wing, but I’ve only tried the one size. Next I should try 1/2” and 1.5” tall, and see what happens. Also, I believe that getting the OE wing a little higher may increase performance, and with that, I could also add some angle of attack. This should be as simple as installing a few shims beneath the wing.
  • Ducktail spoiler – I tested a DIY spoiler at Pineview and the results were similar to the single wing. But WGI has already proven to be quite different than other tracks, and so I should test this one.
  • Bigger wings – The wind tunnel already showed me how important wing span is, and so a 71.7” wing will be a lot more efficient. I’m building a big wing now, and shall test this for sure.
  • Active aero – I wrote an article on active aero, in which I did racing simulations at Watkins Glen. Now it’s time to put my money where my mouth is and do the same experiments in real life. The easiest active aero to fabricate would be a DRS spoiler, so I may start with that rather than jumping straight to a dual wing.
  • Diffuser – I tested a diffuser in the wind tunnel and it was pretty lousy, losing about as much front downforce as it made in the rear. But the A2 wind tunnel doesn’t have rollers for the wheels and so the effect of the underbody can’t be 100% trusted. So I should probably test the diffuser IRL and shoot myself up with another dose of disappointment.

vMins and driver performance

If you saw my previous post on vMins, you may wonder how well I performed on the vMin table. I put the OE wing on the Street table, and the modified wings on the Track side.

The red circles indicate my vMins with the OE wing, and you can see that I’m OK, but not great. My T7 may be a bit high, or more likely, all of my vMins can come closer to that level. However, when I add rear aero, I park it in the bus stop! I’m probably using the same braking marker, and then just over-slowing the car with the extra downforce and drag. I expected my vMins to be a lot worse than this, so I’m pleasantly surprised that I’m not driving like shit. And at least I know what to work on next time.

Gran Turismo nerds

I prepared for my Watkins Glen weekend by doing some laps in Gran Turismo 7. GT7 doesn’t have a Hyundai Veloster N in the game, so I’ve been using a Scirocco R. Now that I have data to refer to, I can modify the car to be as close as possible to the real world.

In the game I set the car weight to 3000 lbs and the horsepower to 244 (buy the lightweight modifier and add ballast weight and a power restrictor). This approximates the dry weight of my car (I have lighter wheels and the rear seats removed) and what my car puts out on the dyno (my engine is bone stock, not even a cold air intake). More importantly, this also gives me a realistic speed of 132 mph on the back straight. (I’m sure you could use a heavier car with more power, but this is just what I landed on.)

I also fitted the non-adjustable Sport suspension because I have lowering springs, and added the Sport brake pads (which do nothing in the game, but I’m trying to match the car IRL). I added a rear wing so that I can adjust the rear downforce from low (OE N spoiler) to high (single wing). GT7 doesn’t simulate aero accurately anyway, but I added no other downforce because I’m not using any. I use Comfort Soft tires, which puts the corner speeds in the right window for Hankook RS4s with painfully not enough negative camber.

If you have GT7, make a Scirocco R like this and play along. The PP value should be 492 with the wing maxed out. You can drop a comment here or contact me if you want to compare notes.

With the Scirocco R set up like this, I can click off low 2:14 laps regularly, and get the occasional 2:13 at WGI. That’s 3 seconds faster than I’m doing in the real world, which seems about right seeing as I can drive much harder in the game than IRL. As I get better in the real world, I expect the lap times to get closer to GT7. We shall see.

If you made it this far, thanks! If you’d like to support more content like this, hit the Buy Me a Coffee link. If you’d like the Veloster Wind Tunnel Report, it’s just $25 and goes through a ton of stuff you can do to make your car faster.

Veloster N Long-term (Track) Report

I’ve had my Veloster N for a year and a half, and with two track seasons finished, it’s time for a retrospective. I’m not going to get into daily driver details, just going to review the important things; race track things.

Wheels

Most people downsize the OEM wheels from 19” to 18” because aftermarket wheels are much lighter, and 18” tires are usually about 20% cheaper. The big challenge is fitting wider wheels and tires; unless you cut the fenders and install flares, the Veloster N can’t fit wide tires. When you compare the wheel and tire sizes to other cars, the Elantra N can easily fit 245 on 9”‘ wheels, while a Civic Type R can fit a 265 on 10”. It’s just not fair.

Ergo, VN track drivers typically fit a 235 tire on 18×8.5 +45. My buddy Chris was able to fit a 245 RT660 on a 8.5 +50, but he was at stock ride height. I tried the same tire on a 8.5 + 45 with 1” lowering springs, and it rubbed front and back.

On 1” lowering springs, a 245 RT660 on 18×8.5 +45 rubs front and rear. The same tire on 18×8.5 +50 will clear with stock springs.

I have three sets of wheels:

  • OEM 19×8+55 – Theres nothing to like about the stock wheel, it’s narrow and weighs over 29 lbs. When I wore out the OE Pirelli PZ4 tires, I put $65 Linglong Crosswind tires on these wheels, which is better rubber than they deserve.
  • Konig Countergram 18×8.5 +43 – I bought these because I like the black center and polished aluminum lip. They were about $300 at Fitment Industries and weigh 19 lbs. I have only used these for Kumho V730s, and they fit fine.
  • Motegi MR140 18×8.5 +45 – These are a bargain at $173 from Phil’s Tire. The only downside is the mounting holes are super narrow, and even 17mm lug nuts won’t fit, so you need to use spline (tuner) nuts, which I fucking hate. Anyway, the wheels are cheap and at 19.1 lbs, quite light. I used these for the 18” PZ4, Blu Trac Race, Pilot SS, and RT660.

I’ve read somewhere that reducing rotating weight is 3x more important than weight elsewhere on the car. So taking 10 lbs off each wheel is a huge benefit for acceleration and braking. Being unsprung weight, this also helps handling.

Tires

I put camber bolts in my Veloster N, and it maxes out at -1.8 degrees of camber. I understand that the DCTs can get more camber than the 6M versions, but I don’t exactly understand why. In any case, this doesn’t allow my car to get the most out of a proper track tire, and so the difference between an all-season and a super 200 is less what it should be. Or another way of putting that is that my car goes well on shitty tires.

At this point I’ve track tested eight different tires, from cheap all-seasons, to max performance summer tires, a few 200s, and a premium 100 treadwear. All of these were properly abused on the same race track, and I dutifully collected data for comparative analysis.

I’ll list them in the order I drove them (including two tires on a friends Veloster N), and sum it up with a report card.

  • Pirelli PZero PZ4 – I’ve had these in the OE 235/35-19 on 8” wide wheels, and 235/40-18 on 8.5”. I felt they were decent rain tires, but otherwise just average. You need to keep the pressures high to keep them from rolling over, and rotate them frequently, as they deteriorate quickly on a dry track.
  • Falken RT660 – I drove these in a wider 245/40-18 on my buddy Chris’s VN, and came away solidly impressed. On an otherwise stock VN I was only .25 seconds off Pineview’s all-time FWD record. Chris’s car doesn’t have a lot of camber, but he had the tires heat cycled before delivery, and thus experienced none of the center delamination or tread splice issues that others have reported.
  • Maxxis VR1 R2 – The Hankook RS4s used to be my favorite dual duty tire, but it’s not always available, and rarely on sale. Maxxis VR1s are pretty close in performance, and a great second choice. I used this tire on Chris’s VN and went a little slower than I did on the RT660. On the other hand, Chris didn’t like the feel of the Falken’s and went faster on Maxxis. This goes to show you that it’s not always the outright grip that matters, and you might turn a faster lap on a tire with less grip. Feel, feedback, and confidence are important.
  • Linglong Crosswind UHP All Season – I bought these because I needed something (anything) to put on my 19” OE wheels after the PZ4 wore out. At $65 on sale, I didn’t expect much more than round and black, but I took them to the track just the same. The sidewalls were mush and they howled like a chorus of tone-deaf banshees, but the performance wasn’t terrible. Three different drivers flogged them all day long, and the budget 400 TW tires earned some respect.
  • Kumho V730 – This is a good dry track tire, but worthless in the wet. It has a NT01 feel, with great feedback and grip that’s good down to the cords. While searching for more grip, I aired them down too low and corded the outside shoulder with half the tread remaining. I can’t start these at less than 32 cold, which means they’ll come up to 41 psi hot, and so I have to pit once and air them down, which is a PITA. They are cheaper than most 200s, and if the car could get more camber, I’d use nothing else.
  • Armstrong Blu-Trac Race – Armstrong left the e off of Blu and the k of off Trac and the grip off a 200 TW tire. And yet this was the most fun tire I’ve tried so far. They break away very early, but are super easy to control when sliding. You can get them with a money-back guarantee, and they go on sale a few times per year. This tire puts the E in HPDE.
  • Goodyear Eagle Supercar 3R – I admit that I often order food looking at the right side of the menu, and so it’s not surprising that I buy tires by price. But this summer I decided to spoil myself for once and get a premium tire and set some PB laps. The grip of the SC3R was incredible, if inaudible, and the turn-in was so insanely quick, it felt like I was driving a completely different car. All the ingredients were there, but the lap times never materialized. The tires made the car feel like I had all the nannies on, and took the fun out of driving. In the end, I went a second faster on V730 than I did on SC3R. I recently traded them away for a used set of RT660s. I’ve also had the devil of a time getting my rebate, which is part of why I bought them in the first place. I’m done with Goodyear.
  • Michelin Pilot Super Sport – These were the OE tire on the base Veloster N (non-Performance Pack), and came in a smaller 225/40-18 size on that version. I got them for free on Facebook Marketplace with half the tread remaining. They are easy to drive at the limit, but have an unusual sound, more of a protesting whine than a painful howl. The PSS are a generation older than most 300 TW tires, but were within a second of the V730 or SC3R. I corded the outside shoulder, just like every other tire. Man I need coilovers.

The following table is how I’d rank the tires on my Veloster N. I’ll probably get some disagreements here, but I like a playful tire that lets the car dance, and lap times matter don’t as much to me as having fun.

TireGripLongevityPriceFunGrade
SC3RA+DD- ($325)DC-
PZ4CCB ($175)CC+
RT660ACC- ($250)CC+
Crosswind DCA+ ($65)CC+
PSSCBC+ ($175)BB-
VR1BBC ($230)B+B
Blu TracDAB+ ($165)AB
V730ABB- ($200)B-B
Tires by grade.

In the future I have two choices: get coilovers so that I can use better track tires, or switch to endurance tires with a symmetrical tread pattern. RS4s are the easy button, working well with camber challenged cars, and allowing me to flip them once, after I wear the outside shoulders.

The more expensive choice is to buy coilovers, which allow more camber and corner balance the car, and that would reorder my tire list completely. The negative camber would also allow the wheels to tuck under the fenders better. With that I might be able to fit 18×9 +45 wheels and 245 tires.

But… this is still a street car and I’ve ruined other cars in the past making them too track focused. I’ll revisit this conundrum in 2025.

Brakes

Muzafar Umarov manages the N Track and Autocross group on Facebook, and is a knowledgeable source on all things N. From him I learned that the Veloster N brake bias starts at roughly 70% front, but changes dynamically based on slip. Brake bias is controlled electronically for each wheel, and can shift to as much as 93% front if the rear wheels are locking.

This is both good news and bad news. If you’re accustomed to using the rear brakes to rotate the car on corner entry, you’ll be disappointed. The system essentially prevents corner entry oversteer, intentional or not. This infuriated my brother, who swore the traction control was on, even though it was turned off in the custom settings.

This also means that putting higher friction brake pads on the rear is a waste. Just as the dynamic brake bias system won’t help you turn the car on corner entry, it also won’t stop the car any faster. The sticky rear pads will just transfer more bias to the front brakes sooner. As a result, even the very serious folks at GenRacer are still using the OE rear brake pads.

And for that reason I’m also using OE rear pads, and will be for the foreseeable future. They are inexpensive, wear is imperceptible, and there’s no reason to use anything else. Life can be just that simple.

The OE front brake pads are reported to be quite good as well, and can do autocross and light track duty as long as you use the OE tires. But they are a little expensive, and the cheap hack is to use the Elantra N pads, and reuse the Veloster N shims.

But I don’t know about that, since once you upgrade the tires, you’re going to want better than OE pads. Knowing this, I switched the front brake pads to Porterfield R4-E immediately upon delivery.

This is a pad I have racing experience with, and as someone who’s never had antilock brakes on a track car before, I typically prefer pads with a lower friction coefficient. I believe the R4-E (E is for Endurance) come in around .46 mu, which is quite a bit lower than most serious race pads. As a result, they probably require more brake pressure. But I like the way they feel as I release the brake pedal, and that’s more important to me than initial bite or maximum stopping power.

Another reason to use a less aggressive pad is that several Veloster N owners have reported getting ice mode when using higher friction track pads. This can overwhelm the stock calipers and ABS system, and send the car into a panic. And so there are at least a few reasons for me to use the R4-E (the E is also for Economy).

The pads cost $210, which is $100 less than what you’d pay for most hybrid street/track pads, and half the cost of a dedicated track/race pad. I leave the R4-E on for daily driving, and they stop fine when cold and don’t squeal annoyingly like an aggressive track pad. (Although I understand some people like that.)

The way the R4-E work on both street and track remind me of the old Stoptech 301, before they switched manufacturing plants. That was a true dual duty pad, but it lasted about half as long as a R4-E. Still, they were less than half the price, and I used them without complaint for years.

Admittedly, I don’t experiment much with brakes, but Gregg Vandivert has done a ton of brake pad testing on his Elantra N. He had a problem using the Porterfield R4 (not R4-E) compound; the pads cracked and separated from the backing plates. The reason this happens is because Hyundai uses a cheap single piston caliper, and so the backing plate needs to be ultra stiff, or it flexes.

Gregg says Porterfield has two thicknesses of backing plates available, and you can special order pads with the thicker ones. Well, my R4-E pads have not cracked or separated, and so perhaps the E pads come with thicker backing plates to begin with? I will need to ask the folks at Porterfield at some point.

In any case, the brake pads are just fine for street and track driving, and they held up for over a year of both. Eventually the brakes started to fade on track, and I figured it was time to change them out. When I pulled them off I noticed they wore evenly inside and outside, and I had used 99% of the friction material without getting into the backing plates. I got lucky there.

I got everything out of them.

Moving on from pads to rotors, I’m now just onto my second set. The service limit is 28mm and that’s where mine are at the outside edge, but down near the center they are 27.2mm.

It looks like I’ll need to replace rotors every two sets of pads, but if I get pad-curious then I’ll do both at the same time so they bed in properly. I paid $140 at Parts Geek for the front rotors, while my local Hyundai shop wanted $400 for essentially the same thing. Areyoufuckingkiddingme?

Two sets of front pads and one pair of rotors works out to $540, and that covers maybe two years. I don’t know how long the OE rear pads and rotors last, but certainly longer. That’s some serious economy, and it surprises me that Veloster brakes are as cheap as Miata brakes.

Fuel and engine modes

The Veloster manual says to use 91 octane, but I use 93 most of the time, because that’s what’s available. However, many of the pumps here only have non-ethanol 90 for Premium (lots of boats and such in this area). I don’t know what the power difference is between 90 non-ethanol, 91, and 93, but it may get more power out of 93 because of the higher octane. I don’t know if the VN has the “octane learning” feature of the EN, but I’m pretty sure the ECU will pull out timing when it senses lower octane. But then again, ethanol burns at 80k BTUs, while gasoline burns hotter with 118k BTUs, and so maybe I should be running non-ethanol?

I get exactly 7.0 mpg on track at Pineview and NYST. Every time. My friend Chris is only a couple tenths of a second slower than me on Pineview’s short track (45 second lap) and gets 2 mpg more than I do. So it’s interesting to see the diminishing returns on driving the car harder. At Watkins Glen I get a miserable 6.0 mpg. In practical terms, this means emptying a 5-gallon jug every track session.

On the highway I get mostly 32-33 mpg with the N wing, and I lose maybe 1 mpg with the ducktail spoiler. With a wing on the car, it gets just under 30 mpg, which is kind of surprising, because I thought that ducktail would have more drag. I haven’t done an accurate two-way test over a distance though.

The Veloster N has four different pre-set driving modes that change engine response, exhaust note, suspension stiffness, steering quickness, traction control, rev matching, and the electronic limited slip diff. I only use one of the pre-set modes, Normal. Economy mode doesn’t do shit, and the performance modes are a collection of settings I’d never use together.

Thankfully Hyundai made a N Custom mode that allows you to adjust each setting individually and save it as a custom setup. Mine has the suspension set to soft, and a quiet engine note with none of the pop and burble nonsense. I turn all of the nannies off, including rev matching, and max out the eLSD. I haven’t decided which of the three steering modes I like best, but I can change that on the fly using the touchscreen.

I use the Normal driving mode when I’m on the street, or when I am on track and it’s raining a shit storm. Compared to my N Custom mode, Normal is about a second faster in the wet and about 1.5 seconds slower in the dry. So I definitely appreciate having the options.

I dyno tested all the engine modes and they put out the same power. Eco mode is supposed to limit boost pressure, but it doesn’t make a difference on my car. I got 244 hp at the wheels on a Dynojet, and that’s 10 more than I expected.

Someone said the different engine modes don’t change power, they change how the engine responds. But given how the modes are identical on the dyno, I’m skeptical, I’ll A/B test engine response on track and see what the stopwatch says.

Finally, there was a recent software update that changes a bunch of things in the N Custom mode. I like the new layout, and appreciate that Hyundai is still making updates to a car they discontinued. I keep the updated software on a keychain USB drive in case I meet someone with a EN, KN, or VN that hasn’t made the update yet.

Track warranty

Arguably the best reason to buy a Hyundai is for the 10-year powertrain warranty. I bought mine as a Hyundai-certified pre-owned car, and so I’m covered until November 2032. I also upgraded to full bumper to bumper coverage, and so if anything goes wrong with my car in the next eight years, someone else is fixing it. And because this is a N car, the warranty extends to track use.

In fact, I’ve already used the warranty. The engine blew up on track at Waterford; Hyundai picked it up at the track, fixed it, and delivered it to me 500 miles away. They even paid for the rental car to get me home. I suspect in the next 8 years I will be using the warranty again.

Hatchback life

There aren’t a lot of sports cars that have enough room to transport a set of tires inside the car. Of course most 4-door sedans can do this, with two in the boot and two on the rear seats, but how many proper track cars can swallow a set of slicks? The Subaru-Toyota BRZ-86 was apparently designed to carry a set of track tires in the back, and I’ve seen four tires disappear inside a BMW 1-series. So I imagine that most BMW coupes can manage this as well.

Hatchbacks have the advantage here, and when you fold down the rear seats, even a diminutive MINI Cooper can carry four tires inside. But can you name any track car that can transport eight tires inside? With the space-saving Modern Spare in the well and one on the front seat, that’s actually nine!

Shocker! Seven in the back and one in the front.

The first time I went down to the A2 wind tunnel, I transported three splitters, five wings, two spoilers, a diffuser, boxes of tools, spares, and other parts inside the car and drove the 10 hours to Moorseville. Try that in any other car you’d actually take to a wind tunnel.

That’s a lot of junk in that trunk!

And if this wasn’t enough space already, I added a trailer hitch so that I can use a cargo tray or small trailer. The Veloster trailer hitch was designed for the base model Veloster, and required some modifications to fit my car.

Aerodynamics

My Veloster has been to the A2 wind tunnel twice, and now I know more about hatchback aerodynamics than I ever dreamed I would. The OE body has a drag of .416 and makes a tiny bit of downforce, which is pretty surprising, since most cars make lift.

Front downforce was easy to get, and even a flat splitter made 135 lbs of downforce at 100 mph. My curved splitter made 195 lbs, and coupled with upper and lower canards and hood vents, total front downforce was north of 300 lbs. And this is without cutting vents into the fenders or extracting air behind the wheels, which you would do on a proper race car, but I may never get around to on a daily.

At the other end of the car, wings didn’t perform as well as I expected, and even the Kamm-back shape is a compromise over a proper coupe or fastback. As such, most wings up to 55” span had lift-to-drag ratios less than 4:1. A 70” Wing Logic gave the best results at 7:1, which is more a function of the wingspan than the shape of the wing; it’s obviously important to get the ends of the wing into clean air where they can get away from the hatchback roofline.

If wings were disappointing, spoilers were a revelation, as they made both front and rear downforce. (Wings reduce front downforce through leverage; Spoilers aggregate pressure over the l roofline, and some of that is in front of the rear wheels.) Spoilers can’t get as much total downforce as a wing, but they work surprisingly well if you’re not going to add a splitter.

The biggest surprise was that adding a 1” Gurney flap on the OE N spoiler gave a better L/D ratio than all but the largest wing.

1” angle aluminum Gurney flap. In the wind tunnel I used duct tape, here it’s fastened with rivets, and in the future I’ll drill those out and use rivnuts for easy on/off. Notice I also added slightly taller end plates, but I didn’t do that in the wind tunnel.

At 100 mph, the OE wing makes 30.8 lbs of downforce and loses 2.5 hp due to drag. With the wicker-kicker it makes an astonishing 123.6 lbs of downforce and uses 8.3 hp. (These numbers are compared to the base model, which has a roof extension, but no wing).

Rear view of wicker, kicker, Gurney flap. I’ll probably paint it black at some point in the future.

The Gurney flap information isn’t (yet) in my wind tunnel report, but there’s over 50 pages specific to the Veloster N, going nose to tail on aerodynamic parts, simulated lap times, and a lot of discussion.

I also did some practical testing of wings and spoilers at Pineview Run and NYST. The short story is that my Veloster went 2.5 seconds faster with rear downforce alone. Given that, I wouldn’t even bother adding front downforce unless you have a really significant wing to balance it out.

Conclusion

In the past year and a half I’ve done probably 30 track days in my Veloster N; I’m still smiling. It’s got enough cargo capacity for everything I bring to the track, and a comfortable ride that makes long-distance track treks a pleasure. It has adequate power, and handles better than it should. Even on track like Pineview, which has a lot of long corners and uphill switchbacks that punish FWD cars, it’s fast and fun to drive.

As track cars go, it’s economical. It doesn’t need expensive brake pads or ultra grippy tires, and seems to work just as well with mid-performance items. If you want to keep the warranty, you can’t modify engine parts or tuning, which leaves very little to spend money on. Except gas, as it is pretty thirsty.

The funny thing is, I’m actually looking forward to when the car is out of warranty, and I can install a bigger turbo. With a larger turbo, all the bolt ons, and a ECU tune, it might get down to a 10:1 lbs/hp ratio. Then I’ll gut it, cage it, and race whatever dumb series will have me. But I’ve got 8 years of wringing the snot out the stock engine, and I’m not at all disappointed with that.

I daresay I’m forming an emotional attachment to this car! It’s the amalgamation of so many cars I wanted and never bought: It’s the Honda CRX I pined for in college, but modernized and powerful; It’s the later CR-Z with double the power and nearly the economy; It’s the 3-door cousin of a MINI Clubman JCW, but with better aerodynamics; It’s as weird as the M Coupe “clown shoe” I nearly bought, but easier to live with.

And it’s so much fun! I love tossing the car into an early apex, forcing it into a four-wheel drift, and then digging it out with the front wheels. It’s Miata like, in its combination of economy and ability to bruise egos everywhere it goes. If you have a BMW M car, Corvette, or Porsche, you’d better be a decent driver, because the hurt machine is coming though!

This is probably the last car I buy that isn’t an electric self-driving killjoy mistake, and so I’m going to continue to modify it for more fun. I’ve already removed the rear seats and put in a flat cargo floor. Next I’ll install a harness bar and race seat. Sometime this winter I’ll figure out a DRS dual wing, because hitting a button on the straights is a plus one to fun. And maybe I’ll hook that up to an adjustable splitter as well. Let’s see what happens in 2025.

As if the car needed more space.

From Corvette C5 Wind Tunnel Test to GLTC Win

Luke McGrew qualified on pole for the first Grid Life Touring Cup (GLTC) race at COTA this year, and then proceeded to win all the races. This isn’t super surprising, because he’s always a front runner. But Grid Life nerfed the flat-tuned cars even more this year. So how the fuck is Luke doing it in a C5 Corvette?

For starters, he’s a hell of a driver. He’s also really smart about the way he sets up his car. For example, he uses a small spoiler rather than a wing. But wait a goddamn minute, everyone knows wings work better than spoilers, right? Well, it depends on the car, and it depends on the rules.

GLTC is a pounds-per-horsepower series that allows some aero for free (small wings and spoilers, undertrays without splitters, hood and fender vents, etc), but penalizes or bans other aero parts. As such, a careful reading of the rules is important, and optimizing to those rules can confer a small advantage.

Luke knows what he’s doing, and part of that is doing the research. In that, he found an old wind tunnel test on a C5 Corvette. After reading that, he asked me to “check his math” so to speak, by running simulations in OptimumLap. After purchasing the wind tunnel report (to get the cL and cD data), I built several versions of his car, ran simulations, and verified his gut feelings were spot on.

No splitter and a spoiler instead of a wing.

There’s more backstory to this story, so let me elaborate.

The wind tunnel report

Back in 2002 a group of SCCA racers took a C5 Corvette to a wind tunnel and published a report on the results. It’s not a very long report, but the story is compelling, and the data speaks for itself. The report is available here for $37. I’m going to review some of what’s in that report, but without any specifics, because the author said not to reprint any of it without permission, and so I won’t.

The group did 26 runs in 10 hours, which is oddly the same number of runs I did at the A2 wind tunnel. They used a much larger wind tunnel at the Canadian National Research Center, in Ottawa, Canada, whuch measures 9 meters square by 24 meters long. This is quite a bit larger than A2 wind tunnel (which is 14 feet wide and 58 feet long), and so the Canadian results should be more accurate.

But how accurate is a wind tunnel compared to the real world? I don’t know. When I posted my wind tunnel data online, some internet pundit, without a shred of empathy or humility, puffed up said I made a major mistake in my report, because the wind tunnel optimizes to a constant Qrh, not V-100mph, so that my data was useless without the Qrh average for each run. I have no idea what that means, but I don’t see anything like a Qrh average column for this wind tunnel report either. And so I guess all this data from Canada is similarly worthless?

Well, I’m not a professional aerodynamicist, I’m a fuggin hack, but I’d have to think the differences from each test run are still important, even if the actual numbers aren’t 100% accurate. So let’s shove all the caveats and internet buffaloes aside and move ahead with what they tested, and the comparative data.

  • Drag – In the test they tried various things to reduce drag, from taping up the front grill to rounding the B pillar, to putting a hole in the license plate. Some things worked surprisingly well, some had no effect at all.
  • Rear wing vs spoilers – A couple different wings were tested, and since the baseline car used a spoiler, they included the data for that as well. But isolating the spoiler data is rather difficult.
  • Wings, end plates, and Gurney flaps – They tested three different end plates on the standard wing, and their results were somewhat similar to mine, which is that end plates are the least important part of the entire aero package.
  • Splitters – They tested a splitter with a flat undertray and one with diffusers. They call this a Laguna undertray for whatever reason, and I will say the design looks quite good.
  • Yaw – I didn’t test yaw, but they did, using both + and – 3 degrees for most of the runs, but they also tested higher yaw angles initially before settling on just 3 degrees for the rest of the tests.
  • Tire life – While tire life isn’t something you test in a wind tunnel, the report concludes with results from the race season, which showed tire life was considerably longer using downforce. This is something I wrote about before, that downforce increases tire life, and their experience was the same.

OptimumLap simulations

With all of this wind tunnel data in hand, I went into OptimumLap and built Luke’s exact car. I started with the basic specifications for a C5 Corvette, but used a 252 horsepower flat-tuned dyno chart instead. Detuning is what allows a Corvette to compete in GLTC, and a result of that is a very flat torque curve. This is recognized as an advantage, and flat-tuned engines are penalized for that. Cars are also penalized for aero.

To see which aero version was fastest, I created nine versions of his car, each with different aero parts. I used the coefficients of lift and drag from the report, and swapped out every version of splitter, wing, spoiler, etc. This may sound easy, but the the table that shows the coefficients has low resolution, which made isolating the individual aero components a little tricky. Anyway, I persevered and had my nine different cars, giving them different weights to match the rules.

Grid Life Touring Cup is a pounds per horsepower series, and penalizes cars for using aero, by making them heavier or less powerful. For example, if you use a spoiler or wing that’s larger than 250 square inches, there is a penalty depending on how large you go. Likewise, a splitter carries a penalty over an airdam, and there are penalties for various combinations of wings with splitters.

Because it’s easier to adjust a car’s weight than its engine tune, I simply changed the weight of each aero build to match the GLTC rules. Thus, the car would weigh between 3213 lbs (free aero) to 3371 lbs (splitter and big wing). Note that these weights may be off by a season, as GLTC again nerfed the flat tunes. And also, don’t take too much into the lap time itself, OptimumLap can’t really predict lap times without a lot of fudging, so this is just comparative data you’re seeing.

I then ran all nine cars around various the race tracks GLTC goes to, to see which would win. The winner wasn’t the same at every race track, but a few builds bubbled up to the top, and some sank to the bottom. The following image shows a speed trace and lap times of five of those builds at COTA. I’m not going to reveal which one was the fastest (that’s between me and Luke), but I will tell you which one was the slowest.

Speed trace of five C5 aero builds for GLTC.

See that black line that has the highest top speed? That’s the OEM aero version, essential a base trim model (BTM) off the showroom floor. It might have a 5-10 mph advantage on the back straight, but it posted a 154.44 lap time, which was the slowest at COTA, and also the slowest at every other track. In the end, cornering speed matters more than top speed.

To get back to what I was saying earlier, Luke uses a spoiler and not a wing. GLTC allows you to use a small wing (less than 250 square inches) for free, and so wouldn’t this be better? Not always, and it’s actually quite close. I go through this investigation in my own wind tunnel report (a $25 bargain), showing that there are times when the wing is faster, but sometimes the spoiler wins.

Miata Spoilers

If you’re serious about downforce, use a wing; it can generate more downforce, and is more efficient than a spoiler. It begs the question, why would anyone want a spoiler?

  • Spoilers are usually cheaper than wings.
  • Some racing rules don’t allow wings, but allow spoilers.
  • A small spoiler can reduce both drag and lift.
  • Wings are often gaudy on a street car, but spoilers almost always make a car look cool. Not only my opinion, but NASCAR fans as well.

I tested a Blackbird spoiler in the wind tunnel, and it performed much better than I expected, and in some ways, better than a wing. You can read about that in my Miata Wind Tunnel Report. I finally had an opportunity to test my large-chord, small wingspan S1223 wing in a wind tunnel, as both a single wing and as a dual wing. The results were not what I expected. I go over all of the details in my Miata Wind Tunnel Report, which is available for $35.

I didn’t just test spoilers, I also tested several wings, splitter diffusers, spill boards, tire spats, canards, hood and fender vents, NACA ducts, brake ducts, and even a fastback, which has a built-in spoiler. You can read about all that in the report, but let’s get back to the topic on hand, which is Miata spoilers.

How a spoiler works

Cars are basically shaped like airfoils, and as air moves over them, it creates lift. The faster the car goes, the more lift and instability is generated. A spoiler, as the name implies, “spoils” the airflow coming over the top of the car, fooling the air into behaving as if the car has a different profile. This cancels some lift, and often reduces drag as well.

A spoiler also concentrates high pressure air on the rear deck lid. Pressure is akin to weight, and so this adds downforce to the rear of the car.

A spoiler also moves the center of pressure rearwards, and like a streamer on a kite, this promotes stability.

Spoiler height

How high should a spoiler be? Let’s take a look at what the pundits say. In Race Car Aerodynamics, Katz shows two different graphs for spoilers. The first is based on spoiler height alone, at a fixed angle of 20 degrees from vertical, or what I’d call 70 degrees.

I’ve put some pencil marks on the graph and drawn some conclusions.

  • A low spoiler about 1″ tall reduces drag the most. It also adds a bit of downforce. From a drag and downforce perspective, it’s a win-win!
  • A 3″ spoiler doesn’t add drag (compared to no spoiler), but doubles the downforce of the low spoiler. In other words, you get something for nothing!
  • A taller spoiler adds downforce and drag, but downforce increases more rapidly than drag. The gift that keeps on giving!

So no matter what height spoiler you chose, it has a benefit. Based on theory alone, we should all have low spoilers on our street cars, and taller spoilers on our race cars (rules permitting).

Note that the previous image shows a loss of front downforce at all spoiler heights, but in my testing, spoilers have increased front downforce by a very small amount.

Spoiler angle

Katz includes another graph on spoiler angle, this time using a fixed-height spoiler. Confusingly, this time the angle is measured from horizontal, not vertical, and the 70-degree angle from the previous graph isn’t included.

Some observations of this data:

  • Drag increases fairly linearly with angle (meaning height).
  • Lift-drag ratio seems best at a very shallow angle, but this may simply be the low overall height of the spoiler. Also note that L/D ratio is at best 3:1, whereas in my testing I’ve seen 11.5:1 L/D ratio using a 5” spoiler on a Miata.
  • Increasing spoiler angle to 60-degrees or more increases downforce, but at a diminishing return.

Spoiler height and angle combined

Next I’ll look at my other favorite reference, Competition Car Aerodynamics. McBeath cites CFD work done on NASCAR spoilers, in which they changed both the spoiler height and angle. Now we’re getting somewhere.

I’ll use the above results to compare spoilers of different lengths and angles that result in a similar total height above the deck. Which in turn allows me to figure out the most efficient spoiler angle.

  • 160mm spoiler, 20 degree angle, 54.7mm total height
  • 80mm spoiler, 40 degree angle, 51.4mm total height
  • 60mm spoiler, 60 degree angle, 52mm total height

It’s a bit difficult to see in this graph, but a 60mm spoiler set at 60-degrees is slightly better than a 160mm spoiler set at 20 degrees, even though the longer spoiler is a little bit taller. In other words, a higher angle works better. But it’s only by a small amount.

Based on Katz and McBeath, here is my simplified conclusion: The total height of the spoiler is the most important factor, and the more vertical, the better.

NASCAR spoilers

NASCAR used rear wings for a short period of time and then switched back to spoilers. Not because they could get better performance from a spoiler, but because the series is always looking for ways to make racing both closer and safer, and the wing did neither. In addition, the fans didn’t like the look of a wing. To be fair, the CoT wing was hideous, see for yourself.

Yuck.

So we can’t look to NASCAR for the most effective spoiler design, because we know their priorities lie in close racing rather than outright speed. But it’s worth noting a few things about NASCAR spoilers.

  • NASCAR probably knows more about spoiler design than any other race series, and they still don’t settle on one design. In fact, the regulations change almost yearly. Looking only at the height, in 2016 it was 3.5″, in 2017 2.375″, and in 2019 8″.
  • Some years the spoilers were adjustable for angle, some years they were fixed, and there have been different heights, widths, and shapes throughout the years.
  • NASCAR uses the spoiler to balance not only the overall aero package, but as a way to balance the performance between different cars, and at different tracks.
  • When NASCAR reverted from rear wings to spoilers, they set the spoiler angle at 70 degrees. In 2019 the fixed angle remains 70 degrees. Interesting.

Here’s an excellent article on A comparative look at NASCAR’s new spoiler, old spoiler, and wing.

Nscs-newspoiler2010hi_medium
Click image to enlarge.

NASCAR spoiler shapes

The 2019 spoiler is flat across the top, but different shapes have come and gone.

Image result for nascar spoiler shape
Curvy, almost bat-wing style.
Image result for nascar spoiler shape
Convex top edge.

The size and shape of Miata spoilers

So now that we’ve looked at spoiler theories and real-world examples from NASCAR, let’s get down to what matters: Miata spoilers.

  • Miatas have a roofline that is peaked in the middle, and you might imagine that the ideal spoiler shape has a matching convex arc to it. Although like all things aerodynamic, this could be totally false, and maybe the sides should be taller.
  • The rear edge of the trunk is curved and so a curved spoiler would look more natural, and could be an easier DIY project as well. Also, a curved spoiler would be more rigid than flat. However, some race series say that the spoiler must be flat, with no curvature. Booo!
  • There’s no reason to “spoil” the air coming along the sides of the car, and so a spoiler much wider than the rear canopy seems like a waste. Although the exposed spoiler ends are probably adding downforce. Albeit not very efficiently, and at probably a different angle than is ideal for spoiling the roofline shape.

Miata products

This IKON spoiler is an attractive design, with a convex top edge and curved profile. It would be neat to see something like this with a flat extension that’s adjustable for height.

The Rocket Bunny spoiler is flatter across the top, taller, and with a steeper angle. I’d guess it’s slightly more effective than the Icon, but it has a tacked-on look that doesn’t really appeal to me.

And then there’s this JSP spoiler that looks like a wing, but isn’t (air isn’t going to flow under it, hence not a wing). The shape follows the curvature of the sides and roof, and this may be an efficient design. But meh to the looks.

Of course all of these spoilers have a fixed height and angle, so there’s no way to adjust the aerodynamic balance. On the other hand, the Blackbird Fabworx spoiler is large and adjustable for angle. I’m also not a huge fan of the way this one looks, but the beauty lies in the function.

Spoiler done right.

DIY spoiler, testing height

I made my own spoiler, it’s about 3.5″ tall and has some curvature to it that follows the trunk shape. It’s made of plywood and fiberglass, and there are 6mm T-nuts so I can add an extension.

With the low spoiler (without any extension), I ran very consistent 1:22s at Pineview Run. And by consistent, I mean 1:22.03, 1:22.05, 1:22.07, and in my second run, 1:21.99, 1:21.99 and 1:21.93. This was a hot day, and if I compare the times to previous ones, the track was definitely slower than normal.

With a 3.5″ extension (total 7″ height), my lap times were less consistent, most of them around 1:21.5, but my fast lap was a 1:21.03, almost a full second faster. But that one was an outlier, and if I average the five fastest laps, the taller spoiler was about .55 seconds faster than the lower spoiler.

The following table is an average of four back-t0-back runs, two with the spoiler extension, and two without. I’ve averaged the top six fastest laps.

ConfigurationAvg LapSimulatedHPLbsCgCdCl
Low Spoiler1:22.01:21.1111224001.00g.44-0.25
Tall Spoiler1:21.451:20.6311224001.00g.45+0.20

I added .01 to the Cd as a guess, but drag isn’t that consequential anyway. I came about the Cl figure by changing that value in OptimumLap until I got the .55 delta in lap time. It seems absurd to think a spoiler can make a .45 swing in Cl, but that’s what the simulation says. Interestingly, this is also the value cited for a 8″ tall spoiler in MacBeath’s Competition Car Downforce.

In Race Car Aerodynamics, Katz cites several examples of spoilers, but none that go as high as 7″. In his examples, the relationship between height and coefficient of lift is nearly linear, and from 0″ to 4″ there’s a change of about .4 in Cl. So if I extrapolate those values from a 3.5″ spoiler to 7″, I’d only expect to see a change of .4 Cl, which is again pretty close to the test result.

Whatever the case, a 7″ tall spoiler works on a Miata. Now I have to make a taller one and test that.