
In a previous article I examined Veloster N Cooling and Hood Vents. I bought a fiberglass hood with an extractor vent, modified the vent to be larger, and then tested that on track and in a wind tunnel. The results were great, with up to a 10-degree drop in water and oil temperature, reduced aero drag, and increased downforce.
That car was totaled, and now my new car needs hood vents. But this time I decided to install Race Louvers in the original hood, rather than use a fiberglass hood. The reasons for that are two-fold: I always felt like the black hood was a bit too boy-racer (boi ricer?) for me; Race Louvers makes the best performing hood vents in the industry.
I know that because Race Louvers publishes their test data publicly, and they’ve tried just about everything. I’ve also tested my own vents and others in the same wind tunnel, and Race Louvers make more downforce every time.
So I contacted Al Watson from Race Louvers and begged him for a deal. “I’ll put stickers on my car,” I whined. “I’ll write an article on my site,” I pleaded. His reply was something to the effect of, “Enh, don’t worry about it, I saw that your car got wrecked, I’ll send you whatever you want.”
No fucking way. Thanks Al.
We discussed which Veloster louvers on his site would work best on my car, and I confess I didn’t realize there was more to it than I thought. We decided on a center vent alone, because using the center and sides, or the new fancy CF Extreme louvers might actually be too much area. Two days later I had the louvers in hands.
Installing Race Louvers
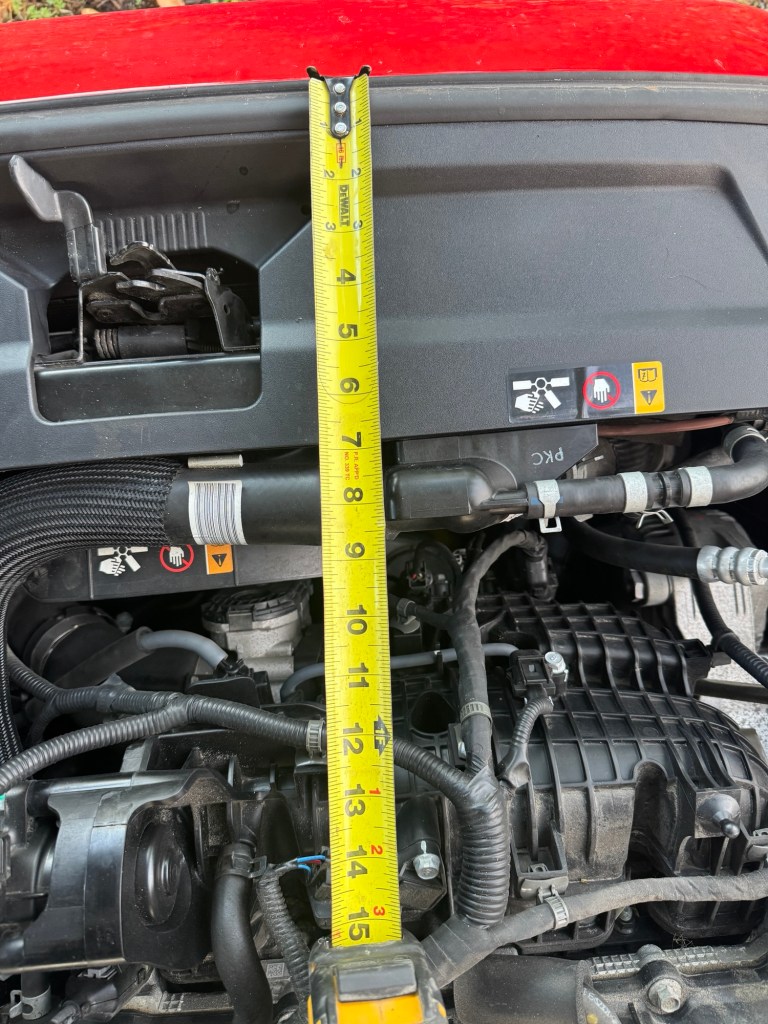
The first thing you need to do is measure the distance from the front of the hood to the louvre opening. This should be directly behind the radiator. In the case of the Veloster, this is just about 10” to the back of the fan shroud.
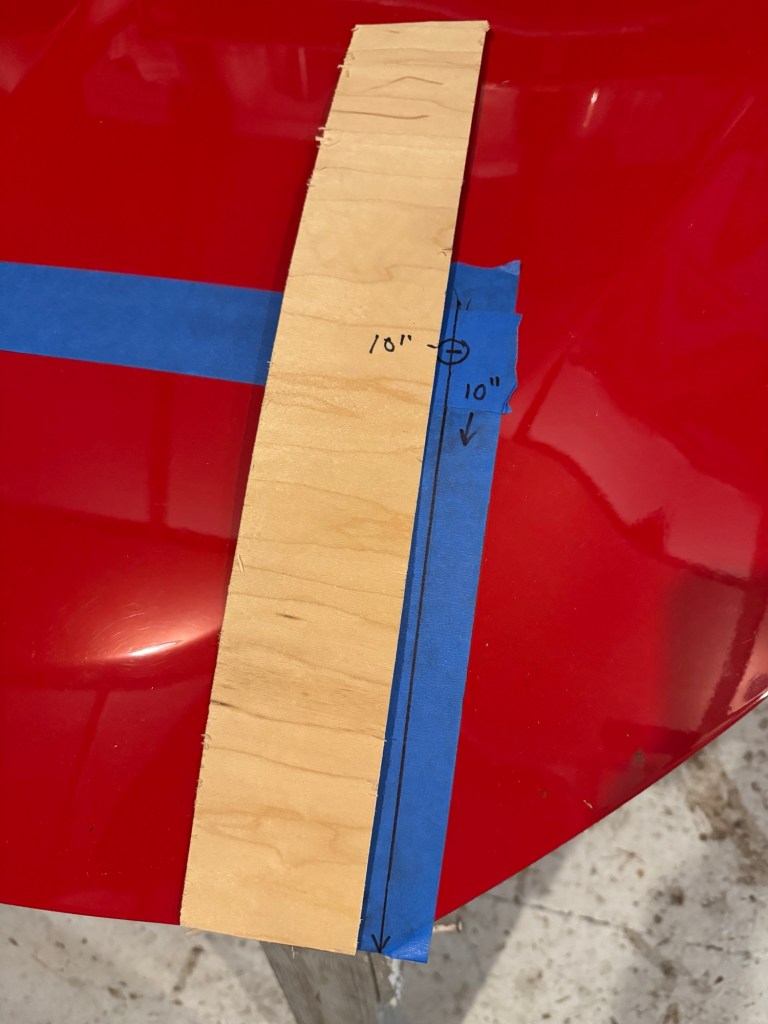
Next I used blue painters tape and a sharpie to draw two lines 10” back from each side. Because the hood is contoured, I used a thin piece of wood as a straight edge.
Next I connected the two sides and drew a line between them. This would be the front of the vent.

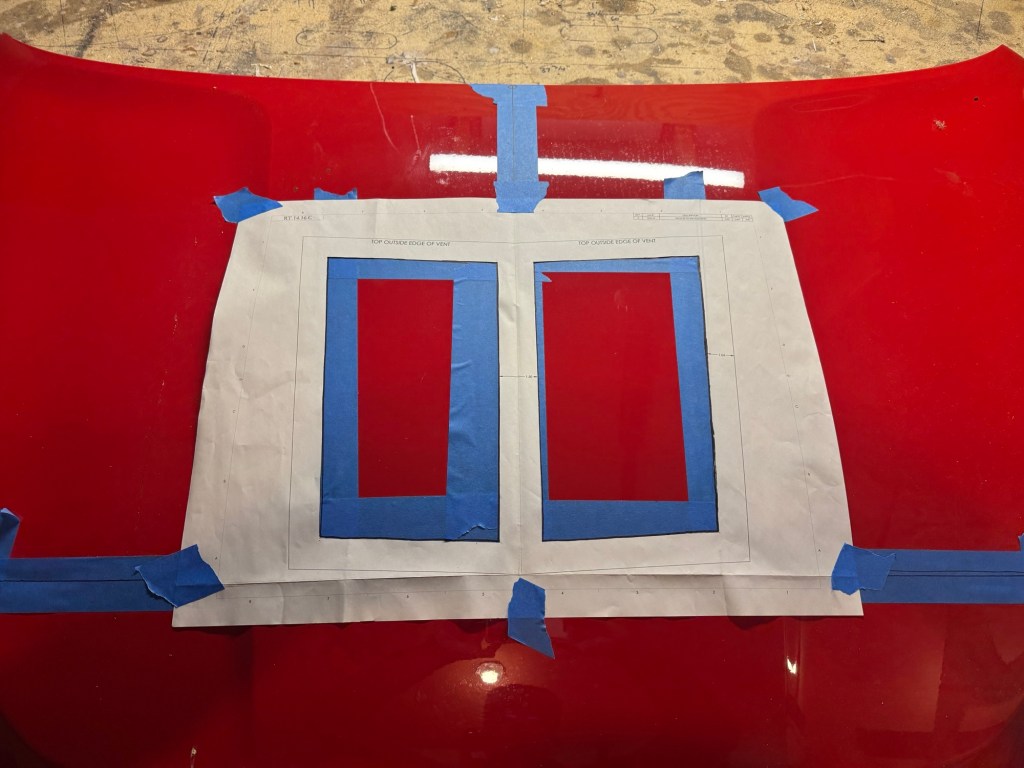
Next I used the full-sized template to draw cut lines on the hood.
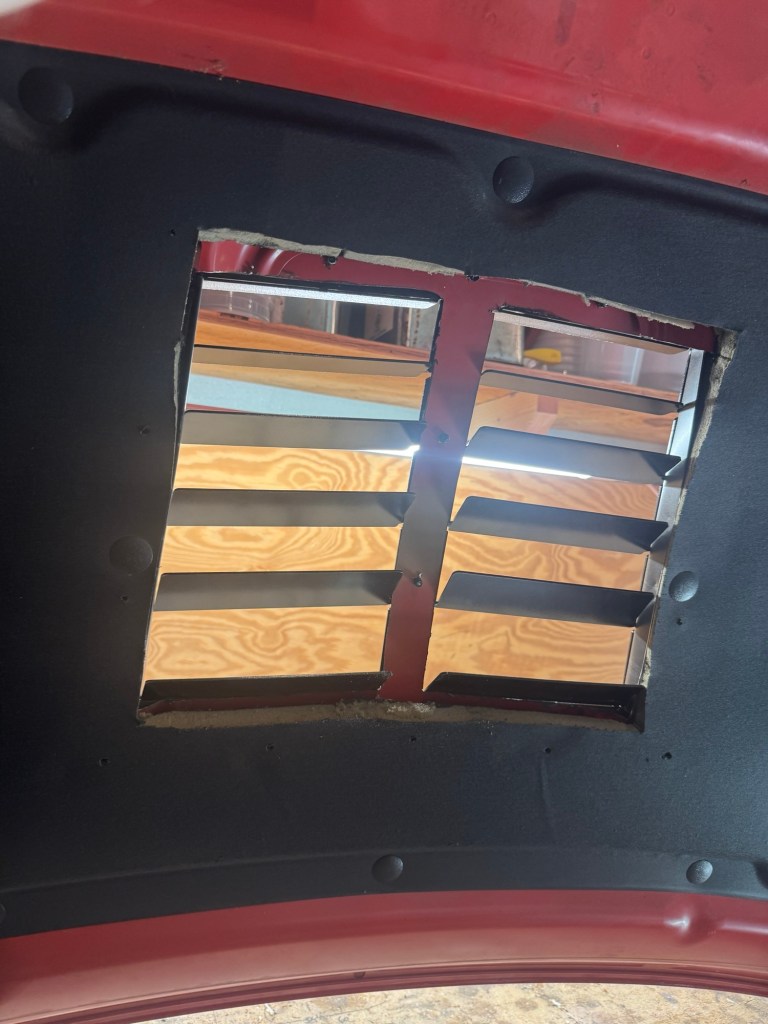
I then masked off the area some more to protect the hood when I cut it. Now I was ready to make the first cut. I used a grinder with a cutoff wheel to make the initial rectangle, but a jig saw was necessary to make the final cuts in the outside corners.

Next I test-fitted the louvers and found some unsightly gaps in the hood. If you look from the side, you can see the support webbing layers. On a race car I wouldn’t care, but on a dual duty track car, I felt this looked sloppy.

I figured if I put some aluminum flashing here, with a 90-degree bend on it, this would cover the side gaps. I don’t think there’s any performance gained here, this was just an aesthetic thing.

I made four pieces.

With that done, I could finally rivet the louvers into place.
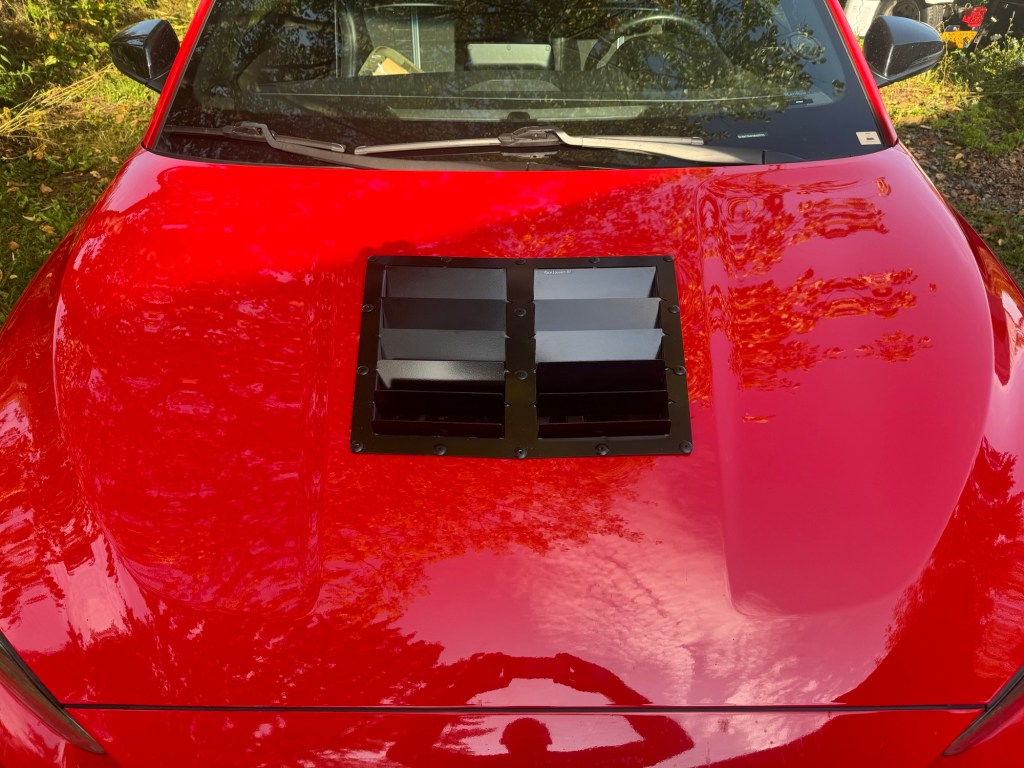
From the side, you can see the aluminum flashing covers up those side gaps nicely.

I did the whole operation without removing the insulation under the hood.
I haven’t tested the louvers yet, but I’m betting they work slightly better than my FRP vent did. The total area on the Race Louvers is 158 square inches, which is 17% larger than what I tested in the wind tunnel. In addition, the louvers should add some differential pressure that should aid in both front downforce and heat extraction.
From start to finish this is about a 2-hour job, and was a fine way to spend a Saturday morning. Next I’ll make a custom cover for it, to keep leaves and water out of the engine bay. But autumn is a month away yet, and there’s a Hayabusa swap calling my name.
