When I built my DIY S1223 wing, I chose a wing span of 53.15” and a chord of 11”. The chord was chosen just so I could say “this one goes to eleven,” but the reason I chose such a short wingspan was so that I could later make it into a dual-element wing. You see, you can buy a 135cm (53.15”) wing on Amazon or eBay for $60 or less, and I had that in mind from the beginning.
The other advantage of a short wing is not bumping into it. I have a decent sized “race barn”, but the garage door isn’t very wide and you’d be surprised how often a wing is just a pain in the ass. Or head.
The short wingspan and large chord combine for a low aspect ratio, and that’s not a recipe for performance. High aspect ratio wings are generally better because they suffer less from the detrimental effects of wing-tip vortices. Just the same, I had good reasons to build it this size, and so let’s get onto the dual wing aspect.
Dual wing end plates
To mount the upper wing I made new larger end plates and suspended the upper wing between them. In the past I always made end plates out of street signs, because I can get them for $1 per pound at my metal recycler. But for this project I decided to use marine plywood, which is considerably stronger at the same weight, and the additional thickness should allow me to reduce drag. Say what?
You might think a thicker end plate is more drag, but because I’ve shaped them as an airfoil, it should be less. That is, the leading edge is rounded and the trailing edge tapered to a sharp edge.
Rounding the leading edge it’s important, because it keeps air attached. For example, when the car is sliding through a turn, the car is in yaw, and airflow hits the end plate an angle. On an aluminum end plate, you might get flow separation on that sharp edge. However on a thicker end plate with a rounded nose, airflow should stay attached for longer.
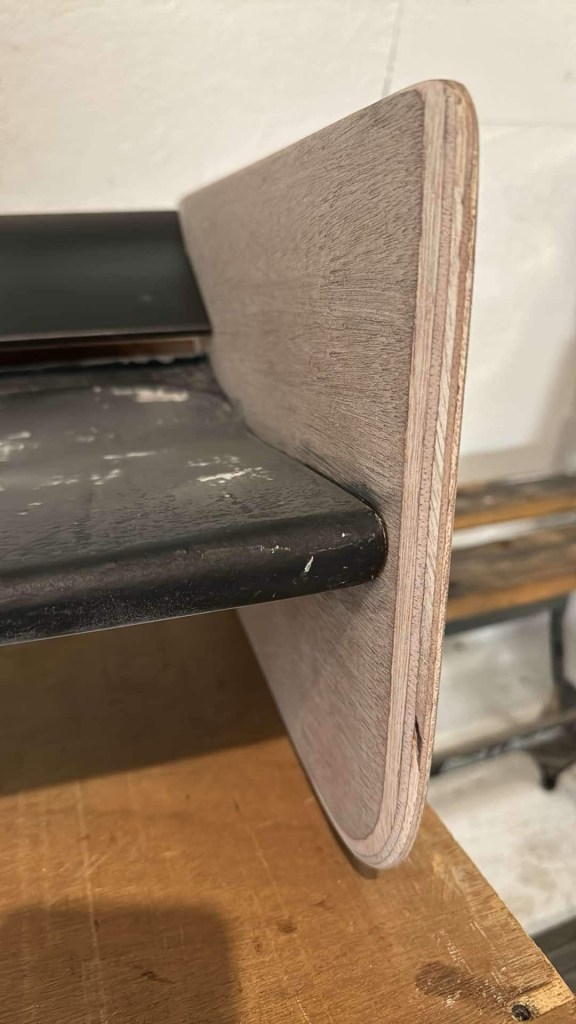
I also tapered the trailing edge of the end plate on the inside. This, combined with the rounded leading edge, forms a curve like an airfoil. This should accelerate air under the wing, which drops the pressure further and creates more suction.

For initial testing, I set the upper wing at a fixed 30 degrees. I honestly didn’t know if this was going to work or not; I suspected that the extra downforce could make things worse, and I was sure there’d be more drag. So I wasn’t going to put effort into making the upper wing adjustable for gap, overlap, and angle, until I’d tested it.
Now if you’ve been reading my other articles, you know that it’s important to set the gap and overlap correctly, especially since the bottom wing has a Gurney flap on it. Putting a wicker on the bottom wing can increase downforce and L/D ratio, but the gap can be finicky. To avoid that I eyeballed a large gap and set a conservative angle of attack.
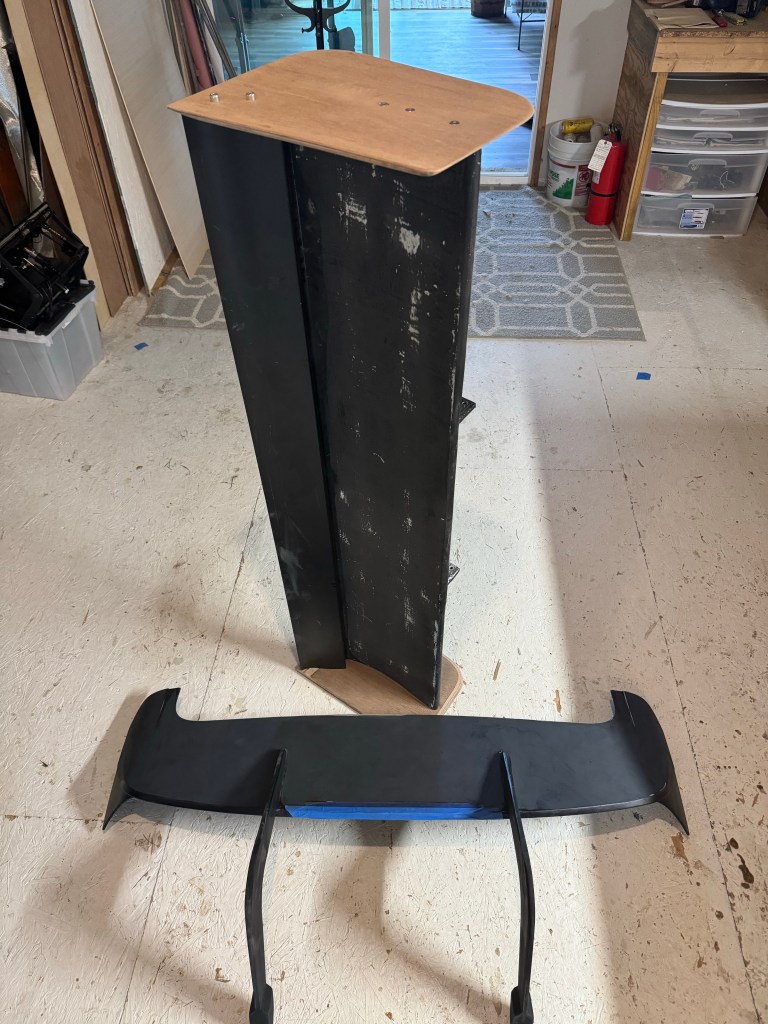
When all of the parts were completed, I weighed the lot: The main wing weighs 6.6 lbs including the bottom mounts, end plates, and Gurney flap; The upper aluminum wing is 4.6 lbs; The roof extension with wing mounts weighs 7.2 lbs. When I put it all together, that’s 18.4 lbs. Total cost was maybe $150.
For comparison, a 55” 9 Lives Racing wing with The Deuce kit, plus universal hatchback wing mounts would cost $1800 and weigh north of 30 lbs. And so I’ve saved a lot of money and weight. But I also did a shit ton of labor, and I can tell you right away it’s cheaper to buy one than to make one.
Note that the OEM spoiler/wing on the Veloster N weighs a bit over 11 lbs. When you consider my double wing is only 7 lbs more than that, it’s pretty damn light.
Testing
I tested the dual wing at Pineview Run, with the long track extension. This isn’t a fast track, and there are really only a couple turns where aero could potentially help out, and one straight where drag could come into play. I also tested other rear aero options, including the OEM wing, a single wing, and a ducktail spoiler.
You can read the results of that test if you have the password to the locked articles. If you don’t, you can get the password to it and all the other articles by buying me a coffee. Sorry about that, but this wing took a lot of effort to build, plus I had to get back to back data, analyze it, etc. All of it is a lot of time and expense, and I’m not going to give that away for free.
Version 2
After initial testing I decided to improve the wing further so that the upper wing can adjust for angle and gap height. Similarly to how I did it on the Wing Logic dual element, I made inner end plates that allow the upper wing to adjust X-Y-Z coordinates for gap height, overlap, and angle of attack.
I also decided to glue the wing directly to the end plates. I did this for two reasons: 1) To take any bit of flex out of the system. Since the upper wing is supported only at the bookends, I wanted those to be ultra strong. 2) To avoid intersection drag from where the end plate boundary layer interacts with the wing’s boundary layer. This can cause flow detachment on the inside corner, and so I rounded and then fiberglassed this joint.
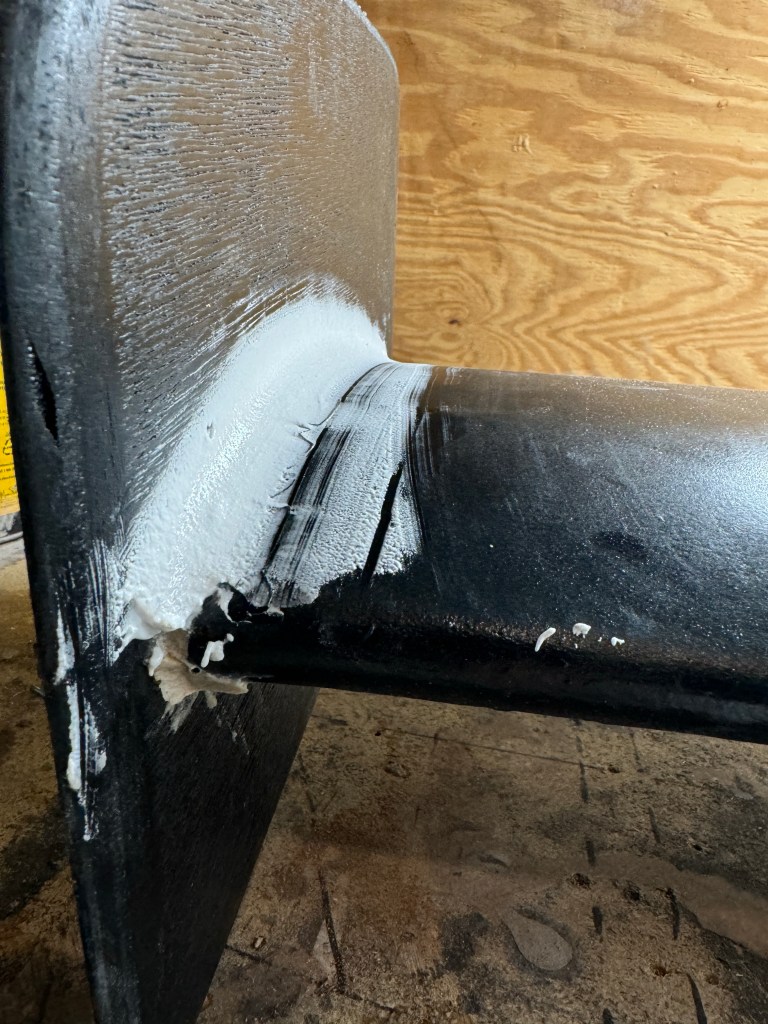
As a result of the inner end plates and glassing, the wingspan got a little wider, and so now it’s 54” even. This is still a rather short wing, and I’m certain longer would be better.
So I’m already thinking about version 3, which will be a longer dual wing with manually activated DRS system. I’ll use a different upper element as well, probably with a 5.6” chord. But that’s a winter project, and I have a few more track events to close out this season and get some final testing data (gap, overlap, angle) for this dual wing. With any luck, you’ll read about that in a couple weeks. Onward!
