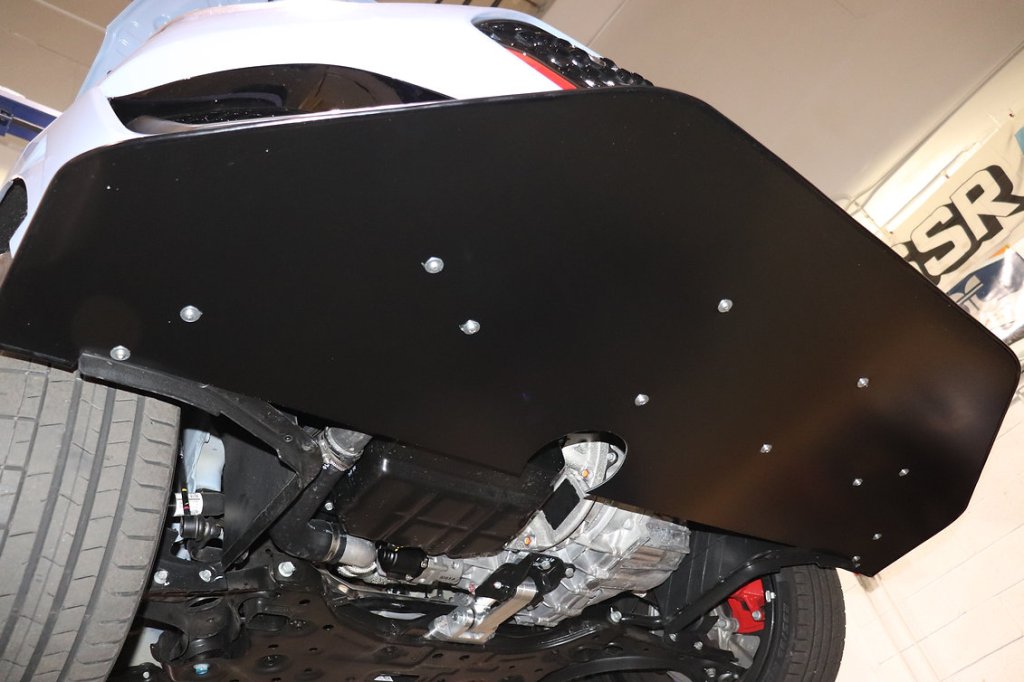
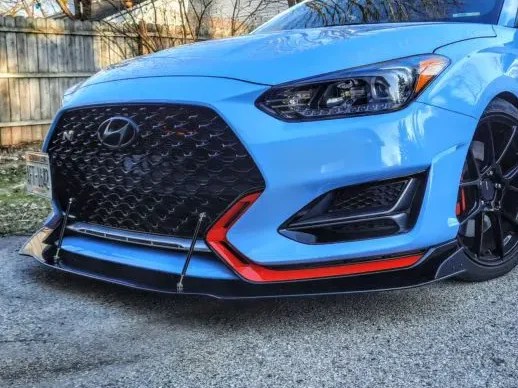
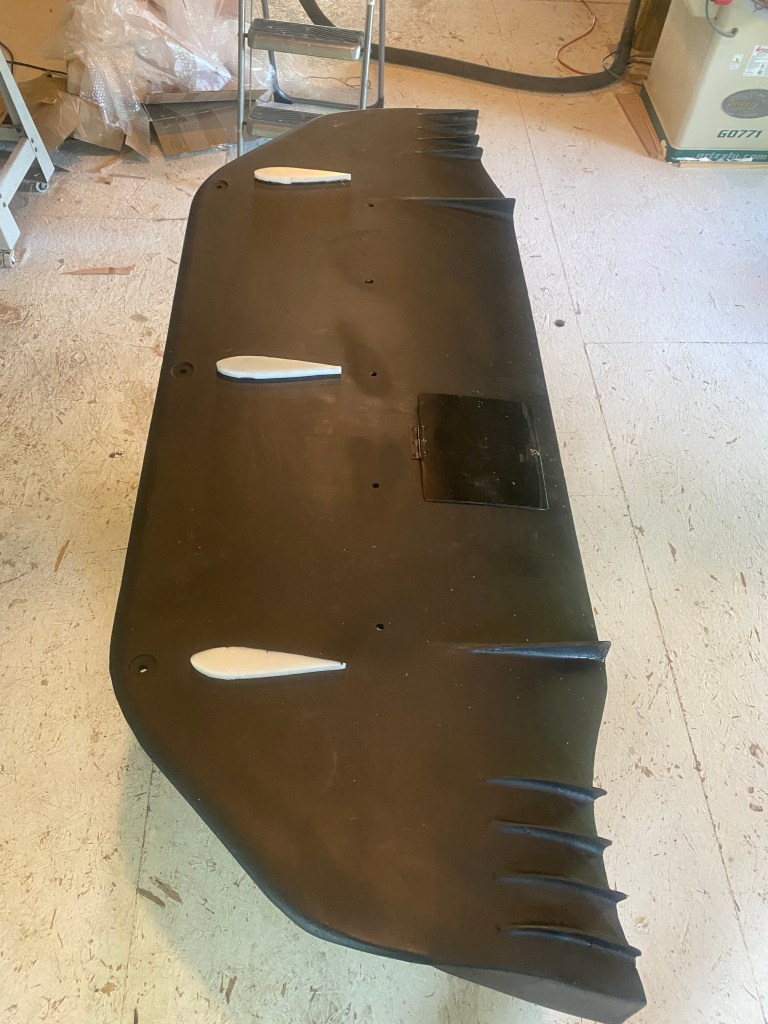
The Veloseter N undertray does a good job of covering the mechanical bits that cause drag under the car. It doesn’t have diffusers in the wheel wells (like a Porsche or Tesla), but there’s a small dam in front of each tire to reduce drag. There are holes for cooling and access, and the general design is one of convenience rather than performance.
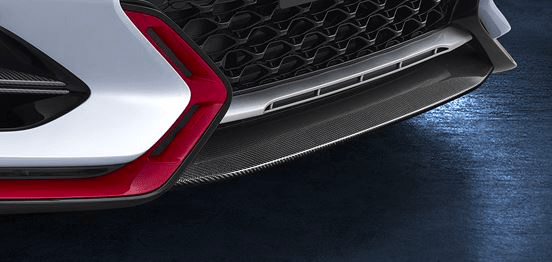
The top-side is more fashion than function. The OEM front fascia has lots of vents, both real and fake, and some of the bodywork is angled to hold a small amount of downforce. As factory aero goes, it’s pretty decent, but there’s also a lot of room for improvement.
I’m going to make my own splitter, but before I do that, I’ll take a look at what’s available for purchase.
Aftermarket front lips
Front lips that are lower and/or longer than the OEM lip are a popular modification. They can reduce drag by reducing the amount of air going under the car, and hold a small amount of pressure on top, making some front downforce.
But if the front lip isn’t integrated into the undertray, it might increase drag due to flow separation between the lip and undertray. In general, I don’t think front lips add much performance and are largely poseur junk.
Aftermarket splitters
Functional front aero starts with a splitter. Splitters reduce drag by keeping some air from going under the car, but the real function of a splitter is to make downforce. I wrote about common splitter mistakes in Your Splitter Sucks!, and if you haven’t read that, it’s required reading.
With that in mind, I’ll review some of the splitters I’ve seen online, bash them mercilessly, and then show you something a fuckload better.
Aero Blitz splitter
The Aero Blitz splitter is half way between a front lip and a splitter. You can see it’s pretty small. There’s some surface area to hold pressure on top of the blade, but it’s not going to be a very useful amount. Anything that fastens with double-sided tape and self-tapping screws isn’t meant to make downforce.
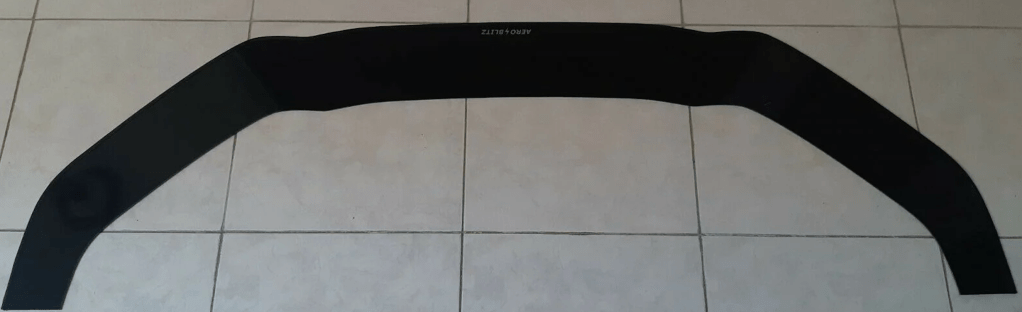
The shape of the Blitz splitter follows the shape of the front fascia and gives it a “Batarang” shape. Most of the aftermarket splitters do the same, and I don’t like it. Functionally, it just doesn’t make sense. But then again, anyone buying this cares that it looks like a splitter, not that it functions as one.
Aerotekk splitter
Aerotekk has done a decent job making a product that looks great and is functional, at a reasonable price. This is a good solution for someone looking for a little bit of front downforce.

The mounting points look OEM, but if you read the description, it says that it doesn’t come with any brackets, and that mounting the splitter is up to you (or as they say, a professional). So is this just a flat an alumalite blade mounted flat against the undertray?
I don’t see any height adjustment, but a clever person could find a way to do that when they figure out the mounting brackets. With height adjustment you’d also need an air dam to fill the front gap.
You might also install splitter diffusers, but this would take away from the rigidity (alumalite isn’t that strong). I don’t see splitter support rods, nor what they attach to. Anyway, an OK starting point for DIY modifications.
APR splitter
The APR carbon fiber splitter is about twice the price of Aerotekk’s, has the same cutouts for the wheel deflectors, but looks to have a different mounting solution. It’s also dead flat, so it’s not doing much to create suction.
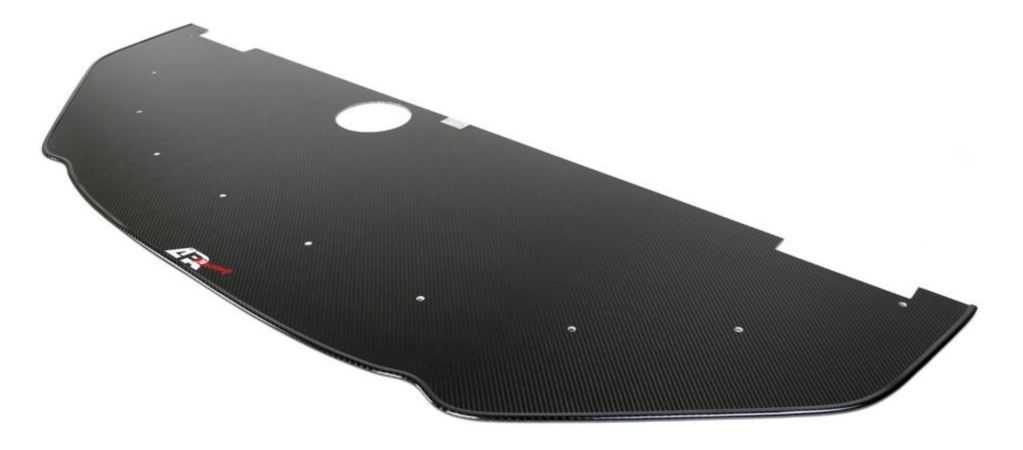
The splitter has some thickening and rounding of the front edge, but could be larger. The shape of the front lip has the bat-wing shape that follows the contour of the bodywork. Whatever.
It looks like there might be some height adjustment via the splitter rods, but the mounting of said rods is sus. Do they adjust for height and if so, how much? Are they really just fastened to the plastic radiator grille? How much weight can they hold? All said, I’m skeptical this does anything more than look like a splitter.
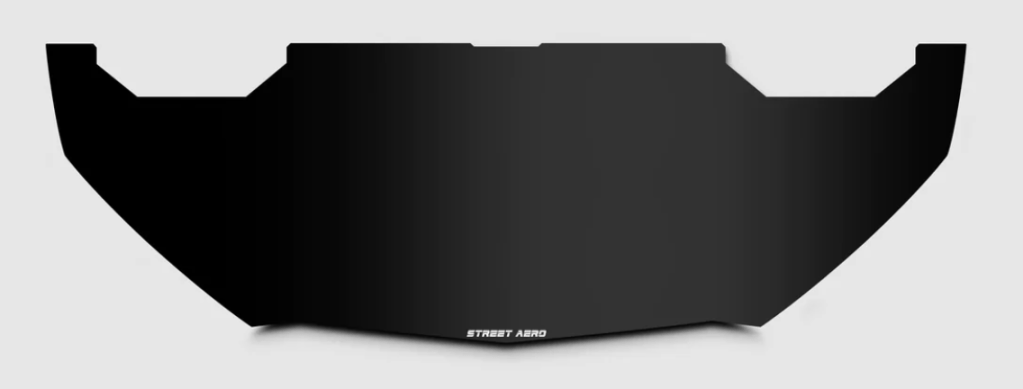
Street Aero splitter
The Street Aero front splitter is made from 6mm alumalite, and a consequence of the material is that it has a sharp leading edge, which results in flow separation. The splitter doesn’t seem to have any height adjustment, and appears to have negative rake (pointed upwards)!
The shape is the bat wing I’ve come to expect out of any of these appearance-first designs, but this one has larger tire cutouts for no good reason, and there’s no oil filter access, so I guess you have to remove the splitter every time you change the oil?
Ventus splitter
Ventus Autoworks appears to have the same, flat, flimsy, do-nothing splitter as everyone else. I’m not sure of the construction, but it claims to have an outer layer of carbon. (Actual carbon or vinyl, it’s hard to tell.) The splitter attaches via splitter rods that are equally suspect as the APR ones.
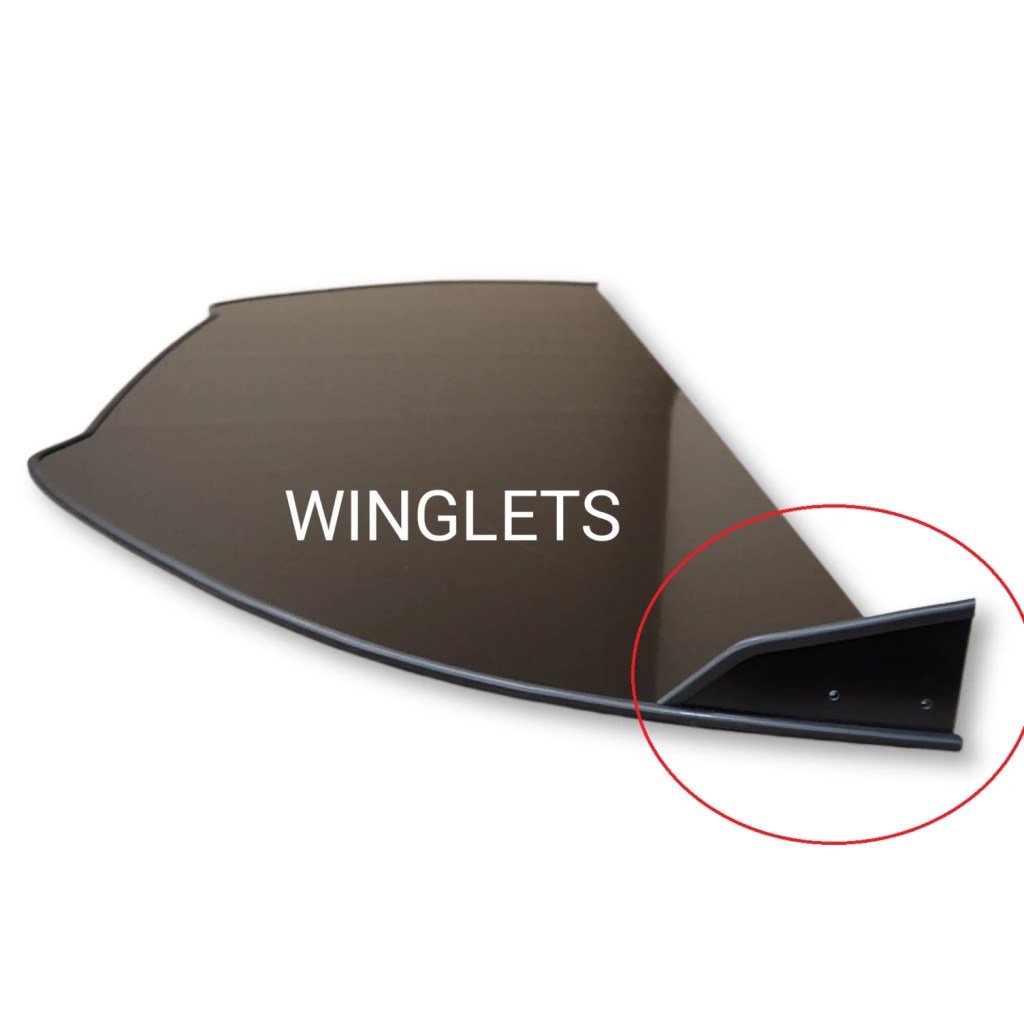
You can get the APR splitter with little vertical winglets on the end, which probably act as an air fence. The Veloster N already has air fences in the fascia, but maybe more is better.
I will say it looks good, and blends in with the style of the car. Even the winglets are pretty tasteful when you see the whole package. But does the splitter do anything for performance? Since it’s not much lower and there’s nothing happening underneath, it can’t be doing much.
DIY splitter
None of the aftermarket splitters do what I want, so I’ll make my own. What I’m looking for is this:
- Height adjustment – Splitters make downforce via suction, which is highly dependent on height. For street driving, I want more ground clearance, but for track driving, I want it lower. I also want to be able to tune the amount of front downforce by raising and lowering the splitter. It’s just like having a wing that’s adjustable for angle.
- Attached flow – Air separates on sharp edges, so the leading edge needs to be as large and rounded as possible. Trailing edges need to break cleanly.
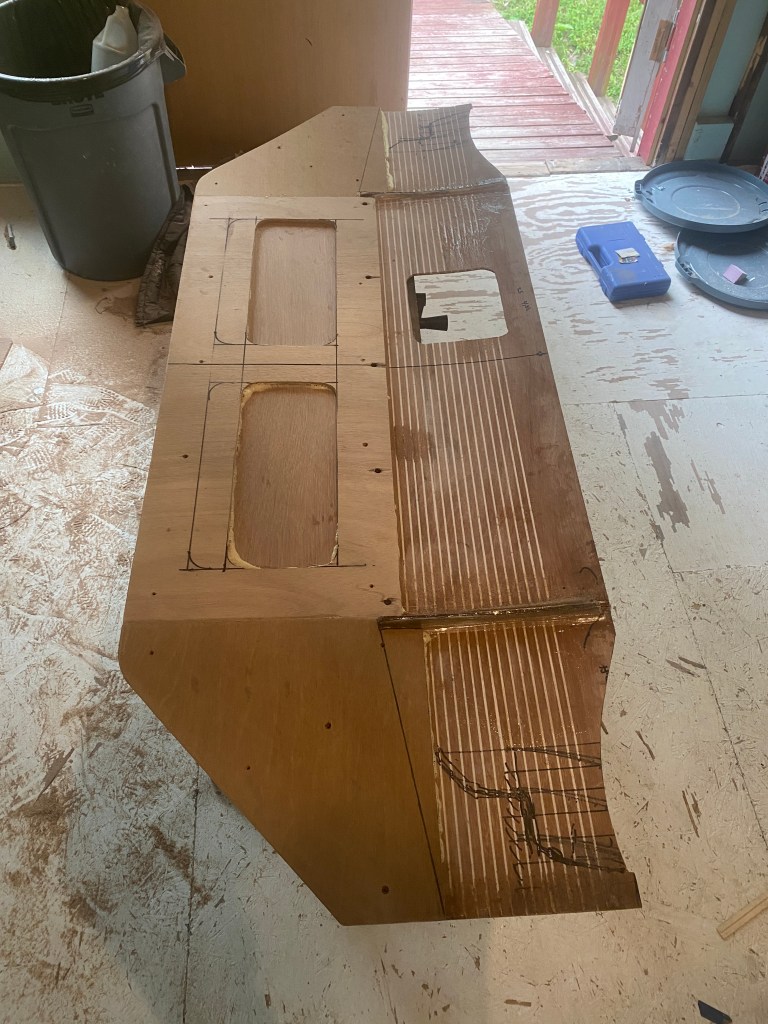
- Suction – A flat splitter doesn’t create a lot of suction. I want to accelerate the air under the splitter by expanding air behind it. This can be accomplished using splitter diffusers, but because the Veloster is so high off the ground, I’ll curve the entire undertray upwards.
Splitters gain downforce linearly as they get closer to the ground, and at around 3” the suction goes up exponentially. At about 1.5” from the ground, downforce decreases sharply. So ideally you want your splitter in that 1.5” to 3” window. But this is a street car on stock (soft) suspension, and so I can’t go that low.
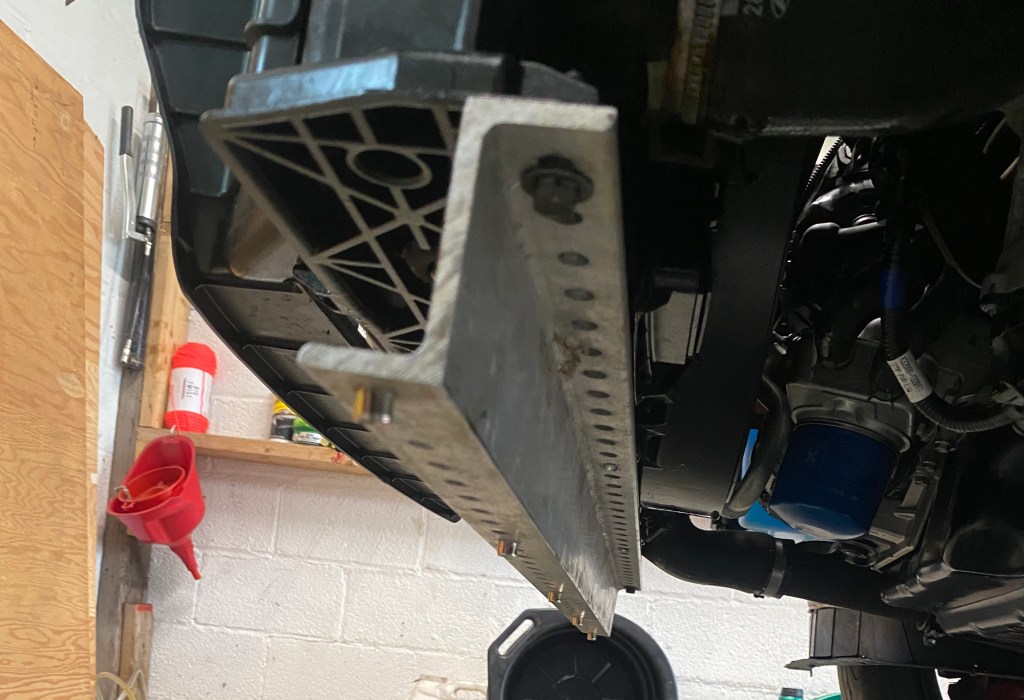
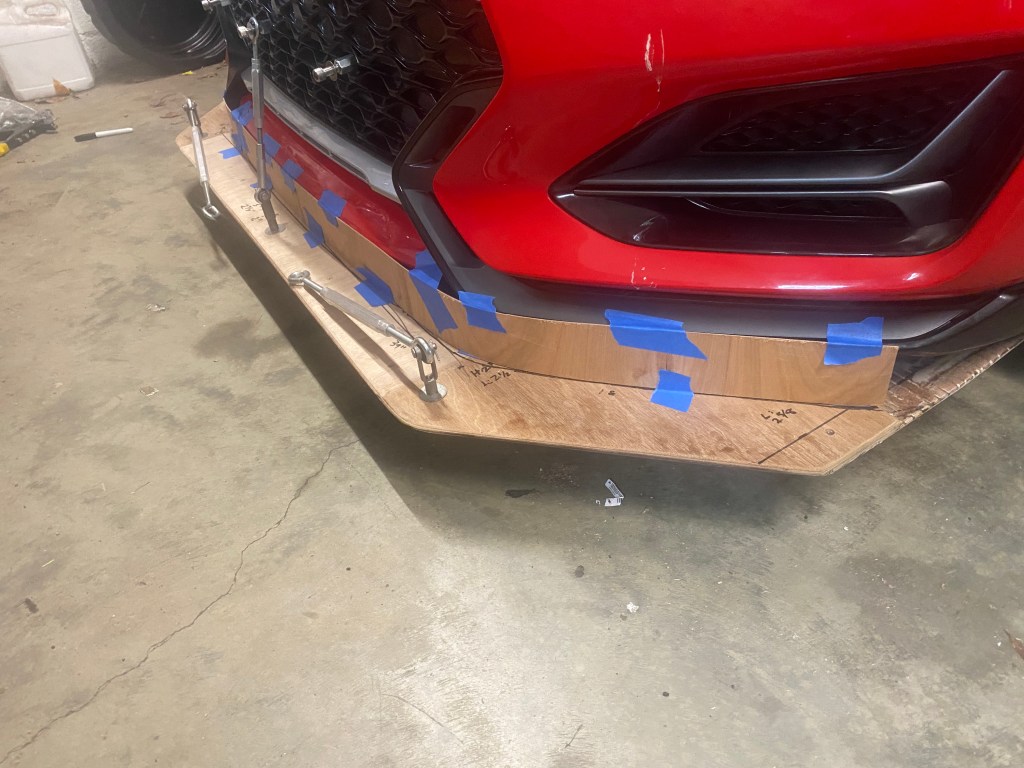
Ground clearance on the VN is about 6” on the front fascia, and I can reduce that by a couple inches, but any more than that will give me problems when street driving. I used an aluminum z-plate to attach the middle of the splitter and lower it slightly.
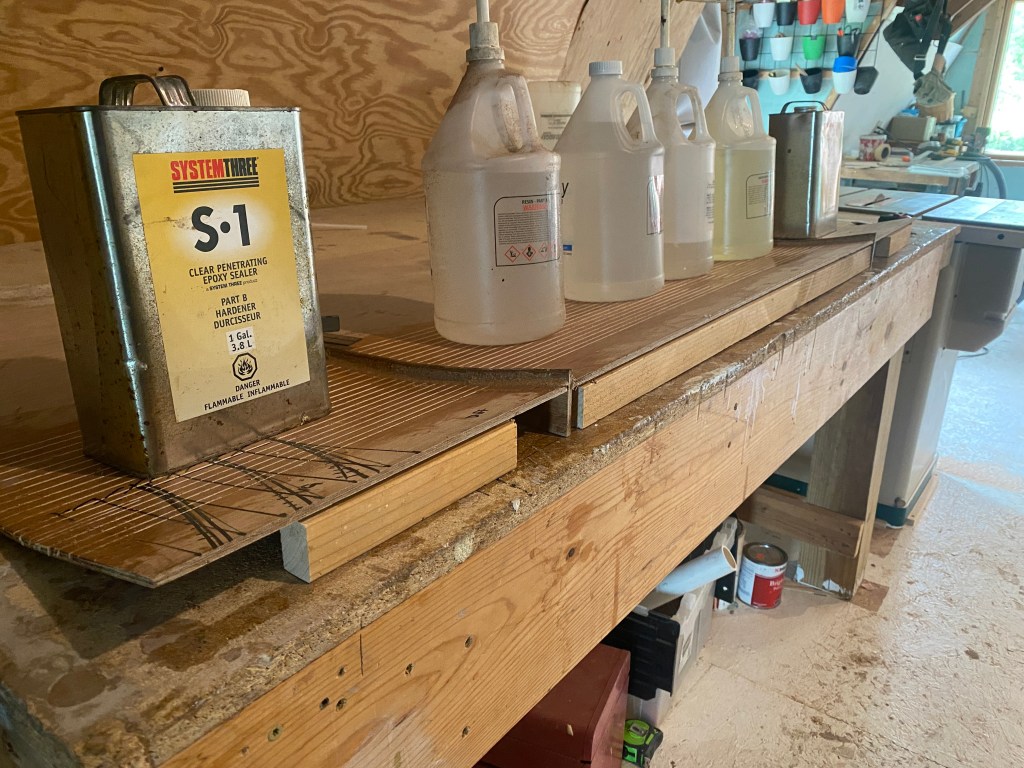
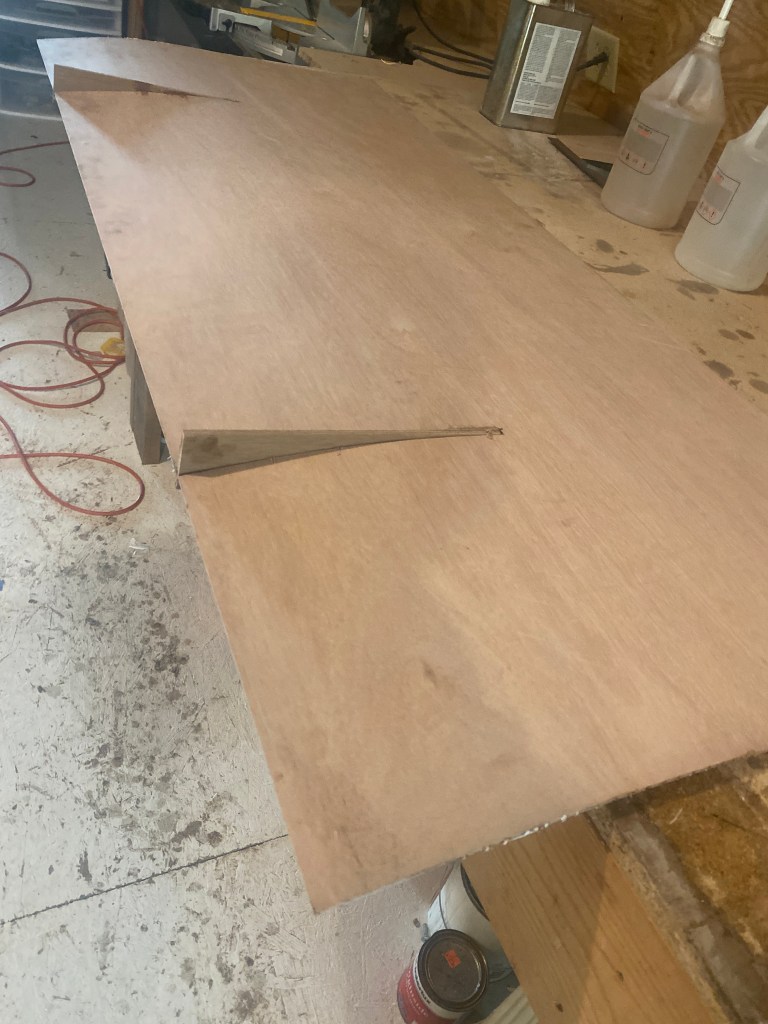
A splitter needs to be stiff enough not to deflect at speed. You don’t need to be able to stand on the lip like I see people doing, because most of the downforce is made behind the lip. I used 6mm (1/4″) Meranti plywood for most of the undertray, I added a layer of 9mm on the front. A much easier solution is to simply laminate two pieces of 1/4” together as a continuous curve.
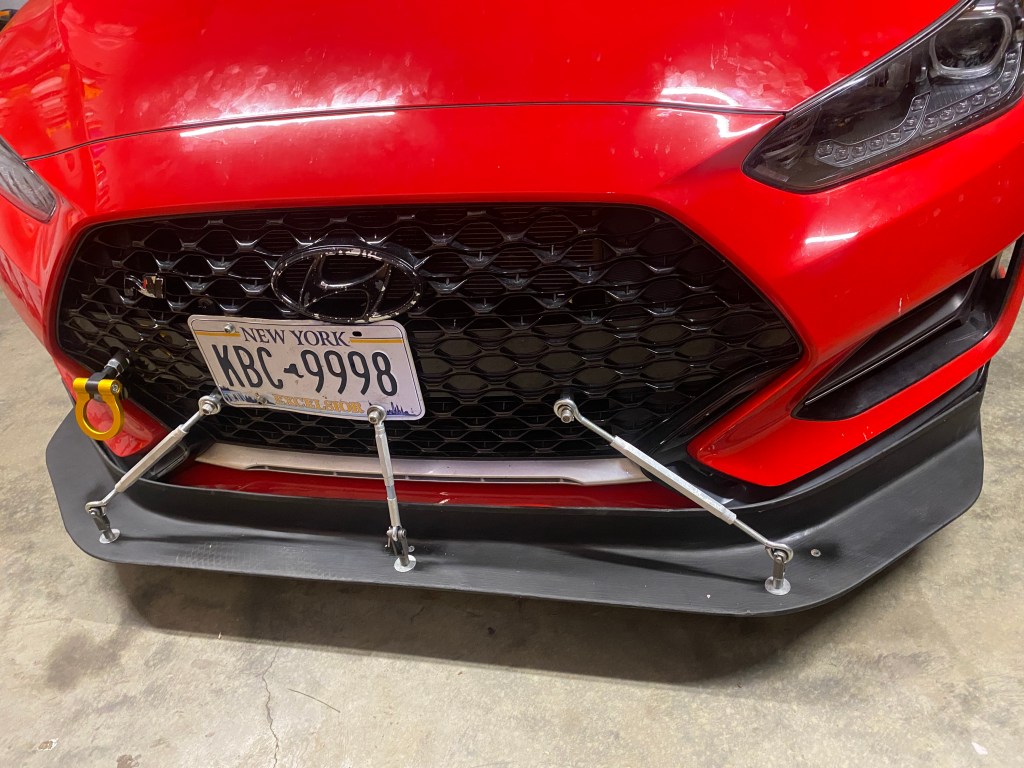
Rather than using splitter diffusers, I’ve curved the entire rear of the splitter upwards at 12 degrees. This will expand air at the rear, which accelerates the air in front, maximizing suction across the entire splitter blade.
Note that for wind tunnel testing, I tried a flat splitter, and curved splitters with 5-degree and 12-degree curves. Curvature wins, big time.
The problem is, what to do with the diffused air? A proper race car would dump the air into the wheel wells and use vents behind the tires and on top of the fenders to extract the air. I don’t (and won’t) have either of these vents, and consequently the splitter can’t make as much downforce. That’s the consequence of having a dual-duty car.
You might be wondering what happens to the air that goes under the car, since it isn’t being extracted properly. Me too. I’m guessing that the air just diffuses under the car creating more drag. (Although this splitter actually reduced drag.) But I will always trade front downforce for drag, so I’m not very concerned by this. I also don’t have a flat belly pan and rear diffuser, so I’m not concerned with keeping air attached underneath.
As a tire rolls forward, it compresses the air underneath, shooting a jet of air sideways on either side. This phenomenon is called tire squirt, and it can have downstream effects on underbody aero. The faster you go, the more pressure on the face of the tire, the faster the tire rolls, the more compression, and hence the more tire squirt.
To reduce tire squirt I’ve added strakes in front of the tires. These spin a vortex and hit the tires at and angle, sending lower energy air sideways across the face of the tire. This reduces tire squirt and aids in extraction beneath the splitter blade.
To make the strakes I cut an arc into the splitter and slid rectangular pieces of thin plywood in the slots. I then trimmed the top side (the side facing the engine), and then fiberglassed over the exposed bottom strakes.
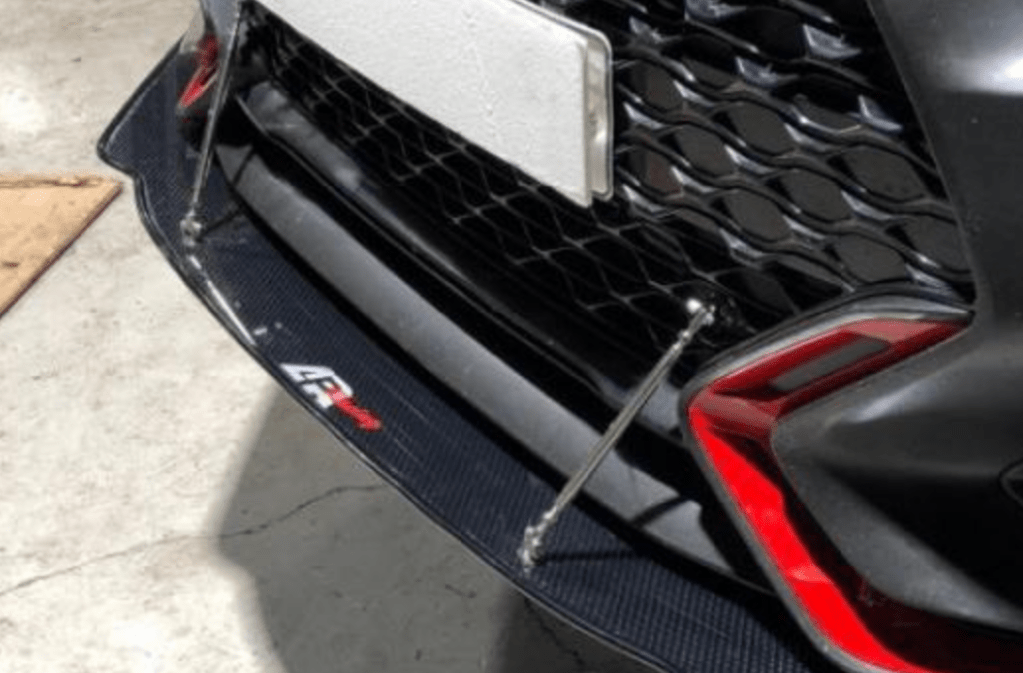
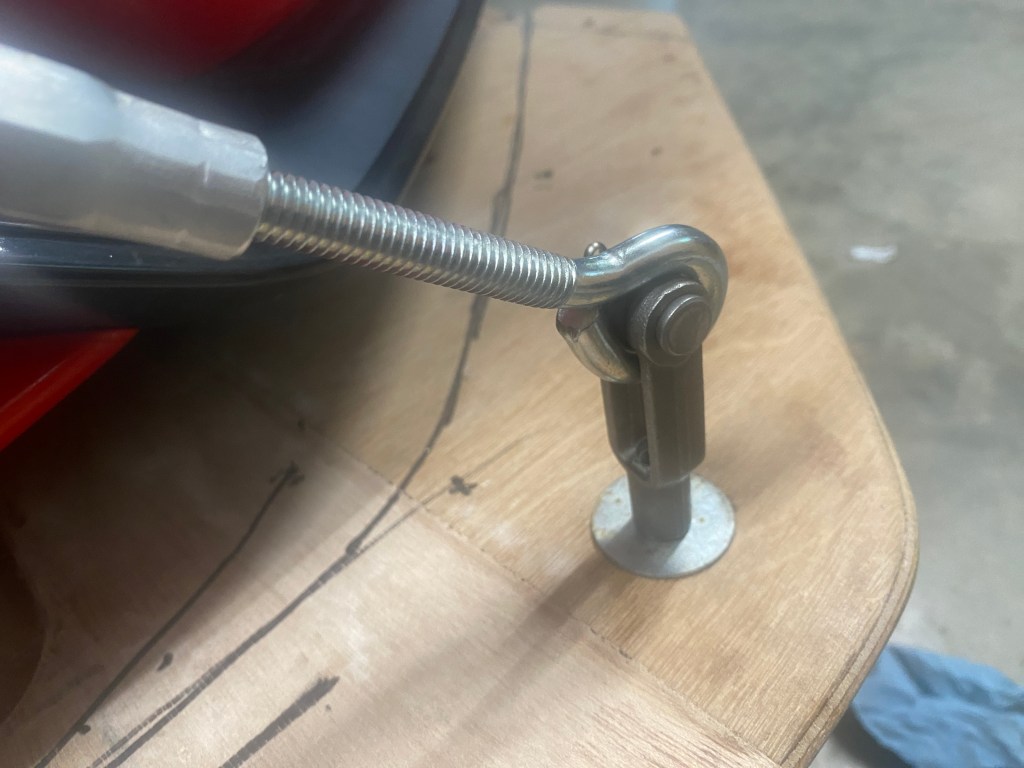
To support the front of the splitter, and provide height adjustment, most people use splitter rods. I made my own from elevator bolts, clevis pins, and turnbuckles. The first hurdle was where to mount the splitter rods to the frame or bumper. Splitter rods that mount to the bumper plastic are poseur bullshit.
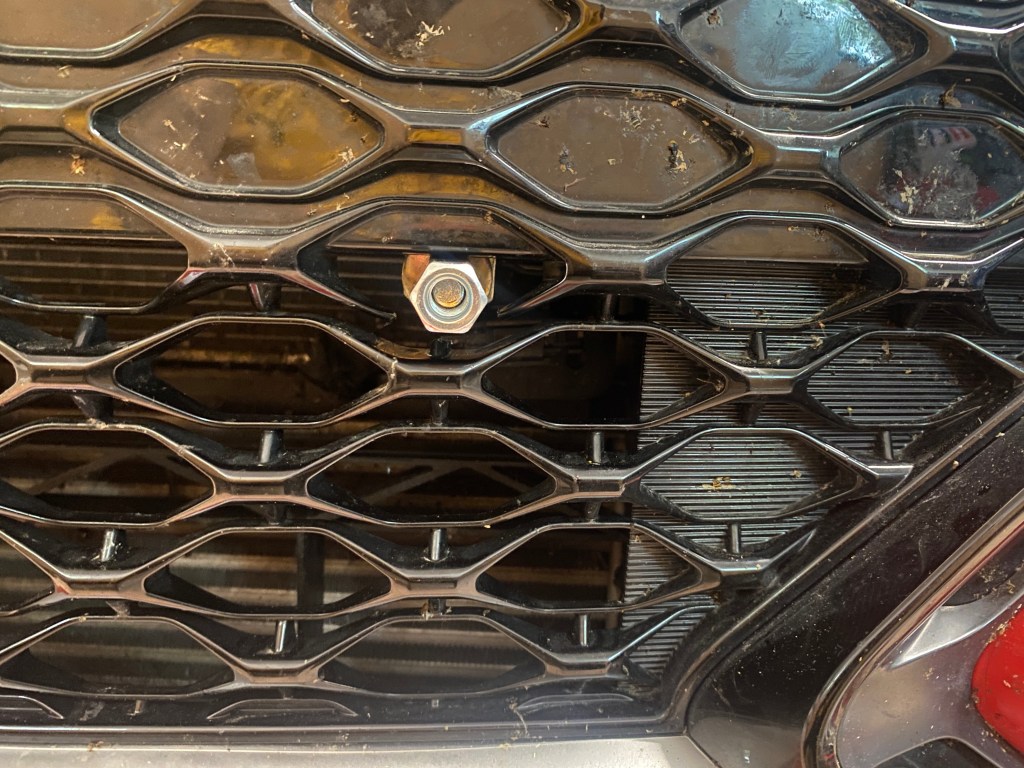
I found out that a 4” square U-bolt is a near perfect fit. You have to bend them out about 1/8”, and then they slip right around the front bumper. At first I bought 5/16 U-bolts, but then switched to 3/8”, it’s way stronger.

I placed the splitter rod supports 19.5” apart, so that they line up with a couple holes in the front grill. You’ll have to cut the webbing out to enlarge the hole. There are coupler nuts on the ends of the bottom of the U-bolt, which is where the splitter rods attach.
I originally made two splitter rods, and then decided to make three. I don’t know that three is really necessary, but I tend to overbuild things.

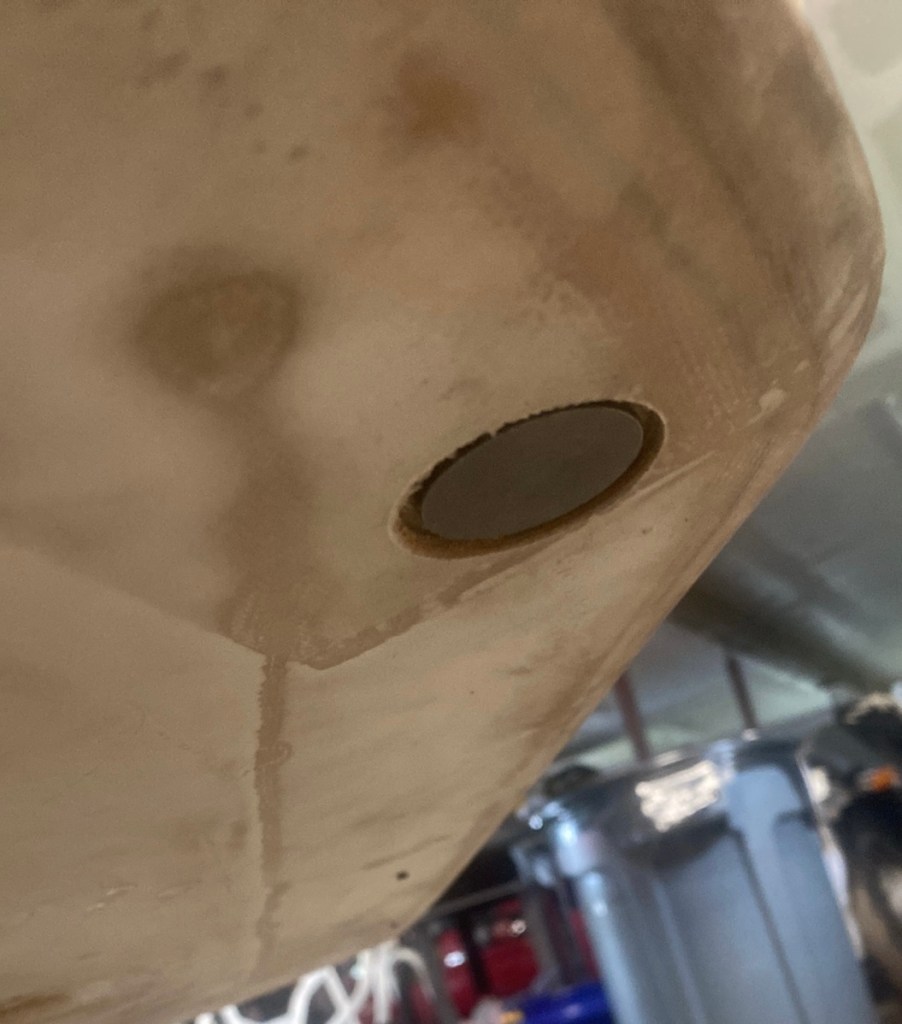
The splitter rods attach to the splitter using elevator bolts. Mark a hole with a small drill bit, recess the bottom facing using a Forstner bit, and then drill a hole large enough to install the elevator bolt from the bottom. This makes a nice flush fit, with lots of support from underneath.
The elevator bolt attaches to a clevis on the top side. Make sure to match the thread pitch on both, as the elevator bolts are typically a coarse thread and the clevis joint is usually a fine pitch. You can find the coarse thread clevis from McMaster Carr and everything else from Lowe’s or whatever local hardware store you use (but avoid Home Depot for their shady business practices). Fender washers between the clevis and elevator bolt is a good finishing touch.
The splitter is adjustable for height via turnbuckles and in the lowest position sits about 2-3” lower than the front lip, and so I need to cover the gap with something. Most people use race plastic or garden edging. It doesn’t really matter what you use as long as it blocks the air from going between the top of the blade the bodywork.
The splitter is 69” wide, and for aesthetics, I made the airdam go around the bumper fascia on the sides of the car. There’s no performance gained from that, and a 67” splitter with an airdam only on the front section would have been a lot less work. I made 5-degree and flat splitters 67” wide and they worked great.
This is a street car, and so I didn’t do a lot of the downforce-producing tricks I would have done on a track car. For example, other than the strakes under the splitter, I’m not doing anything to kick air sideways, or extract air from the wheel wells. There are no vents behind the fenders or on top of them.
If I was building another dual-duty splitter, I wouldn’t use the z-plate, it restricts the vertical height adjustment. Instead I’d bolt a piano hinge to the undertray. This would allow a full range of motion from stock height to resting on the floor. I’d make the splitter slightly thicker so I could use two splitter rods instead of three, and then it would be easier to adjust the height.
For a track car, I’d make a different splitter, wider, with some treatment on the ends to kick air up and sideways. And I’d make it longer, maybe 5-6”. It would be adjustable for height and I guess it could be used on the street, but would also need a lot more rear downforce to balance out.
But even as is, this is a good splitter. I tested this splitter in the A2 wind tunnel and it reduced drag while making good downforce. At 100 mph it made 165 lbs of downforce and reduced power consumption by 3.1 hp. This is good, but can be improved upon.
I’ve written in the past about aero balance, and how I like to add more rear downforce than front, so that the car can be tuned to oversteer in slow corners and push in the fastest corner, and be neutral for most other corners. But on a FWD car, that doesn’t actually mean you add twice as much rear downforce, you have to take into account the weight of the front and rear of the car. Most FWD cars have roughly 2/3 of the weight on the front tires, so adding say 220 lbs of front downforce adds 10% more front grip, but adding 220 lbs rear downforce would be 20% more rear grip.
I still need to tune the aero balance on the car, so I can’t say exactly how much rear aero is required to balance the front. But this is why wings are adjustable for angle, and why splitters should be adjustable for height and angle as well. And yet none of the manufactured splitters are adjustable for either height or angle, and why you should DIY your own.

Sweet lookin compound curve/vortex gens……. but those outer turnbuckles are shite.
I guess the fact that this task is complete, that u are not gonna fix it?
However i can’t sleep until i at least put you right.
Those outer turnbuckles are doing nothing to support the splitter, they are on WAY TOO MUCH angle sideways…….all they will do under load is wrench the elevator bolts thru the splitter. Start again from the grill mounts and use stainless balustrade cable and slimline turnbuckles in 1/4″.
Why don’t you just buy everything from McMaster?
Do you have a welder/skills?
LikeLike
Yes, I have welding skills (certified for all positions all thicknesses with 7018 rods). The turnbuckles are the easiest way to do height adjustment, which is necessary for this car, and Lowe’s has a great racing department! I could reduce the angle on the outer rods, but honestly it feels like a sidewalk when I step on the splitter, it can easily hold my weight, and probably double without flexing. These are 3/8” bolts…
LikeLike