Updated 1/12/2023
I originally published this article in August 2020, but after taking the JKF Aero course, and doing more independent research, I’ve updated it.
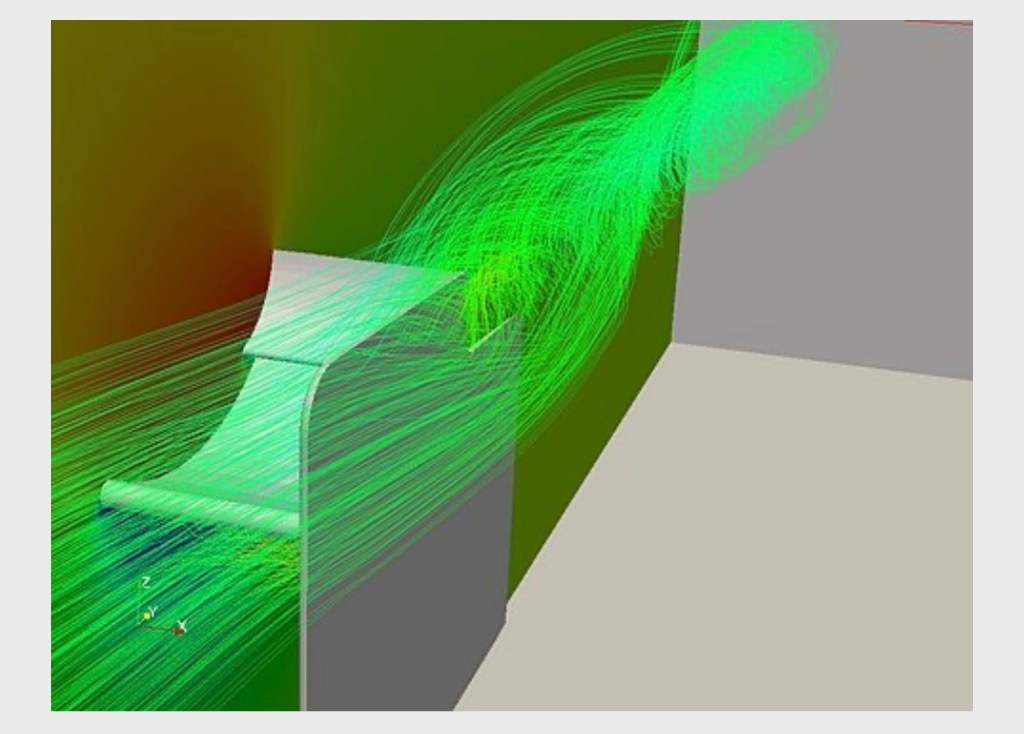
Wings without end plates allows the low-pressure air below the wing to collide with the high-pressure air on top of the wing. This interaction reduces suction under the wing and creates vortices, which further reduce downforce and create drag. The middle of the wing still works well, but you get progressively less downforce and more drag at the ends. For a quick video on why a wing needs endplates, see this video by Kyle.Engineers.
End plates separate the flow between the top and bottom of the wing, effectively reducing drag and increasing downforce. The end plate has to be large enough to keep these two pressure zones from colliding.
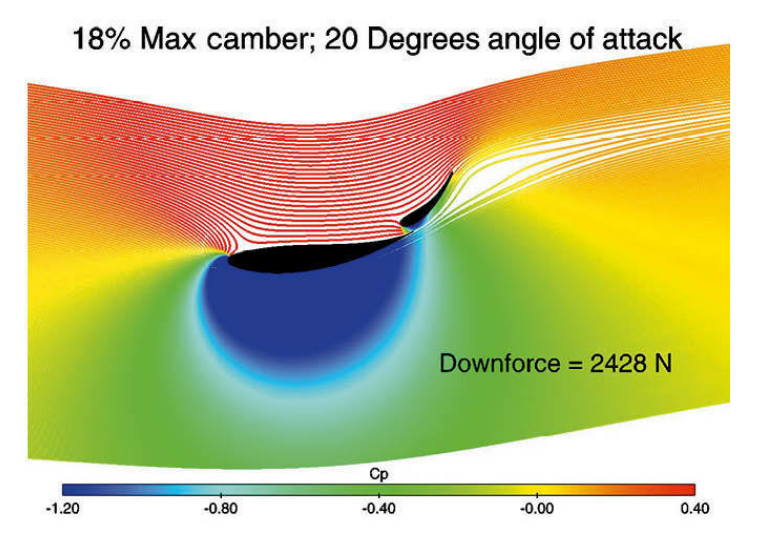
In the following image, notice how different wing shapes have similar high-pressure areas above the wing, but very different low pressure shapes below the wing. Indeed, at first blush you might think that the shape of the end plate should be similar to the pressure zone shape. Note that the low pressure side (suction) is more important than the high pressure side, and so end plates must extend further below the wing than above.

Take a look at the wing shapes above:
- The first one (on the left) is a wing with a NACA profile around 4410. (4 degrees of camber, max camber at 40% of the chord length, thickness of 10% of chord length). Most car wings have low pressure zones that look similar to this.
- The second “wing” looks like a skateboard deck. I’ve seen a lot of DIY wings in 24 Hours of Lemons (skateboard decks, snowboards, and just a piece of curved wood), and I love the spirit. Mostly I don’t see them with end plates. Do it!
- The third one is a symmetrical airfoil. It doesn’t make a great wing for a car, but can excuse that because it was the first one. This shape is still good for stanchions and other places where you need to hold something up with little drag.

Rectangular vs shaped
Before you get started on making your own end plates, let me leave you with a couple pieces of advice from a Formula 1 aero engineer who has tried various shapes of end plates on touring cars (like Miatas):
- First, whatever end plate you choose will make very little difference in your aero package. You will find bigger gains literally everywhere else on your car.
- Second, if you can model your car in CFD or put it in a wind tunnel, there are some minor gains to be had by modifying the shape of the end plate. If you can’t do that, your best bet is to stick to a rectangular end plate. Changing the shape of the end plate is just as likely to be worse as it is to be better!
Let’s take a real-word example, say you have a 9 Lives Racing wing, you can use their standard rectangular end plates or pay up for their CFD end plates, or pay $130 for Kazespec endplates with gills and a cutout. But is there a true benefit? Let’s take a look at Kazespec.
First, it looks like it’s a double wing. Uh… why are you showing me this and selling me something different?
Then if you look at the data, you’ll see that the most downforce was created with the plain endplate. All the cuts and slots reduced drag, but they did so by reducing downforce.

Free stream wing data is worthless, because you have to take into account the entire vehicle. Because wings don’t have much drag to begin with, the L/D ratio of the entire vehicle is the highest when creating the most downforce, regardless of the wing’s drag. It really doesn’t matter how efficient the wing is in free stream. So when you look at that table above, you should realize that every modification to the endplate resulted in less downforce, and consequently the L/D ratio of the vehicle was the best before they modified the end plate. Just leave the damn thing alone already.
OK, so how big should this rectangular end plate be? Different racing organizations have rules on end-plate size, and for simplicity, you can make a rectangle of whatever the maximum size is.
In an article in Racecar Engineering from 2008, Simon McBeath CFD tested end plates of various depths in 25mm increments to 300mm on a 300mm chord wing. For the American audience, I’ve converted his results to inches and pounds, and summarized them in the table below. All end plates were identical in shape (rectangular), except for the depth below the wing.
| Depth | Downforce lbs | Drag lbs | L/D Ratio |
| 0″ | 203 | 38.6 | 5.26 |
| 3″ | 224 | 39.9 | 5.61 |
| 4″ | 221 | 39.1 | 5.66 |
| 5″ | 234.9 | 40.6 | 5.78 |
| 6″ | 215.4 | 38.4 | 5.61 |
| 12″ | 217.7 | 38.4 | 5.76 |
| 24″ | 228.5 | 39.9 | 5.73 |
The first thing you might notice in the table is that there’s about a 10% difference in L/D ratio between no end plate and the best end plate. That’s a big difference, and it’s why every wing needs an end plate.
However, notice that there’s less than a 3% difference in L/D ratio between the smallest end plate (3″) and anything else. To put it in practical terms of the only thing that matters, the most extreme difference in end plate performance resulted in 100 lbs versus 103 lbs of downforce. I don’t know about you, but I couldn’t feel that amount of difference.
But this is Occam’s Racer, and we don’t do things with feelings, we do them with data. On a Miata (2400 lb race weight) going around a 75 mph corner, that’s a difference of about 0.13% additional grip. It’s not nothing, but it’s close to nothing. So as long as you have something on the end of the wing, you’re good.
Notice that the highest downforce and best lift/drag ratio is with the 5″ deep end plate. The author goes into a long investigation about why this is, but it’s too complex of a relationship to go into here. It’s kind of a magic number he stumbled upon, and trying to find this on your own would be folly, because on either side of 5″, the numbers are worse.
If you throw out the 5″ outlier, then the 12″ depth end plate has the best L/D ratio, which conveniently matches the chord of the wing. So a good rule of thumb here is make your end plates the same depth as the chord of your wing.
One final note on end plate size is that end plates move the center of pressure rearward. The larger the end plate, the more the center of pressure moves rearwards. This could be useful if your car tends to oversteer in high speed corners, and it could be a hindrance if it pushes too much already.
DIY single-element end plate
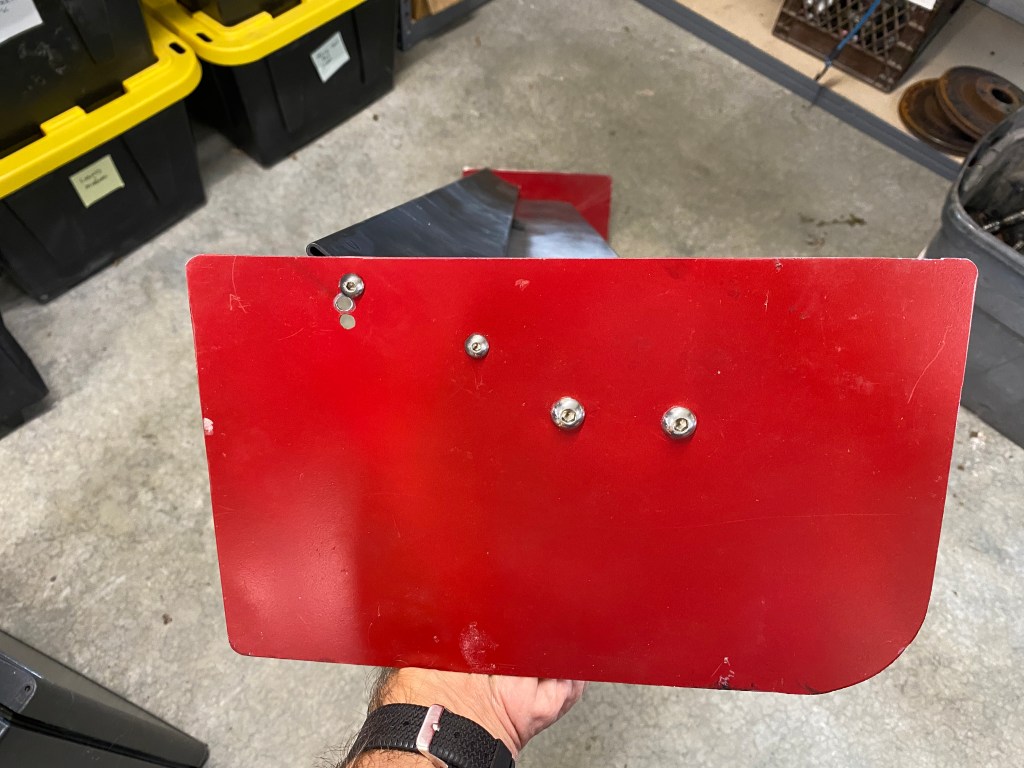
I use recycled street signs for my end plate. I pay $1 per pound at my local scrapyard, so about $2 all in, and the graphics are free! But you could use any sheet metal, carbon fiber, plywood, etc. The endplate needs to be relatively stiff and light.
Pro tip: Lay a straight edge across the chord of the main wing, and use that same angle for the top of the end plate. This makes it easy to set and adjust your wing angle using the top of the end plate.
Rectangular end plates are boring, and even though I just warned you that a different shape might lose performance, it won’t be much (because there’s so little to be gained, to begin with). So, if you roll the dice, you might get lucky on your own design, or you could copy someone else’s and hope that works on your car.
- The first thing I did was shape the bottom of the end plate to match the pressure zone of my wing, putting most of the area well forward, rounded at the front, and tapering upwards at the rear. At some point you will knock your head on the endplate, so rounding the bottom is a safety precaution as well.
- I then cut a notch on the top trailing edge to lessen the vortex here. That’s what other people do, it must work, right?
- I also bent a small Gurney flap on the outer edge of the wing, which theoretically increases downforce, at the expense of some additional drag. (Gurney flaps typically measure 1-5% of the chord, so on a 12″ end plate, the wicker should be 1/8″ to 1/2″ in height.)

Now that’s not a very extreme end plate, and anyone could make something similar. However, if you look at F1 end plates you’ll notice slots above and below the wing, a leading-edge slat, strakes along the sides, and a gurney flap at the trailing edge. Most of the these tricks are used to tame vortices, which reduce drag, but usually results in a loss of downforce as well.

I personally wouldn’t bother with these modifications, because a Miata ain’t a F1 car. But end plates are a good place for personalization, and like many questionable performance modifications, great conversations pieces. And it’s always fun to build stuff.
End plates for dual wings
Last summer I raced in the 24 Hours of Lemons race at Thompson, and saw some good aero, and a lot of bad. Lemons cars have wings largely for looks, it doesn’t really matter that some of them were a slab of plywood set at an angle. Among these quasi-aero devices were a lot of cheap eBay/Amazon wings that would have worked, but were done poorly.
Case in point: on one orange Chevy Lumina (winner of the IOE), the wing was on backwards. I enquired about this, and apparently the wing came pre-assembled with the pointy part of the wing facing forward! That’s just dumb from the “factory” but shame on the team for not correcting it. Or maybe it was intentional? This is Lemons, it’s hard to tell.

At the race I saw a lot of dual wings with absolutely ridiculous end plates that had big holes or cutouts on the underside. As you saw from the first image, the underside of the wing is what matters! Moreover, they had the upper wing mounted so far away from the main wing that it defeated the purpose of a dual wing setup.
I’ve seen a lot of terrible end plates that are more for show than go. They have most of the surface area of the endplate at the back of the wing, or cutouts below that would let the pressure zones collide. It would be easy to correct the function of these wings by building your own end plates.

DIY dual-element end plates
So if you have a crappy dual-element wing with crappy end plates, and you want to make it work better, build your own end plates. Again, let’s start by looking at the pressure zone below the wing.
It’s not intuitive, but the suction side is more important than the pressure side of a wing. This is apparent in the numbers: the blue is 3x the value of the red. Notice that the low-pressure zone extends below the wing by almost the length of the chord of the main wing. Meaning, if you have a 10″ chord wing, you’re going to need at least a 10″ deep end plate. Also notice that the low pressure zone extends in front of the wing, but not much at the trailing edge.
In Competition Car Aerodynamics, McBeath examines what happens with end plates of different sizes. At first he uses no end plate (ep0), and then end plates of increasing size. The larger the end plate, the more downforce and less drag.
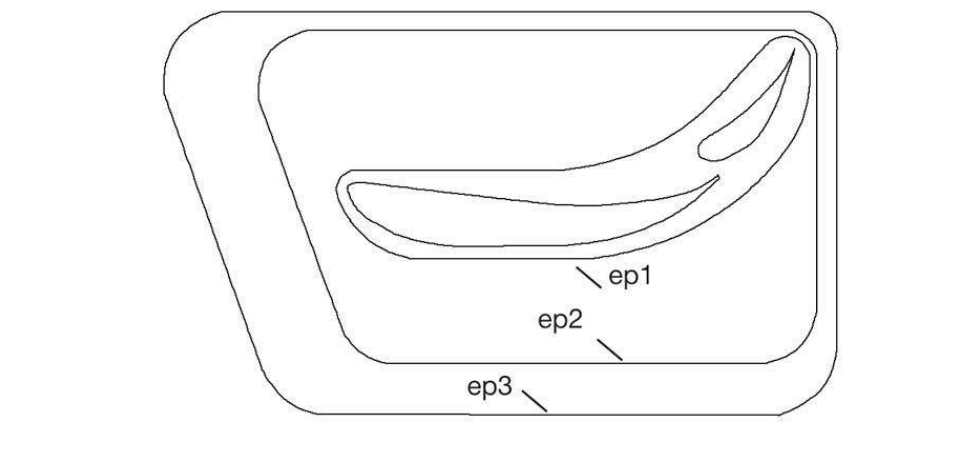
| End Plate | Downforce | % Increase | Drag | % Decrease |
| ep0 (none) | 769.2 | Equal | 194.8 | Equal |
| ep1 (minimal) | 786.7 | 2.3% | 188.3 | 3.5% |
| ep2 (medium) | 873.4 | 13.6% | 183.8 | 6% |
| ep2 (large) | 900.1 | 17% | 178.1 | 9.4% |
OK, so if bigger is better, how big is too big? There is a height at which end plates start creating more drag, and a diminishing return on downforce. But I don’t want to give away all the secrets, so please buy the books on my Resources page and learn yourself some aero.
Make ’em
Here’s how I’d DIY myself end plates:
- Start with a 12″ x 12″ piece of sheet metal. Use a street sign if you’re Lemons, otherwise plain aluminum will do.
- Put most of the surface area at the front and below the wing (as pictured in the drawing, above).
- Lay a straight edge across the chord of the main wing, and use that same angle for the top of the end plate. This will help you set and adjust your wing angle.
- After mounting the main wing as above, mock up where you want the holes for the secondary wing. I would put a single mounting hole in front that acts as a pivot and drill two or three holes at the rear. Don’t exceed 35 degrees. I don’t trust adjustment slots because they can shift out of whack, and so I go with holes instead.
- Make the gap between the wings about a half inch in height, and overlap the upper wing on top of the lower wing by about a quarter inch. This should create a convergent gap between the wings, meaning the front opening is larger than the rear. This will accelerate the air going through the gap.
- Set the lower wing angle almost flat (zero degrees). Most wings will have the highest lift-drag ratio in this vicinity.
- Start the upper wing at 25 degrees and if you need more downforce, use the 35 degree hole. Don’t exceed 35 degrees with the upper wing. If you still need more downforce, rake the entire wing a few degrees.